In my previous post Creating Azure Function Apps in Azure Portal, we learned how to implement and test Azure functions in Azure Portal without leaving the browser. Azure portal is very easy to use but for professional development, it is recommended that you develop your functions locally using tools like Visual Studio. In this post, we will learn how to create Azure Functions in Visual Studio 2022 and test them locally. We will also learn how to deploy functions on the Azure portal from within Visual Studio 2022.
Table of Contents
Prerequisites
If you are not familiar with Azure functions, then I will recommend you to read my post Introducing Serverless Computing with Azure Functions before reading this post. The following are some prerequisites for this post.
- Azure Account – You need an Azure subscription to create Azure Function Apps and related resources from Visual Studio. If you don’t have an Azure subscription, you can create a free Azure account before starting to read this post.
- Azure Functions Tools – You need Azure Function Tools to develop and test your functions on your local computer. Your local functions can connect to live Azure services and you can also debug your functions locally using the full Azure Functions runtime. To add Azure Function Tools in Visual Studio 2022, you need to include Azure development workload in your Visual Studio installation.
- Other resources – You also need other resources such Azure Storage account and these resources are created in your subscription when you will publish your functions to Azure.
Benefits of Creating Azure Functions in Visual Studio
Visual Studio is an amazing tool for developing cloud-based serverless applications targeting Azure. It allows you to develop, test and deploy Azure Functions as C# class libraries. Following are some of the advantages of using Visual Studio for creating Azure Function Apps.
- You can edit, build and run Azure functions on your local development computer.
- You can publish Azure functions apps directly to the Azure cloud.
- You can create Azure resources such as Azure Function Apps, Storage accounts, resource groups, etc. on Azure cloud as needed.
- You can use C# attributes to declare Azure function bindings in C# code.
- You can develop and deploy pre-compiled C# functions which provide better cold-start performance than C# script-based functions.
- You can use all the features available in C# language in your Azure functions code
- You can enjoy a great debugging and editing experience with Visual Studio along with all the cool features, e.g. IntelliSense, CodeLens, etc.
Creating Azure Functions Project in Visual Studio
Visual Studio has a project template called Azure Functions that allows us to create an Azure Functions App in Visual Studio. We can create multiple Azure functions in Azure Functions App which can not only share resources but can also be managed, deploy and scale as a logical unit. Let’s create a brand new Azure Functions app using the steps below.
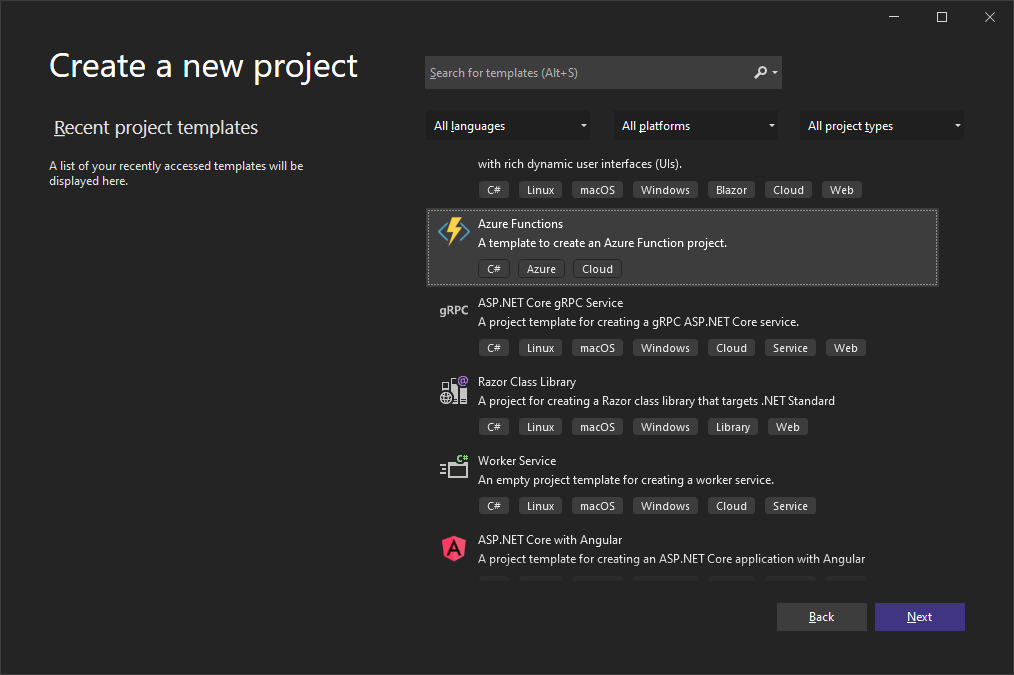
From the File Menu choose New > Project.
Choose the Azure Functions project template from the Create a new project dialog and click the Next button.
In the Configure your new project dialog, enter a Project name for the project and then click Create button.
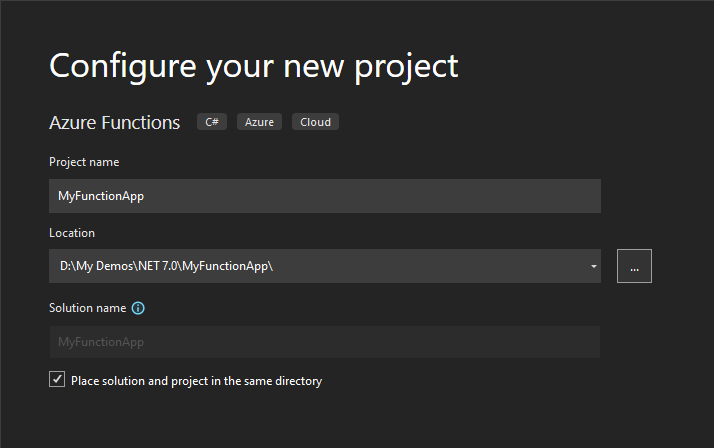
Note: The project name of the function app must be valid as a C# namespace, so don’t use underscores, hyphens, or any other non-alphanumeric characters.
The following Create a new Azure Functions application dialog will allow you to configure different settings of the Azure Functions app.
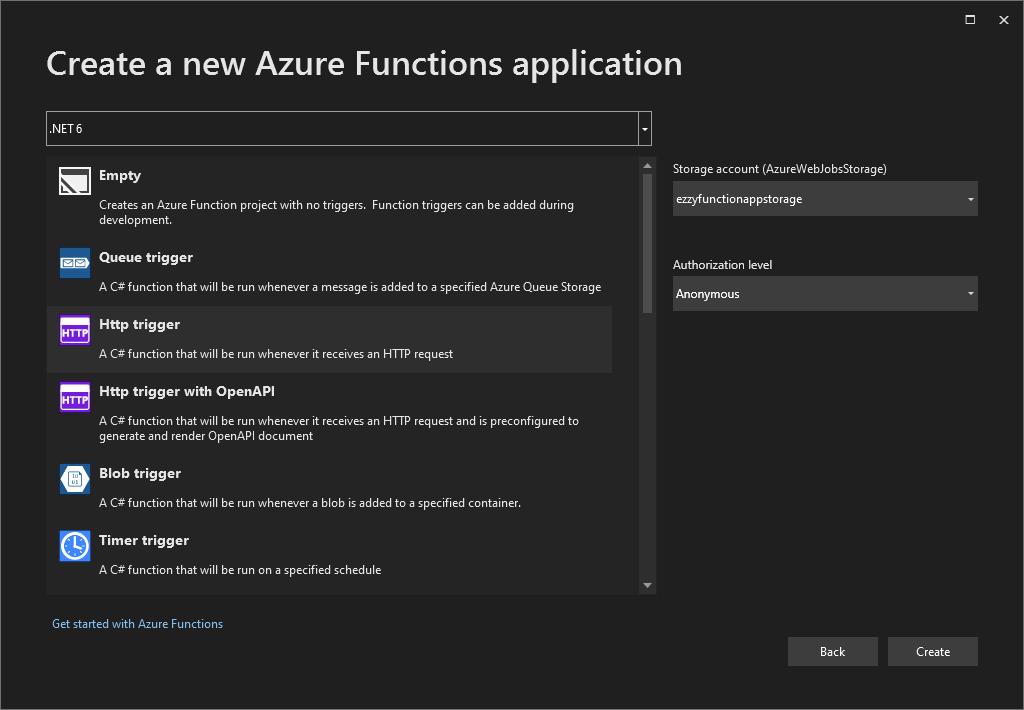
The following section explains the above settings in detail:
.NET Version –Azure Functions currently supports several versions of the runtime host such as 1.x, 2.x, 3.x, and 4.x. You need to select the .NET runtime version you want to use for your Azure Functions. If you want to use the latest Azure function runtime 4.x, then you can choose .NET 6. The following table shows which .NET versions are supported by each Azure function runtime.
| 1.x | 2.x | 3.x | 4.x |
| NET Framework 4.8 | .NET Core 2.1 | .NET Core 3.1 | .NET 6.0, .NET 7.0, .NET Framework 4.8 |
Azure functions versions 2.x and 3.x reached the end of life (EOL) on December 13, 2022, so Microsoft highly recommends migrating our apps to version 4.x for full support. To learn which programming languages are currently supported in each Azure Functions runtime version, see Azure Functions runtime versions overview.
Function template – You need to select one of the Azure function trigger types to create a pre-configured Azure function. I have chosen an Http trigger that will create a function that can be triggered by an HTTP request.
Storage account (AzreWebJobsStorage) – Azure function apps require a storage account for operations such as managing triggers and logging function executions. If you already have some storage accounts, then you can choose one otherwise you can create a new storage account.
Authorization level – You can decide whether you want to make accessing your function endpoints harder. If you will choose the Anonymous option, then you can test your functions quickly during development without providing any access key in the request. For more information about keys and authorization, see Authorization keys.
Click the Create button to create an Azure function app along with the HTTP trigger function.
Overview of Azure Functions Project in Visual Studio
Azure Functions project template will create a C# project and will also install the Microsoft.NET.Sdk.Functions NuGet package. The project Solution Explorer will look similar to the following screenshot.
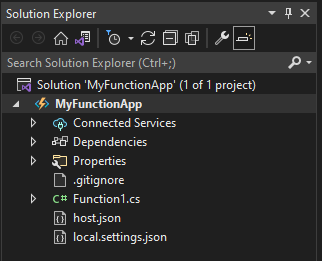
Let’s review some important files of the project.
host.json – This file contains settings that affect all functions in the Azure functions app. These settings apply both when running locally and in Azure. Configurations in host.json related to bindings are applied equally to each function in the function app. If you want to learn about each setting then visit official docs here.
local.settings.json – The settings in this file are used when you are running Azure functions locally. These settings aren’t used when running in Azure. When you publish your project to Azure, be sure to also add any required settings to the app settings for the function app. To read more about this file read official docs here.
Function1.cs – This file contains the definition and the implementation of generated Azure function with some C# attribute.
public static class Function1
{
    [FunctionName("Function1")]
    public static async Task<IActionResult> Run(
        [HttpTrigger(AuthorizationLevel.Anonymous, "get", "post", Route = null)] HttpRequest req,
        ILogger log)
    {
        log.LogInformation("C# HTTP trigger function processed a request.");

        string name = req.Query["name"];

        string requestBody = await new StreamReader(req.Body).ReadToEndAsync();
        dynamic data = JsonConvert.DeserializeObject(requestBody);
        name = name ?? data?.name;

        string responseMessage = string.IsNullOrEmpty(name)
            ? "This HTTP triggered function executed successfully. Pass a name in the query string or in the request body for a personalized response."
            : $"Hello, {name}. This HTTP triggered function executed successfully.";

        return new OkObjectResult(responseMessage);
    }
}
- On line 3, we have the FunctionName attribute that defines the name of the function. The function name can be different than the containing class name but it is recommended to use the same name for class and function.
- On line 4, we have the Run method definition. This method is called by Azure Functions runtime whenever a function trigger is executed.
- On line 5, we have the first argument of the Run method and its type is defined as HttpRequest. The argument has an HttpTrigger attribute associated with it to tell Azure Function runtime that this method should run whenever the HTTP trigger gets executed. The first argument of the HttpTrigger attribute specifies that the Authorization level is Anonymous and the second and third parameters specify that this function can be invoked by HTTP GET and POST requests.
- On line 6, we have an argument of type ILogger which can be used to log debugging information while the Azure function is running.
- The implementation of the function is very straightforward. It accepts a name parameter from either query string or in the HTTP request body and if the name is available, it returns a response message with the name otherwise it returns a different response message.
Running Azure Functions Locally in Visual Studio
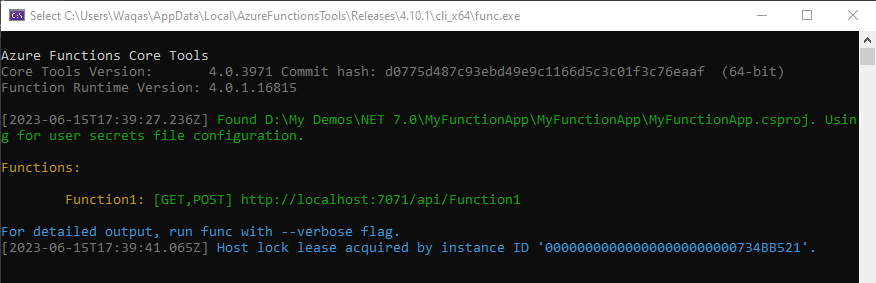
Azure Functions Tools allows us to run the Azure Functions project on your local development computer. You need to press F5 to start debugging a Functions project. The local Functions host (func.exe) will start to listen on a local port (usually 7071). The function endpoints are written to the output, and you can use these endpoints for testing your functions.
In the console window of the running Function App, we will see a log statement that the function has been executed.
Let’s open the browser and copy/paste the above URL http://localhost:7071/api/Function1 in the browser address bar to trigger the function. You will see the message “This HTTP triggered function executed successfully. Pass a name in the query string or the request body for a personalized response.” in the browser.
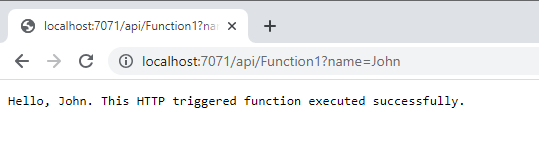
Now let’s provide the name parameter as a query string http://localhost:7071/api/Function1?name=John and press enter and you will see an output similar to the following.
Publish and Deploy the Function App to Azure
If you want to deploy your Azure functions app to Azure using Visual Studio 2022, then you can follow the steps given below.
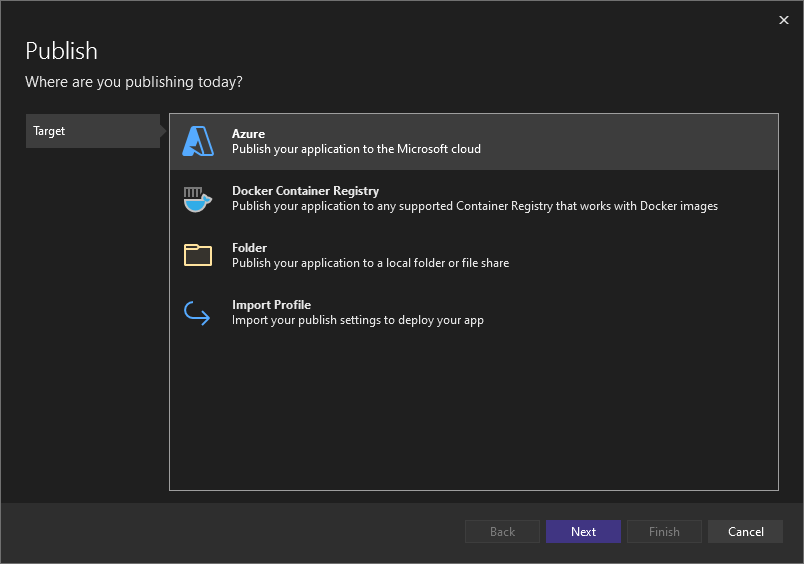
Right-click on the project in Solution Explorer and select Publish option.
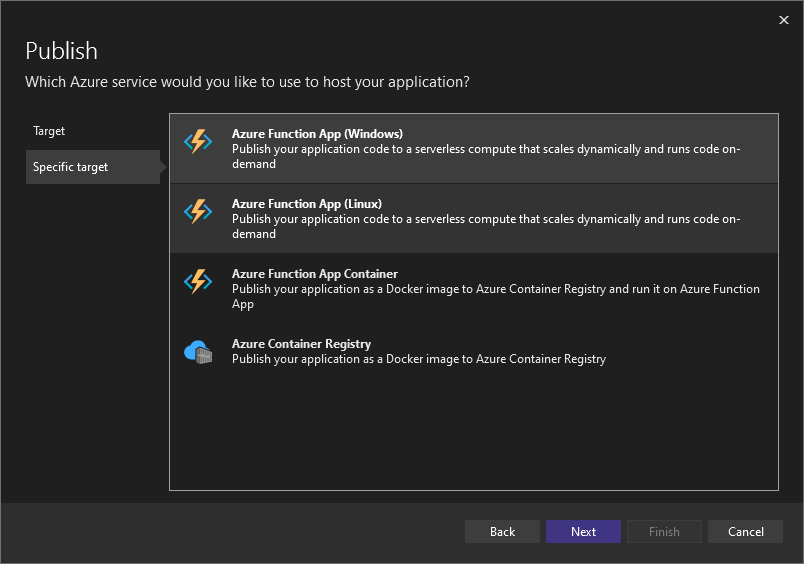
In the Publish dialog box, select the Azure option as a Target and click the Next button.
From the Specific target options, choose Azure Function App (Windows) to create a function app that runs on Windows.
Click the Next button to move to the next screen.
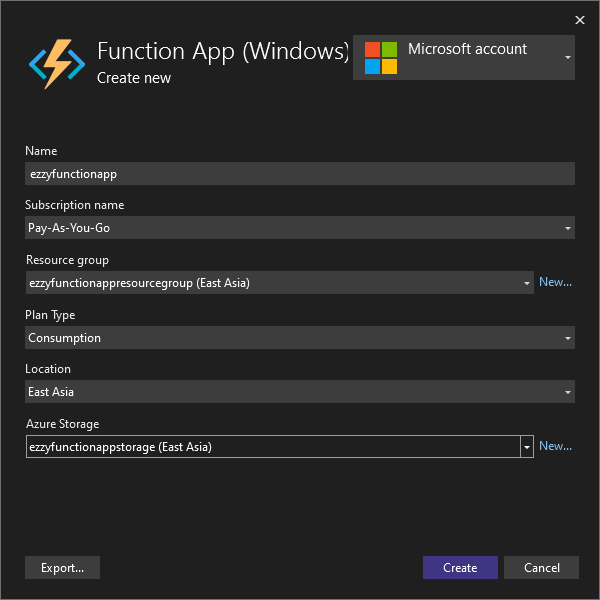
The Function App (Windows) screen will allow you to configure the settings related to the Azure function app.
Name – You need to provide a globally unique name for your function app.
Subscription name – You need to either select an existing Azure subscription or select a new one from the drop-down list.
Resource group – You need to select the resource group in which you want to create your function app. You can either select an existing resource group from the drop-down list or create a new resource group.
Plan Type – You need to select a plan type for the Azure function app. A consumption plan is a good option when you only want to pay for the function executions.
Location – You need to choose a location for your Azure function app. It is recommended to choose a location near you or other services your function access.
Azure Storage – You need to choose an Azure storage account required by the Functions runtime. You can either create a new general-purpose storage account or you can choose an existing account that meets the storage account requirements.
Click Create button to create a function app and its related resources in Azure.
In the Functions instance screen, make sure that the Run from package file is checked. Your function app is deployed using Zip Deploy with Run-From-Package mode enabled. Zip Deploy is the recommended deployment method for your functions project resulting in better performance.
Select the Finish button to complete the publishing wizard.

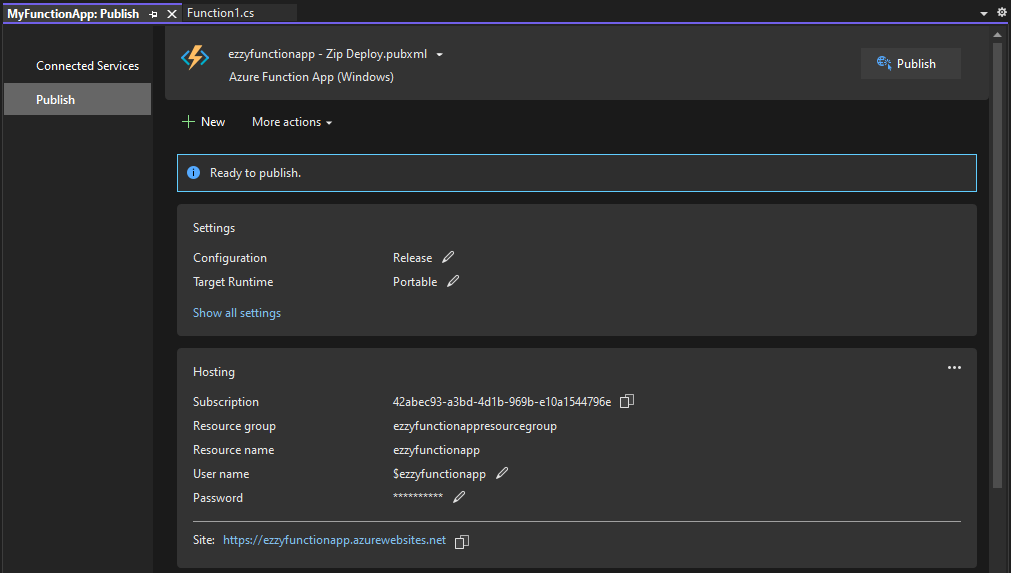
You will see a review page similar to the following screen where you can review or edit any setting you want. Once you are happy, click the Publish button to start the publishing process that will deploy the package containing your project files to your new function app in Azure.
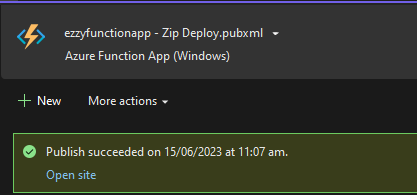
Once the publishing process will complete, you will see a success message similar to the following screenshot.
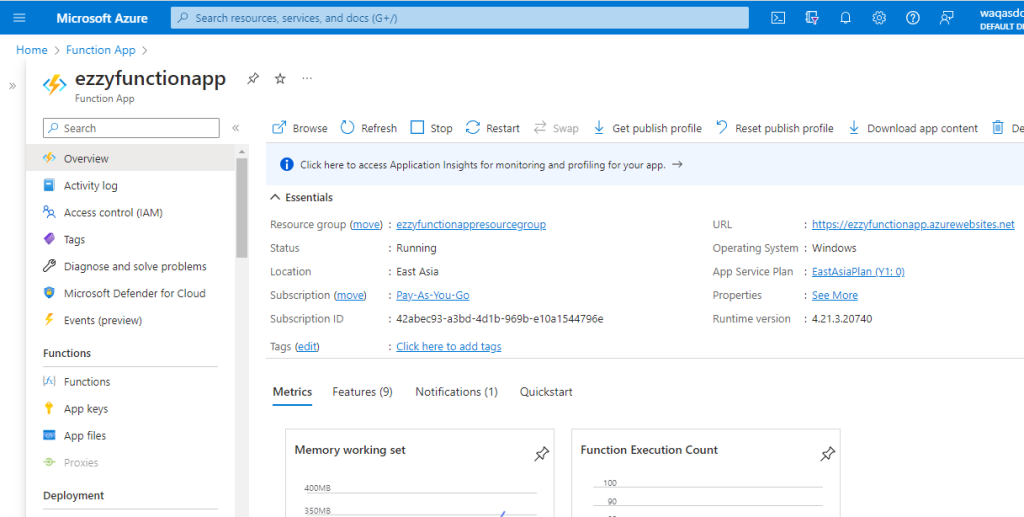
If you want to see your function app on Azure, then login to the Azure portal and click the Function App icon or search Function App in the search box. You will see your newly published function app and you can click the app to view its settings.
Conclusion
In this post, we learned how to create and test Azure Functions App in Visual Studio 2022 and how to deploy Azure Function Apps on the Azure portal from Visual Studio. If you have any comments or suggestions, please leave your comments below. Don’t forget to share this tutorial with your friends or community.

Also, if possible can you please share azure deployment agent structures
please whatapp in share list want to share page with my office collogues too.