
In my previous post Getting Started with Azure App Services, I gave an overview of Azure App Services and the features available in different service plans. There are different ways to create Azure services and each of these ways can be easier or harder depending on your skills and application needs. You can create Azure App Service using Azure Portal, CLI, or PowerShell scripts. You can also create App Services from the Visual Studio IDE. In this post, we will learn how to create and configure Azure App Service using Microsoft’s official Azure portal.
Table of Contents
Getting Started with Azure Portal
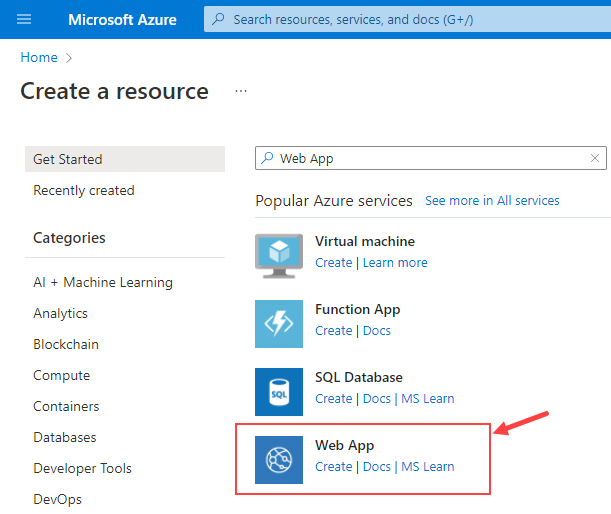
I am assuming that you have already created an Azure account and you have either free or one of the paid Azure subscriptions available. To create your first Azure App Service in the Azure Portal, you need to click on + Create a resource button and search for Web App. Once the Web App tile is shown, you need to click the Create link shown below Web Apps.
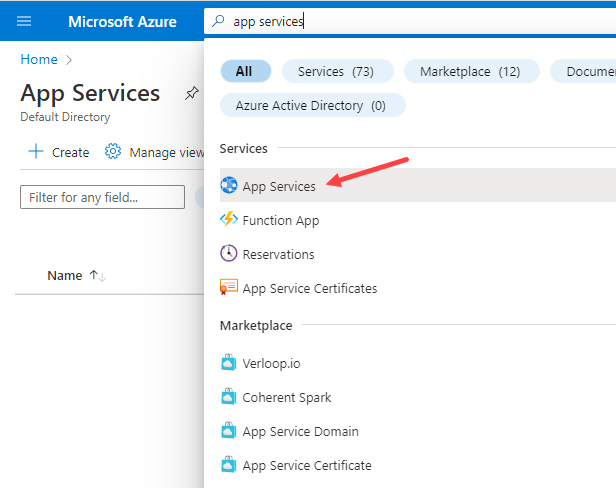
Alternatively, you can also search for the keyword App Services in the top search bar and you will see the App Services option in the autocomplete menu.
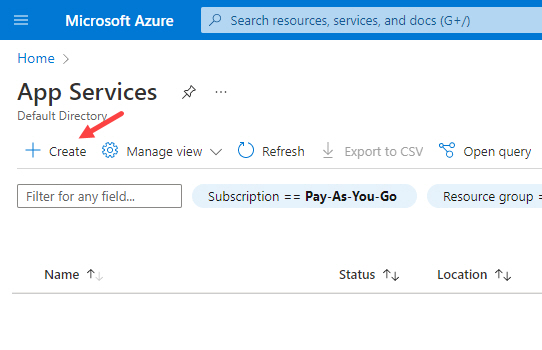
Clicking the App Services option will take you to the App Services list page where you can click the Create button to create a new App Service.
Clicking the Create button will open the following Create Web App page that will ask you to provide some basic information to create a web app.
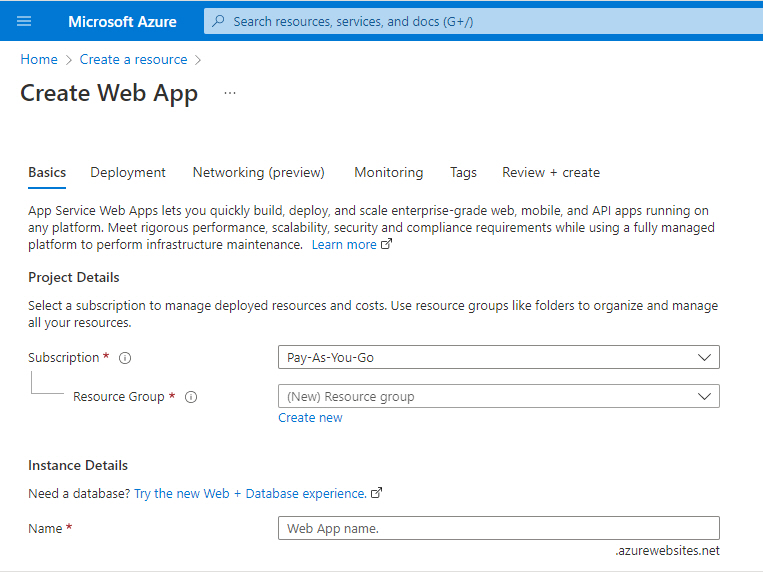
The page is divided into four sections, e.g. Project Details, Instance Details, App Service Plan, and Zone redundancy and each section has one or more fields. I will now explain each section in detail:
Project Details
This section will ask you to choose the subscription and the resource group.
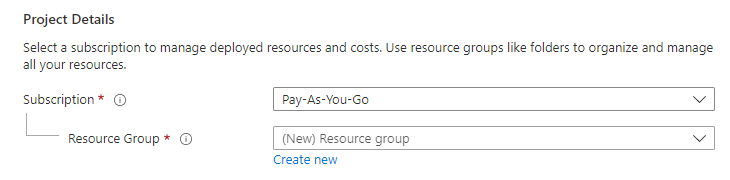
Subscription
If you have more than one subscription, you can select the one you want to use for your web app. This will help you to differentiate the cost between different web apps/projects.
Resource Group
In Azure, a resource group is a logical container that associates multiple resources so you can manage them as a single entity. When you are creating a web app, you can either choose an existing resource group or create a new one. There is no additional cost for creating resource groups so you can create multiple resource groups to manage your resources.
Instance Details
This section will ask you to choose your web app name, technology stack, operating system, and the region in which you want to deploy the app.

App name
This field represents the domain name of your application. It is important to select both a unique and valid name, as it cannot be changed later on. Please note that you can easily attach your custom domain if needed.
Publish
This field allows you to choose the way you want to publish your application. You can publish your code directly or you can choose to deploy your app using Docker Container or a static web app.
Runtime stack
If you have selected the Code option in Publish setting then this field will allow you to choose the runtime for your web app. You can choose .NET, ASP.NET, Java, PHP, Python, etc.
Operating System
Azure allows you to create a web app using different operating systems, e.g. Windows, Linux, etc. This choice can impact both cost and performance, so make sure you have chosen the right operating system as per your web app needs.
Region
This field allows you to choose the region in which you want to host your application. Sometimes, you get fewer or more features depending on the region of your application so make sure the features you need for your web app are available in the region of your choosing.
App Service Plan
This section will ask you to choose the App Service plan which is a mandatory requirement because you cannot create an App Service in Azure without creating an App Service plan. App Service plan determines the pricing tier, location, features, cost and compute resources associated with your app.
In this section, Azure will automatically filter the app service plans based on the region and operating system selection and you can either choose one of the filtered plans from the dropdown or create a new plan using the Create new link.
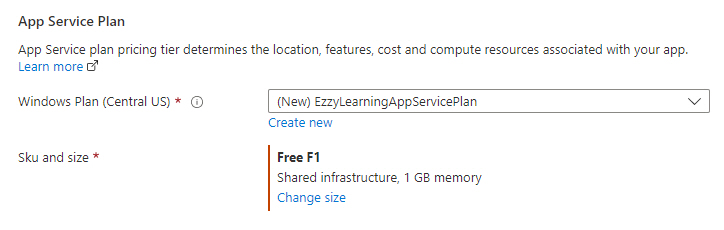
You also have the option to change the machine specification and pricing tier of your app service plan. This choice is really important as it will decide the features and the environmental characteristics of your web app.
Dev/Test
If you are looking for a simple development or testing workload or you want to deploy a lightweight web app that doesn’t require too many advanced features, then you can choose one of the tiers available in the Dev/Test category. The available tiers in this category are Free, Shared, and Basic tiers.
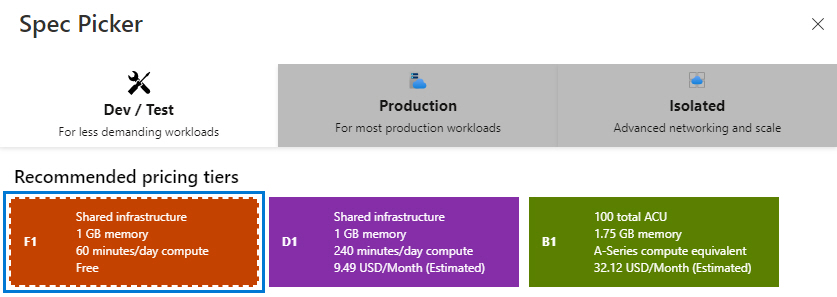
Production
If you need a powerful production environment with a lot of advanced features to deploy a big e-commerce app or a popular web portal or a famous Web API, then you can choose one of the tiers available in this Production category. The available tiers in this category are shown below and you can choose one as per your app requirements and features.

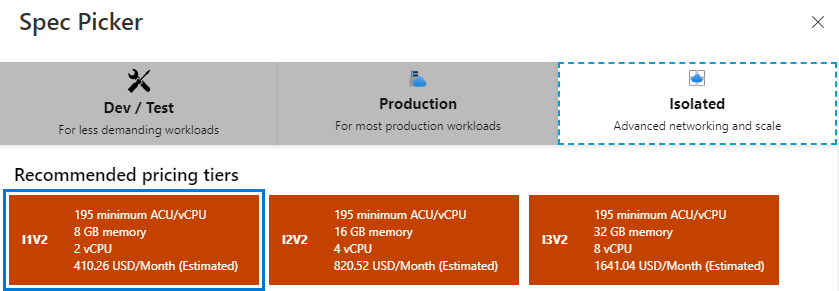
Isolated
If you are building a critical web app that needs to be deployed on your own virtual network or if you want to isolate your app with all types of external access, then you can choose one of the tiers available in this Isolated category. This is the most expensive category because the apps use almost the same hardware as the Production tier, but you have more control over the resources being used by your app. The available tiers in this category are shown below and you can choose one as per your app requirements and features.
For this post, I have chosen a Free tier from the Dev/Test category but please remember that if you need a specific feature or the popularity of your application has grown, then you can always upgrade (or scale-up) the instance of your App Service Plan. This is one of the biggest advantages of cloud over on-premises, where you would have to buy and set up new machines on your own.
To keep this post short, let’s skip the settings available in other tabs such as Deployment, Networking, Monitoring, and Tags. I will write separate blog posts to cover these App Service features in more detail soon.

Once all the information is provided on the Basic tab, you can click the Review + create button shown at the bottom. You will see a screen showing all your settings for your final check.
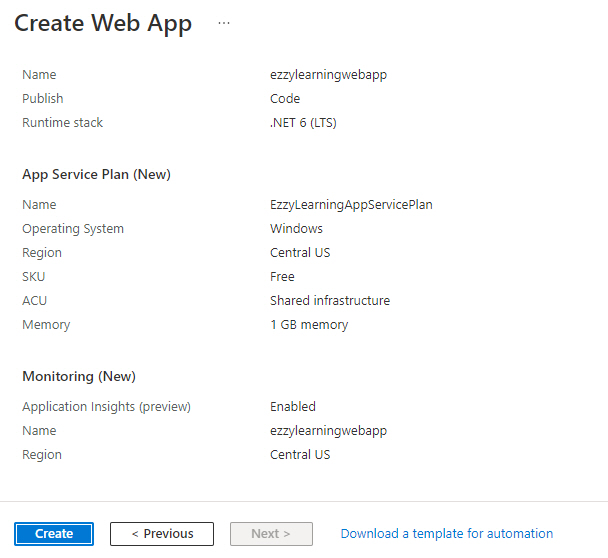
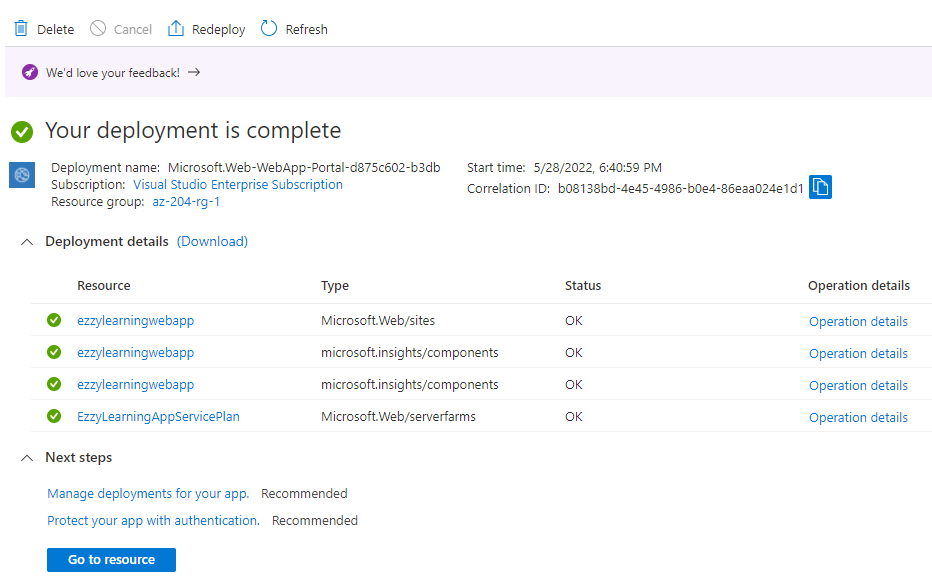
Click the Create button and wait for a few seconds/minutes for the creation of new resources required to run your web app. Once the web app is created, you will see a success page similar to the one shown below that will list down all newly created resources.
Testing Web Application
Click the Go to resource button to go to your App Service resource page that will show the basic details, e.g. status, location, URL, etc. of your newly created web app along with lots of configurations.

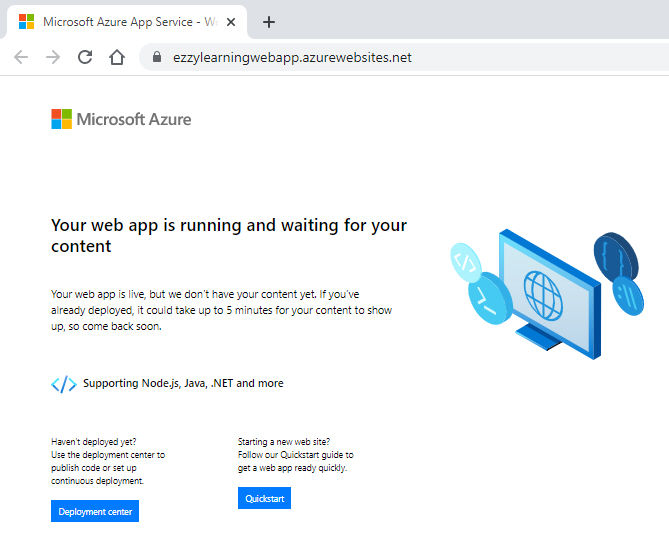
Click the URL of your web app and you should see your web app running in the browser.

nice