In my previous post Create Azure App Services using Azure Portal, I explained how to create and configure Azure App Service using Azure portal. If you do not want to create your web apps using the Azure Portal, you can use Microsoft Visual Studio, which has built-in integration for many different Azure services. In this post, I will walk you through the process of creating Azure App Services from Visual Studio 2022. You will also learn how to deploy your ASP.NET Core web application to a newly created Azure App Service from within Visual Studio IDE. When you’re finished, you’ll have an Azure resource group consisting of an App Service hosting plan and an App Service with a deployed ASP.NET Core web application.
Prerequisites
Before we start, I am assuming that
- You already have an Azure account with an active free or paid subscription.
- You have Visual Studio 2022 installed on your computer with the ASP.NET and web development workload.
- You have an ASP.NET Core web application and it is running fine on your local machine.
If you think that your machine is not configured correctly, then you can visit https://docs.microsoft.com/en-us/dotnet/azure/dotnet-tools?view=azure-dotnet&tabs=windows to set up your computer correctly.
Creating an ASP.NET Core Web Application
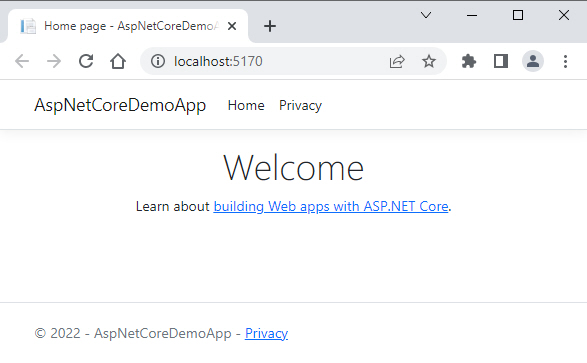
Let’s create a new ASP.NET Core MVC Web Application with the name AspNetCoreDemoApp. Once the project is generated in Visual Studio, press F5 and make sure it is running fine on the local machine and you can browse the application in the browser.
Publishing Web Application to Azure App Service
You can add more features to your ASP.NET Core web application and test and debug your application locally as many times as you want but when your development is finished, you would like to deploy your web application to the cloud. In our case, we want to deploy our web application to Azure App Service. Let me show you the step-by-step process of publishing your web application to Azure without leaving the Visual Studio IDE.
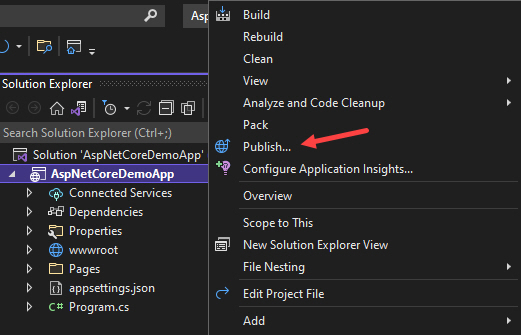
To start publishing, right-click on a project name in the solution explorer and choose the “Publish…” option to open the publish dialog.
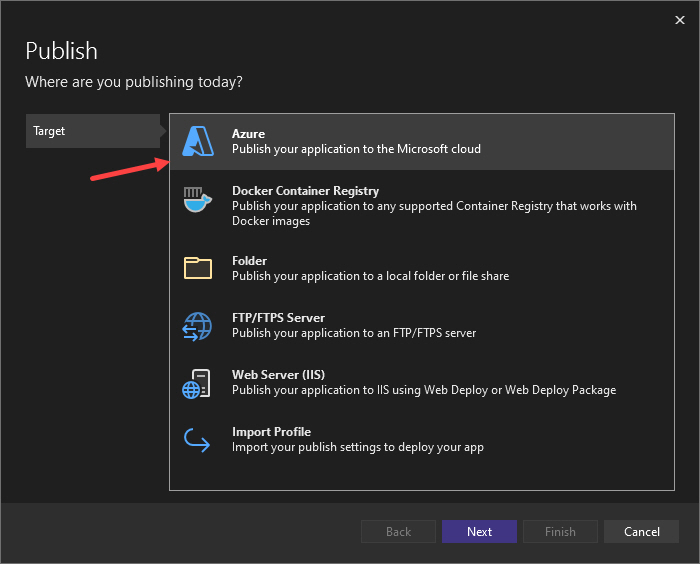
You should see the Publish dialog similar to the following where you have multiple options to publish your web application. You can publish the web application to a web server (IIS), FTP server, a local folder, etc. We want to deploy our application to the Azure cloud so select the Azure option and click the Next button.
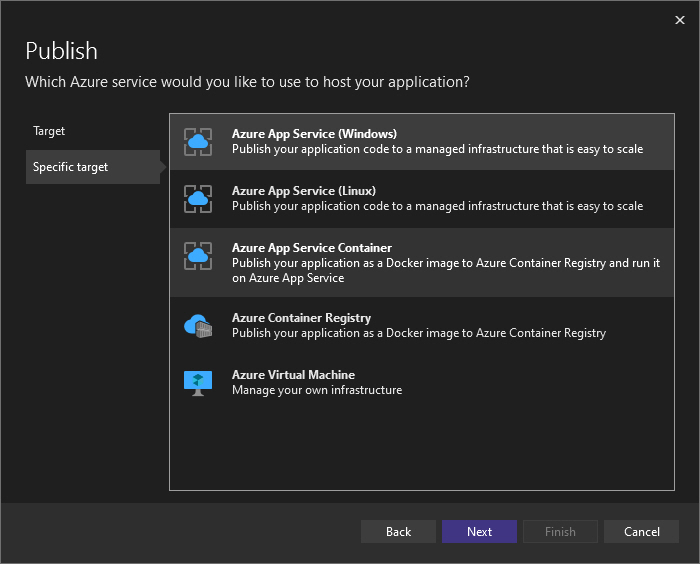
In the next dialog, you need to select Specific target in the left sidebar and you will see a list of different Azure services that can be used to host your application on Azure. We are interested in Azure App Service so select the Azure App Service (Windows) option and click the Next button.
The options in the next dialog can vary depending upon your sign-in status. You can either add a new account or sign in to your Azure account to link your Visual Studio to your Azure account. Once you are signed in, you will see the following dialog that will give you the option to choose your subscription, resource group, and one of the existing Azure App Service to deploy your app.
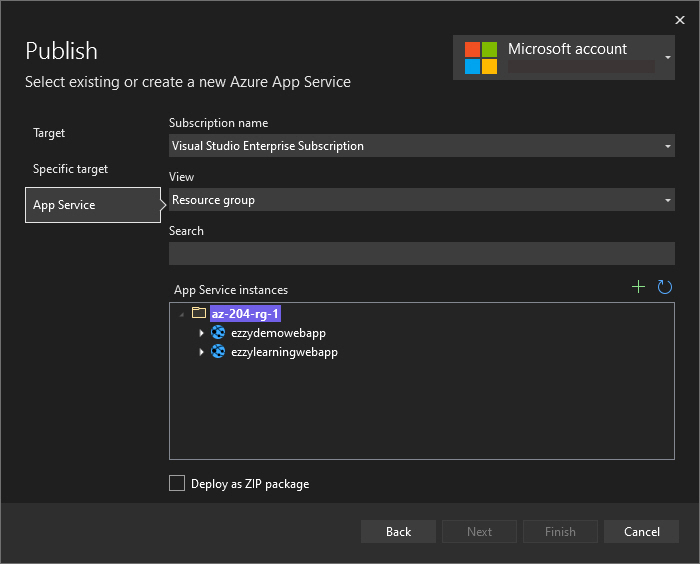
In our case, we want to host our application on a newly created Azure App Service instance so click the green color + icon shown on the right-hand side of the App Service instances setting. You will see the following dialog that will allow you to create a new Azure App Service. This is another advantage of tools such as Visual Studio, as you do not have to leave your programming environment to create new Azure services.
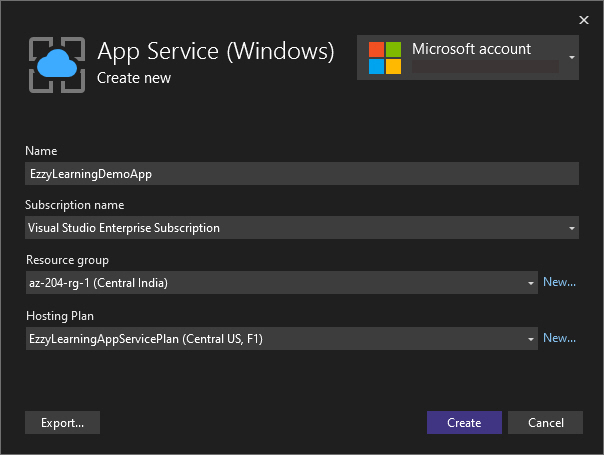
If you have already read my previous post Create Azure App Services using Azure Portal, then the fields shown in the above dialog will look similar to the options you have seen in the Azure portal.
Name – In this field, you need to provide a unique name of Azure App Service. You are allowed to use valid characters a-z, A-Z, 0-9, and dash (-). You can also accept the auto-generated unique name if you want. In either case, your app name will become the initial part of your web application URL e.g. http://<app-name>.azurewebsites.net. For example, our name shown above is EzzyLearningDemoApp so our web application URL will be http://ezzylearningdemoapp.azurewebsites.net.
Subscription name – In this field, you can either select one of the existing subscriptions or create a new one.
Resource group – In this field, you can either select one of the existing resource groups or create a new one using the New… link shown next to the resource group field.
Hosting Plan – In this field, you can either select one of the existing hosting plans or create a new one using the New… link shown next to the Hosting Plan field.
Once all information is provided, click the Create button to start the process of creating Azure resources. After a few moments, all resources will be created and you will be ready to publish your app. Visual Studio will also create the following publish profile for you so that you can easily republish your application in the future without going through the above publishing wizard.
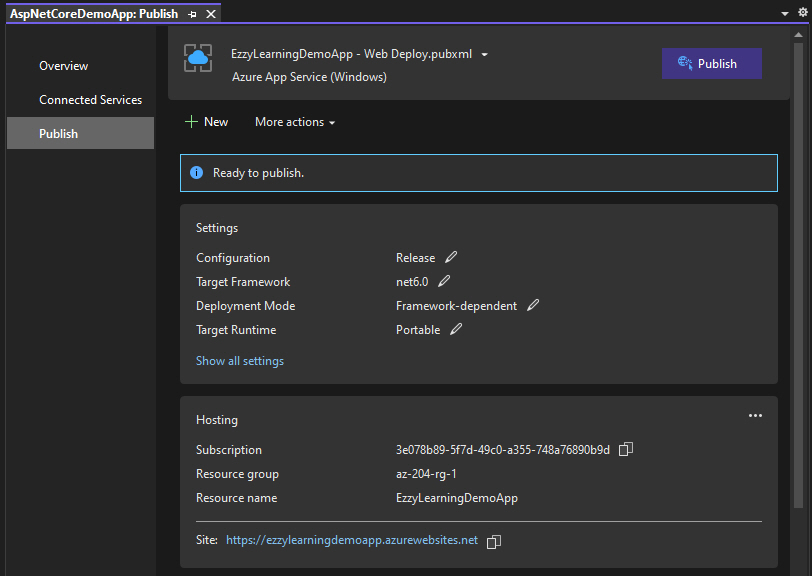
If you are satisfied with the current configurations, click the Publish button in the publish profile, and Visual Studio will start the process of building, packaging, and publishing your web application to the newly created Azure App Service. It will also launch the web app in the default browser.
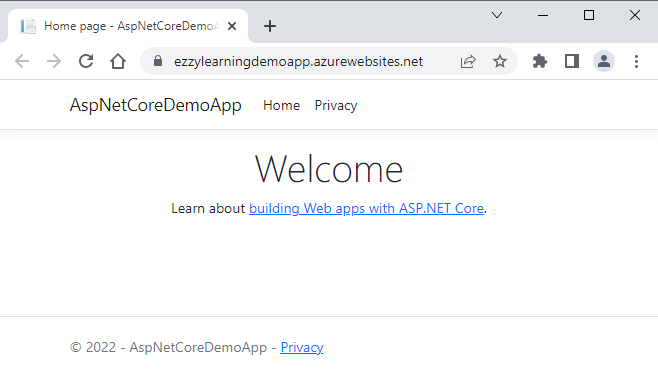
Congratulations! You have just created and deployed your web application to Azure App Service and now it is accessible to anyone in the world.


