
In my previous post Introducing Serverless Computing with Azure Functions, you learned the basics of Azure functions, Azure function bindings, and triggers. In this post, you will learn how to create Azure function apps using the Azure portal. You will learn how to choose the runtime, programming language, and trigger type for your Azure functions. You will also learn how to configure Azure functions as per your requirements using various settings available in the Azure portal.
Table of Contents
Overview of Azure Function Apps
Azure function apps are a serverless compute service offered by Microsoft Azure that allows developers to group multiple Azure functions as a logical unit for easier management, deployment, scaling, and sharing of resources. Function apps provide an efficient and scalable way to develop cloud-based serverless applications without worrying about the underlying infrastructure. Azure function apps offer many features, including automatic scaling and integration with other Azure services.
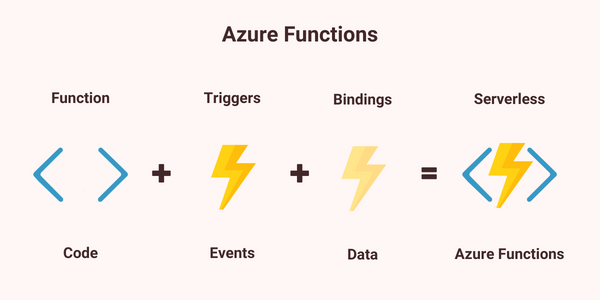
The Azure portal provides a user-friendly interface for creating, configuring, and managing Azure function apps directly in the browser. Developers can easily monitor the execution and performance of their functions, set up authentication and authorization mechanisms, and manage scaling and deployment options within the portal. Developers can write their application logic using a wide range of supported programming languages, including JavaScript, C#, Python, PowerShell, and more.
Creating Azure Function App
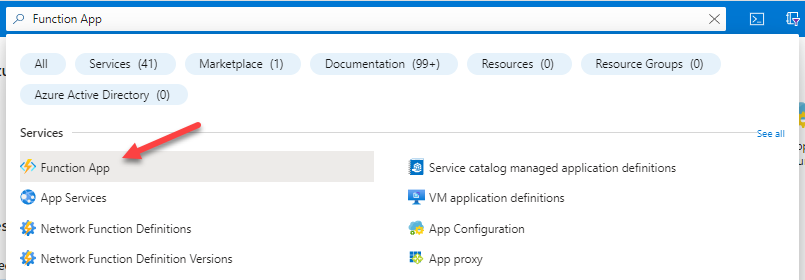
To create an Azure function app using the Azure portal, you must have an Azure account. You can create a free trial account if you don’t have an account. Log in to the Azure portal, type “Function App” in the top search bar, and select “Function App” from the dropdown menu.
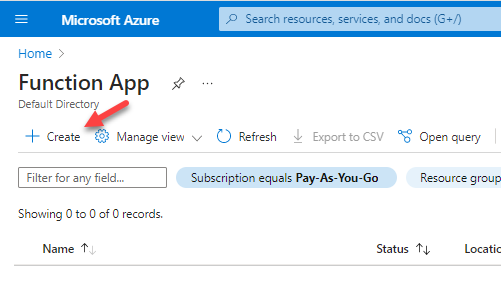
Click on the “Create” button to add a new function app.
You will see the “Basic” tab of the Create Function App wizard where you need to provide the basic details of your function app.
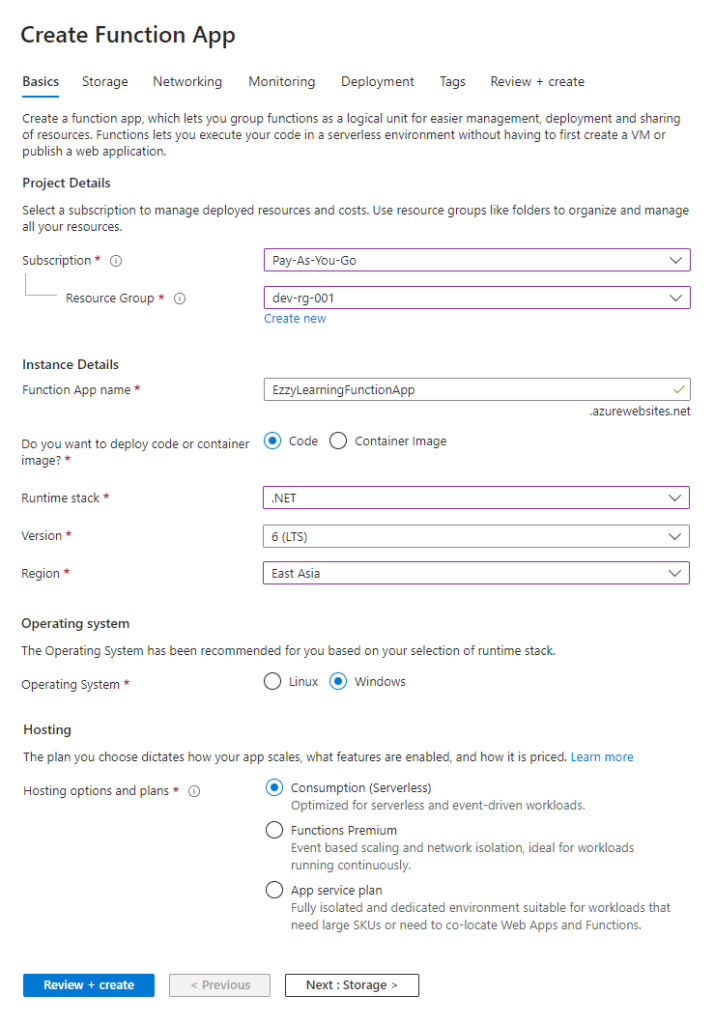
The Basics page has the following fields:
Subscription – Select the subscription under which you want to create your function app. Azure subscriptions are a logical unit in which multiple Azure services can be grouped to link with an Azure account. This serves as a single billing unit for Azure resources used in the account.
Resource Group – Select either an existing resource group from the dropdown or create a new resource group by clicking the “Create new” link. A resource group is a logical container that group together all related resources required for a single Azure solution.
Function App name – Provide a globally unique name for your function app. For this tutorial, I am providing the EzzyLearningFunctionApp name.
Code or Container Image – You need to decide whether you want to publish code files or a Docker container. For this post, I am choosing the Code option.
Runtime stack – You need to choose your favorite programming language to write Azure functions. Azure portal only allows you to edit C#, JavaScript, TypeScript, and PowerShell files. If you want to write functions in Java or Python, you must develop them locally. For this tutorial, I want to use C# so I am choosing .NET runtime.
Version – You need to choose the version of your runtime. I want to use .NET 6 so I choose the “6 (LTS)” option from the dropdown.
Region – Select the region where you want to deploy your function app. It is recommended to select the region near you, your customers, or the services your function wants to access.
Operating System – You need to select one of the recommended operating systems based on your runtime stack selection. For .NET runtime, the available options are Linux and Windows. I am choosing Windows because, in the Azure portal, you are only allowed to edit functions using Windows.
Hosting – Hosting plan defines what resources will be allocated to your function app, what features will be enabled, and how much price you will pay for the available resources and features. I am choosing the default “Consumption (Serverless)” plan that allows Azure to dynamically add/remove resources as needed by your function app. You only have to pay for the time your functions run.
Once all the basic details are filled in, click on the Next : Storage button to open the following Storage page.
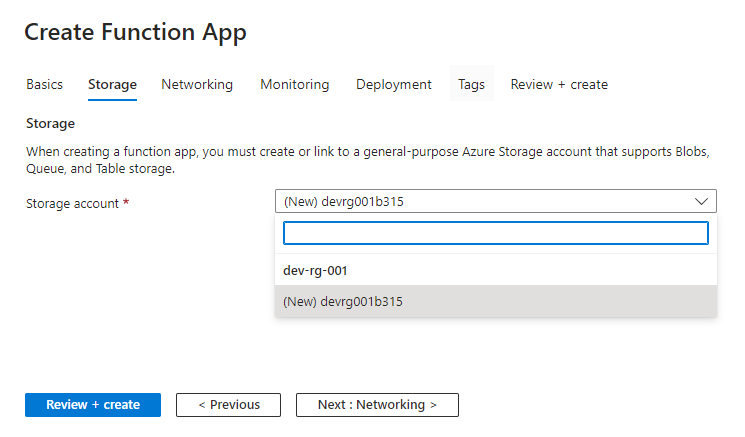
The Storage page has the following fields:
Storage account – A storage account provides a unique namespace in Azure for your data. Azure functions rely on Azure Storage for operations such as managing triggers and logging function executions so we need to choose a general-purpose Azure Storage account that supports Blob, Queue, and Table storage. If you already have a storage account, then you can use it or you can create a new one as well.
Click on the Next : Networking button to open the following Networking page.
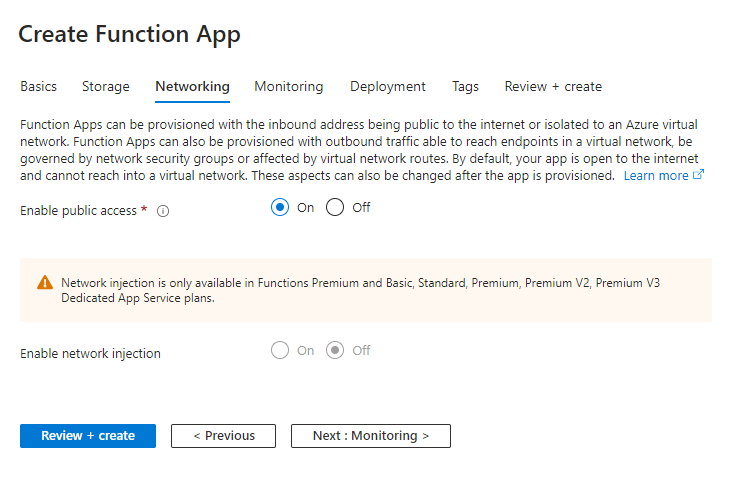
Enable public access – Networking page allows you to configure the access of your Azure functions. By default, functions apps are open to the internet which means the functions can be called from any browser or client. For this tutorial, I am choosing the “On” option for Enable public access setting.
Click on the Next : Monitoring button to open the following Monitoring page.
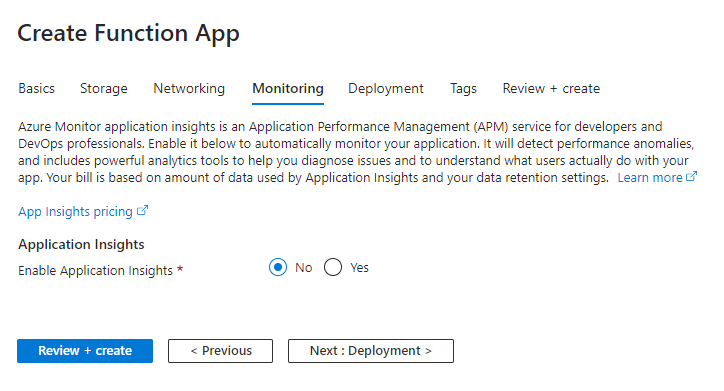
Enable Application Insights – Application Insights is an extension of Azure Monitor that helps you understand how your app is performing and how it’s being used. It has many Application Management (APM) features for developers and DevOps professionals to monitor applications. For this tutorial, I am not enabling this feature so you can select the “No” option and click on the Next : Deployment button to open the following Deployment page.

Continuous deployment – This setting allows you to enable continuous deployment features for Azure function apps. Continuous deployment is supported using GitHub Actions which is an automation framework to build, test and deploy your function apps as soon as code is committed in your repository. For this tutorial, I will keep this setting disabled.
Click on the Next : Tags button to open the following Tags page.
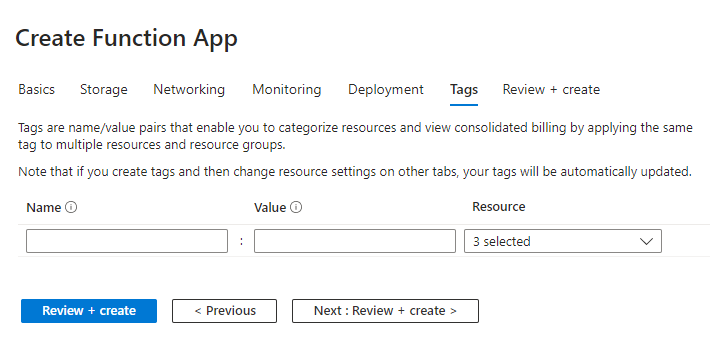
Tags page allows you to add some tags with your function app. Tags are name/value pairs that allow you to categorize different Azure related resources so that you can see the consolidated billing of multiple resources together. For this tutorial, I am not adding any tags.
Click on the Next : Review + create button to review all your configurations.
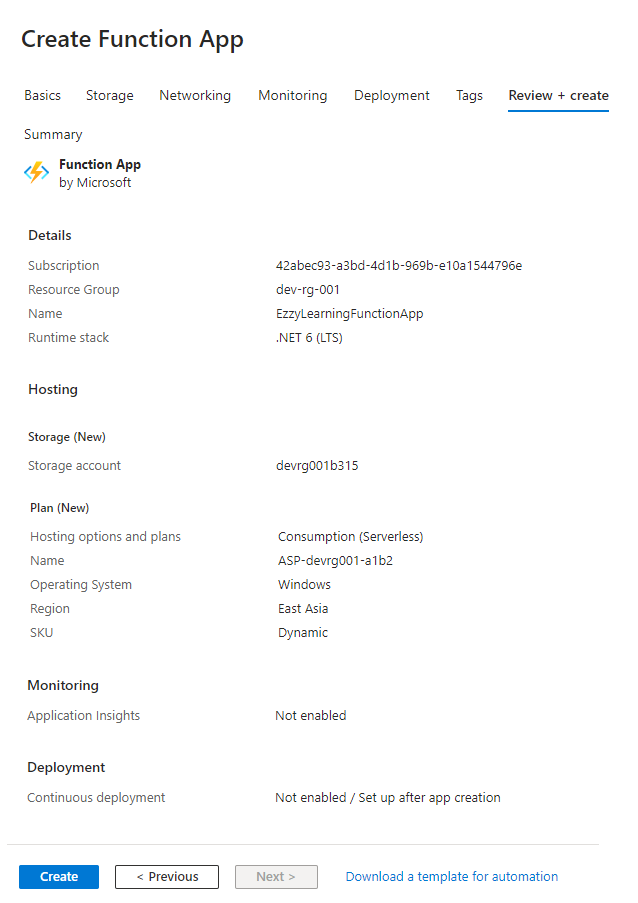
Click on the Create button to provision and deploy the function app. Once deployment is complete, you will see a page similar to the following screenshot.
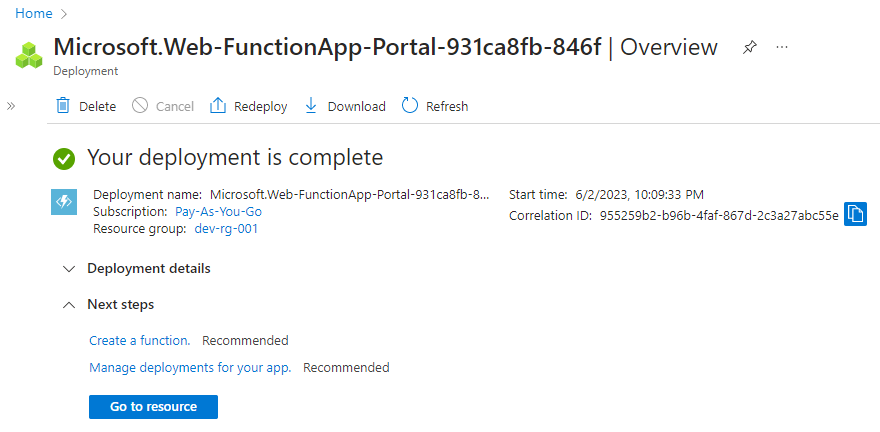
Click on the Go to resource button to see your new function app. The function app page will display all the basic details of your application such as Resource group, status, operating system, location, URL, etc.
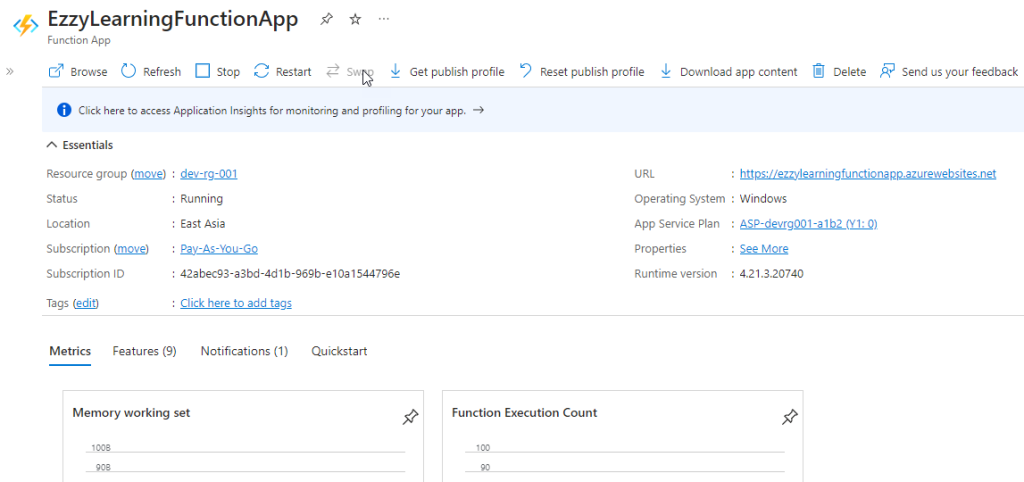
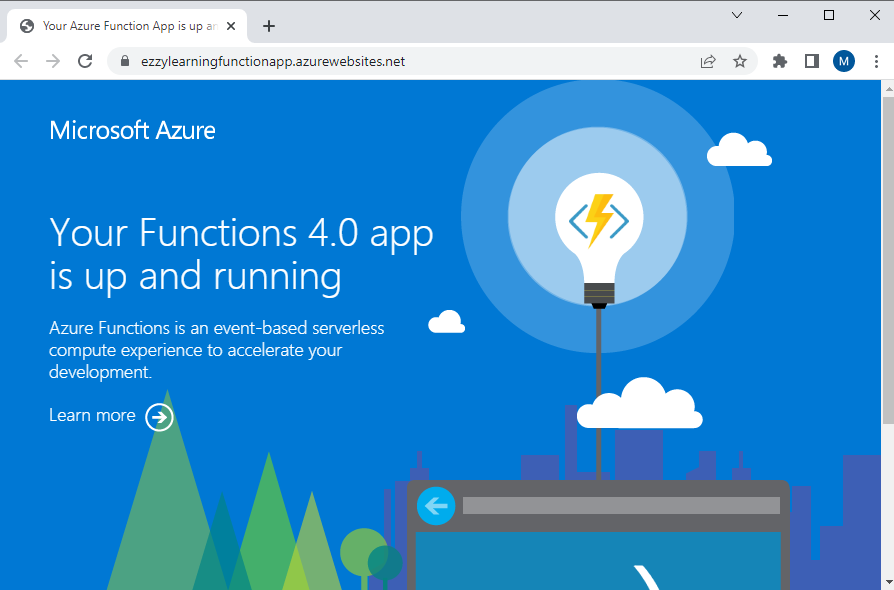
Click the URL or the Browse button to open your function app in the browser. The function app is up and running but we still haven’t seen the function code and haven’t configured how we will call that function.
Creating an HTTP Trigger Azure Function
A trigger defines how a function is invoked and a function must have exactly one trigger which acts as a starting point for the function. There are many types of triggers available but for this tutorial, let’s create an HTTP trigger that allows functions to be executed when an HTTP request is made to a specified URL.
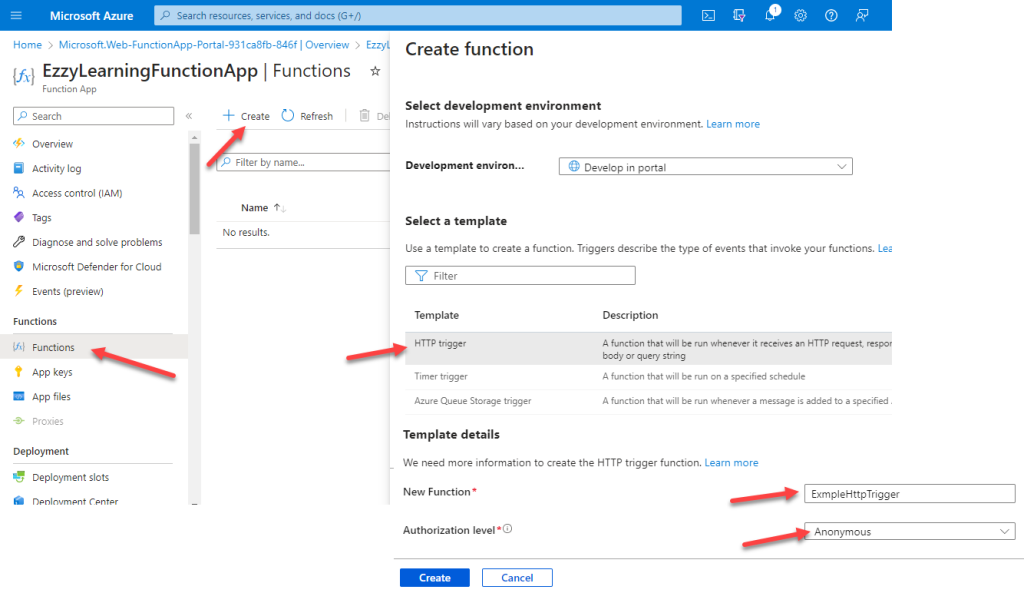
- From the left menu of the Function App window, select Functions, and then select Create from the top menu to open the Create function dialog.
- Inside Create function dialog, leave the Development environment property as Develop in the portal, and then select the HTTP trigger template.
- Under Template details use ExampleHttpTrigger for New Function, select Anonymous from the Authorization level drop-down list, and then select Create.
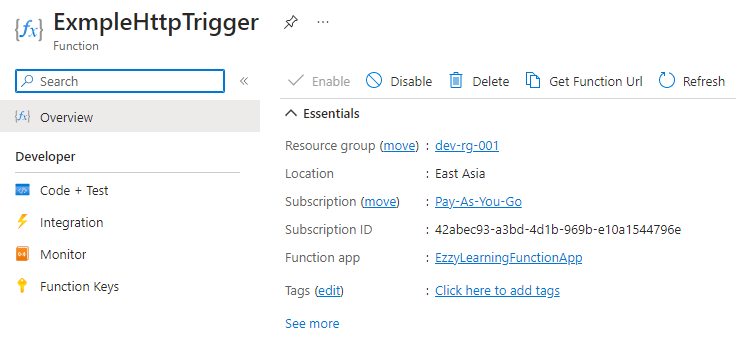
Azure will create the HTTP trigger function and when it’s ready, you will be redirected automatically to the function. You can now change the code of your function within the Azure portal editor shown below and run the new function by sending an HTTP request from the browser or a client tool such as Postman.
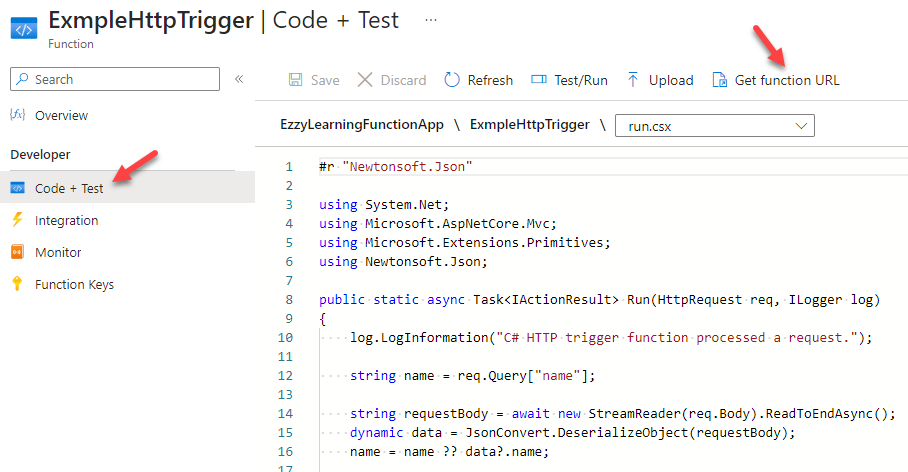
Click on the “Code + Test” button under the Developer section from the left sidebar panel to open the function code. The code is written in C# language and it accepts the name from the query string or the request body and appends to name to the Hello string and returns the output. To get the function URL click on the “Get Function URL” button
Copy the function URL from the Get function URL dialog.
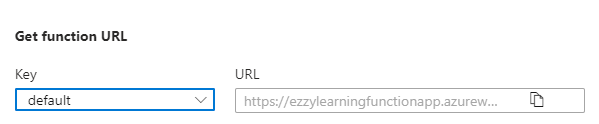
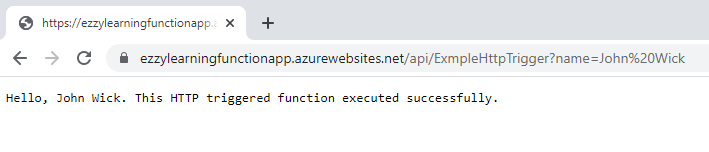
Paste the function URL into your browser’s address bar. Add the query string value ?name=<your_name> to the end of this URL and press Enter to run the request. The browser must display a response message that echoes back your query string value.
Conclusion
Azure Function Apps enable developers to build and deploy event-driven applications quickly and efficiently. Azure portal has a lot of features to simplify the process of creating and managing Azure Function Apps which allow developers to build scalable and efficient serverless applications with ease. Even though the Azure portal is easy to use but it is recommended that you develop your functions locally using tools like Visual Studio or Visual Studio Code and publish them to Azure Function Apps. If you have any comments or suggestions, please leave your comments below. Don’t forget to share this tutorial with your friends or community.

