These days, almost all web applications have some sort of form to accept user input. As a developer, it is our job to not only present these forms to the user but also make sure that the data submitted to the server is valid. Microsoft Blazor framework has built-in support for forms and validations and it provides us many built-in components to handle almost any use case related to web forms. In this tutorial, I will give you an overview of building and validating web forms in Blazor.
Table of Contents
Create Blazor Forms using EditForm Component
The Blazor framework renders forms using a built-in component called EditForm. We can bind this component to a model that may or may not have any Data annotations for validations. To learn more about the EditForm component let’s create a new Blazor Server application and create the following Product model inside the Models folder.
Product.cs
public class Product
{
    public int Id { get; set; }
    public string Name { get; set; }
    public decimal Price { get; set; }
    public string Description { get; set; }
    public bool IsPublished { get; set; }
    public DateTime PublishedDate { get; set; }
}
Declare an object of Product model class with the name ProductModel inside the Index.razor.cs code-behind file of application home page.
Index.razor.cs
public partial class Index
{
    private Product ProductModel = new Product();
}
As I mentioned above that the form can be defined using the EditForm component so let’s use this component in the Index.razor file as shown in the code snippet below.
Index.razor
@page "/"
<h1 class="mb-3 mt-3">Add Product</h1>

<EditForm Model="@ProductModel" class="row p-3">
   <div class="col-md-12 mb-3">
      <label for="Name">Name</label>
      <InputText id="Name" @bind-Value="ProductModel.Name" class="form-control" />
   </div>
   <div class="col-md-6 mb-3">
      <label for="Price">Price</label>
      <InputNumber id="Price" @bind-Value="ProductModel.Price" class="form-control" />
   </div>
   <div class="col-md-6 mb-3">
      <label for="PublishedDate">Published Date</label>
      <InputDate id="PublishedDate" @bind-Value="ProductModel.PublishedDate" class="form-control" />
   </div>
   <div class="col-md-12 mb-3">
      <label for="Description">Description</label>
      <InputTextArea id="Description" @bind-Value="ProductModel.Description" class="form-control" />
   </div>
   <div class="col-12 mb-3">
      <div class="form-check">
         <InputCheckbox id="IsPublished" @bind-Value="ProductModel.IsPublished" class="form-check-input" />
         <label class="form-check-label" for="IsPublished">
         Published
         </label>
      </div>
   </div>
   <div class="col-12 mb-3">
      <button type="submit" class="btn btn-primary">Submit</button>
   </div>
</EditForm>
In the preceding code snippet, we are binding the ProductModel object with the EditForm using the Model attribute.
<EditForm Model="@ProductModel" class="row p-3">
The remaining form is created using several built-in form components available in Blazor such as InputText, InputNumber, etc. Each one of these components is bound with a single property of the ProductModel object using the @bind-Value attribute. For example, to bind the product Name property with an InputText component we are using the code snippet similar to the following.
<InputText id="Name" @bind-Value="ProductModel.Name" class="form-control" />
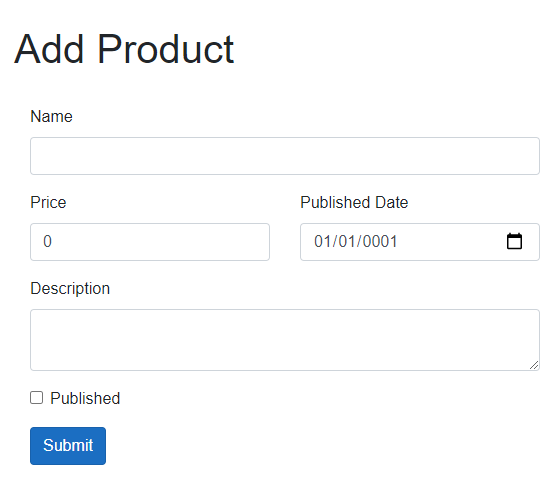
If you will run the project at this point, you will see the following web form rendered in the browser.
Create Blazor Forms using EditContext Component
When we use an EditForm component in Blazor, it automatically creates an instance of a component called EditContext. This component keeps track of metadata about the editing process. For example, it can tell us which form fields have been modified and what are the different validation messages available. We can also create the object of the EditContext component in our code and bind the form directly with the EditContext component using the EditContext property of the EditForm component.
Let me demonstrate this concept by modifying the above example slightly. To use the EditContext component, we need to perform the following two actions.
- Declare an object of EditConext component in the Index.razor.cs file.
- Wrap the ProductModel object inside the EditContext component by passing it as an argument of the EditContext constructor.
Index.razor.cs
public partial class Index
{
    private Product ProductModel = new Product();
    private EditContext EditContext;

    protected override void OnInitialized()
    {
        EditContext = new EditContext(ProductModel);
    }
}
Now we can bind the EditContext object with the EditForm component using the EditContext property as shown in the following code snippet. Please note that you can use either an EditContext or a Model attribute with an EditForm component. Assignment of both isn’t supported and will generate a runtime error.
Index.razor
<EditForm EditContext="@EditContext" class="row p-3">
Run the project once again and you should see the same web form rendered in the browser.
Overview of Blazor Forms Validation
The Blazor EditForm component can use data annotations to validate web forms. To enable data annotations validation in razor views you need to use the Blazor DataAnnotationsValidator component. This component attaches the data annotations validation to a cascaded EditContext.
Blazor performs the following two types of validation
Field Validation – This type of validation is performed when the user presses the Tab key to move from one form component to another. During this validation, the DataAnnotationsValidator component associates all reported validation results with the field.
Model Validation – This type of validation is performed when the user submits the form. During this validation, the DataAnnotationsValidator component tries to determine the problematic fields by their member name. The validation results not associated with any individual member are associated with the model rather than a field.
Let’s cover the above concepts by adding some basic data annotations in our Product class.
Product.cs
public class Product
{
    public int Id { get; set; }

    [Required]
    [StringLength(50, ErrorMessage = "Name must be less than 50 characters.")]
    public string Name { get; set; }

    [Required]
    public decimal Price { get; set; }

    public string Description { get; set; }

    public bool IsPublished { get; set; }

    public DateTime PublishedDate { get; set; }
}
Next, add the following two components as the first statements within EditForm component
<DataAnnotationsValidator />
<ValidationSummary />
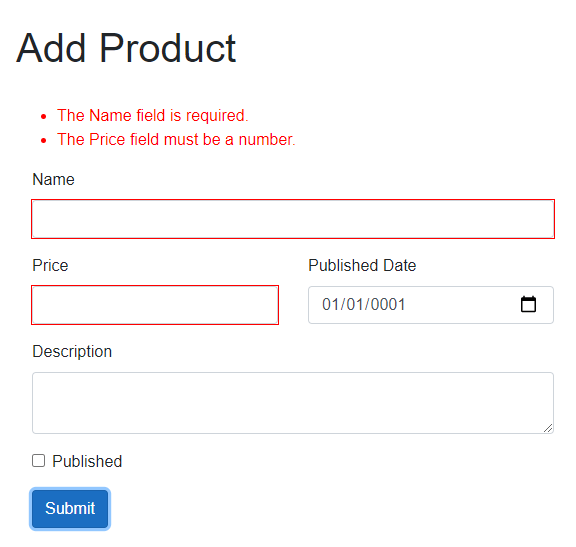
Run the project once again and try to submit the empty form. You should see the following validation messages appearing on top of the form.
Handling Blazor Form Submission
The EditForm component provides the following callbacks for handling form submission:
OnValidSubmit – The event handler associated with this callback will run when all fields of a form are submitted with valid data.
OnInvalidSubmit – The event handler associated with this callback will run when some fields of a form are submitted with invalid data.
OnSubmit – The event handler associated with this callback will run regardless of the form fields validation status. To programmatically validate the form in the event handler we can call the Validate method of the EditContext component. This method returns true if the form is valid.
Let’s see the above callbacks in action with some examples. Add the following HandleSubmit event handler in the Index.razor.cs file. Note how I am calling the Validate method to check if the form is valid or not.
Index.razor.cs
public partial class Index
{
    private Product ProductModel = new Product();
    private EditContext EditContext;

    protected override void OnInitialized()
    {
        EditContext = new EditContext(ProductModel);
    }

    private void HandleSubmit()
    {
        Console.WriteLine("HandleSubmit Called...");

        if (EditContext.Validate())
        {
            Console.WriteLine("Form is Valid...");
        }
        else
        {
            Console.WriteLine("Form is Invalid...");
        }
    }
}
To attach the above event handler, we need to add OnSubmit attribute to the EditForm component as follows:
<EditForm EditContext="@EditContext" class="row p-3"
          OnSubmit="@HandleSubmit">
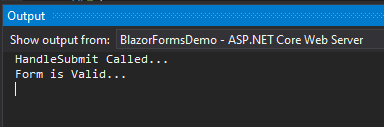
Run the project and try to submit the form by filling the required fields and you will see the following statements in the Output window.
If you want to handle valid and invalid form submissions separately then you can define two event handlers as shown below:
public partial class Index
{
    private Product ProductModel = new Product();
    private EditContext EditContext;

    protected override void OnInitialized()
    {
        EditContext = new EditContext(ProductModel);
    }

    private void HandleValidSubmit()
    {
        Console.WriteLine("HandleValidSubmit Called...");
    }

    private void HandleInvalidSubmit()
    {
        Console.WriteLine("HandleInvalidSubmit Called...");
    }
}
To attach above event handlers with EditForm, we can use OnValidSubmit and OnInvalidSubmit attributes.
<EditForm EditContext="@EditContext" class="row p-3"
          OnValidSubmit="@HandleValidSubmit"
          OnInvalidSubmit="@HandleInvalidSubmit">
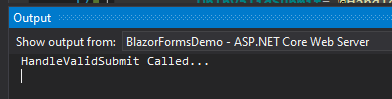
Run the project and try to submit the form by filling the required fields and you will see the following statements in the Output window.
Display Inline Error Message in Blazor Forms
Until now, we are using ValidationSummary component to display the entire form validation messages on top of the page. If you want to display error messages next to form fields then you can use the ValidateMessage component.
<div class="col-md-12 mb-3">
   <label for="Name">Name</label>
   <InputText id="Name" @bind-Value="ProductModel.Name" class="form-control" />
   <ValidationMessage For="@(() => ProductModel.Name)" />
</div>

<div class="col-md-6 mb-3">
   <label for="Price">Price</label>
   <InputNumber id="Price" @bind-Value="ProductModel.Price" class="form-control" />
   <ValidationMessage For="@(() => ProductModel.Price)" />
</div>
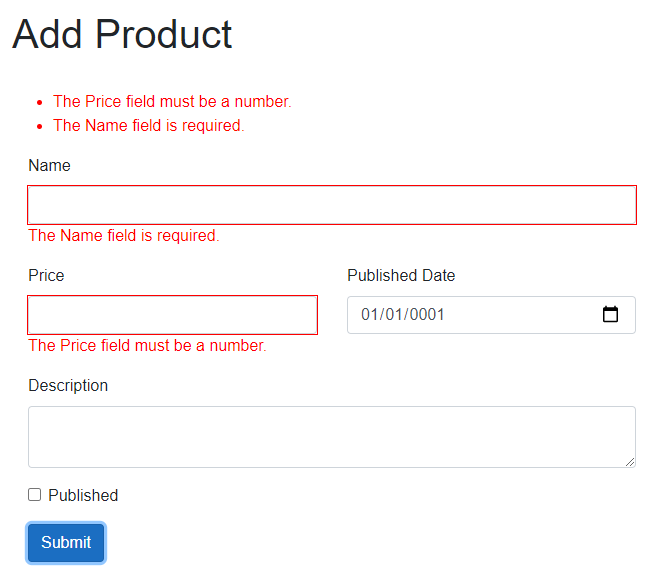
Run the project once again and try to submit the empty form. You should see the validation messages appearing with each problematic field as shown below:
By default, Blazor displays the property name e.g. Name, Price, etc. in validation error message but if you want to customize the error message template and the property name then you can use DisplayName and ParsingErrorMessage attributes.
<div class="col-md-6 mb-3">
    <label for="Price">Price</label>
    <InputNumber id="Price" @bind-Value="ProductModel.Price" class="form-control"
                 ParsingErrorMessage="The {0} field has an invalid value."
                 DisplayName="Product Price" />
    <ValidationMessage For="@(() => ProductModel.Price)" />
</div>
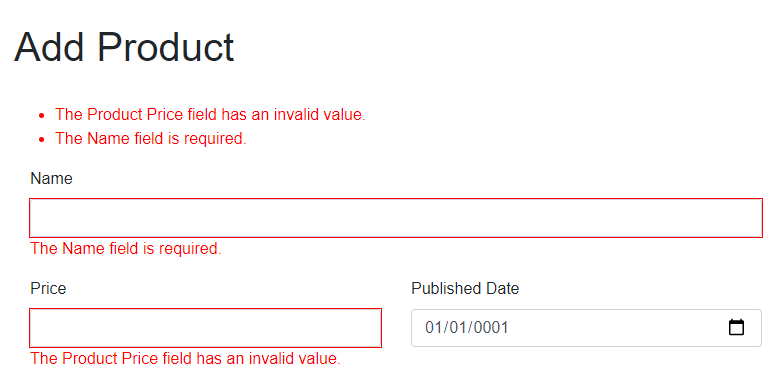
The DisplayName property is available in several built-in components and if it is available then it will be displayed at the position where we will add the {0} placeholder in the ParsingErrorMessage template. The ParsingErrorMessage property is used to define a custom error message template.
Run the project once again and try to submit the empty form. You should see the validation messages appearing as shown below:
Summary
In this post, I tried to cover the basics of Blazor forms and validation. Blazor has many more features that can cover almost any use case related to web forms and validations. I hope you have found this post useful. If you have any comments or suggestions, please leave your comments below. Don’t forget to share this tutorial with your friends or community. You can also download the complete source code of this post using the Download Source Code button shown at the start of this post.


Thanks a lot, I have learnt a lot of stuff from your content and wish you bring more soon.