
This tutorial is part of a serious of tutorials
- Part 1 – Setting up Ionic Development Environment and Creating Ionic Project using Ionic CLI
- Part 2 – Ionic App Themes and Styles and Customizing Ionic Themes and Colors
- Part 3 – Understanding Ionic Pages and Creating Ionic Pages using Ionic CLI
- Part 4 – Creating Food Recipes Page in Ionic
- Part 5 – Creating Food Recipe Detail Page in Ionic
This tutorial series will teach you how to build such hybrid mobile app using one of the most beautiful, free and open source front end mobile apps library called Ionic and a very popular web and mobile apps development framework made by Google called Angular.
Table of Contents
Understanding Ionic Pages
From Angular point of view, the Ionic page is an Angular Component. Ionic pages are defined as a TypeScript classes and decorated with @Component directive in a similar manner as Angular components. They also have an HTML file associated with them to act as a template to define the contents of the page. They also have a SCSS files associated with them to define the styles of the entire page. In the context of Ionic, angular page is a component that acts as an entire view and can contain nested components. All Ionic app pages reside in src/pages folder and every page has its own folder in pages folder in which all the files related to any particular page exist. Notice how the TypeScript (home.ts) file, the template (home.html) file and the styles (home.scss) file are combined together in a folder named home. Let’s examine out food recipe app home page to learn more about Ionic pages.
home.ts
Open the home.ts file from src/pages/home/home.ts and you will see that a page in Ionic is just an Angular component defined as a TypeScript class decorated with @Component decorator imported from @angular/core. The component defines a templateUrl which points to a path of an HTML file home.html which resides in the same folder as this component file home.ts.
import { Component } from '@angular/core';
import { NavController } from 'ionic-angular';

@Component({
  selector: 'page-home',
  templateUrl: 'home.html'
})

export class HomePage {

    constructor(public navCtrl: NavController) {

    }
}
It also defines a selector to be used as a container or root element in which home.html contents will be placed.
<page-home></page-home>
You can declare variables and functions inside the HomePage class defined in home.ts file and these variables and functions can be accessed from the template file home.html.
home.html
Open the home.html file from src/pages/home/home.html and you will notice that it contains standard HTML elements such as paragraph (p) element and some Ionic UI components such as ion-header, ion-content and ion-button etc.
<ion-header>
  <ion-navbar>
    <button ion-button menuToggle>
      <ion-icon name="menu"></ion-icon>
    </button>
    <ion-title>Home</ion-title>
  </ion-navbar>
</ion-header>

<ion-content padding>
  <h3>Ionic Menu Starter</h3>
  <p>
    If you get lost, the <a href="http://ionicframework.com/docs/v2">docs</a> will show you the way.
  </p>
  <button ion-button secondary menuToggle>Toggle Menu</button>
</ion-content>
Ionic apps are made of high-level building blocks called components. Components allow you to quickly construct an interface for your app. Ionic comes with a number of components, including modals, popups, and cards. You can fine more about Ionic UI components at following URL.
https://ionicframework.com/docs//components
home.scss
Open the home.scss file from src/pages/home/home.scss and you will notice that it has only single element page-home declared in it. All home page specific styles can be defined inside the page-home element.
page-home {

}
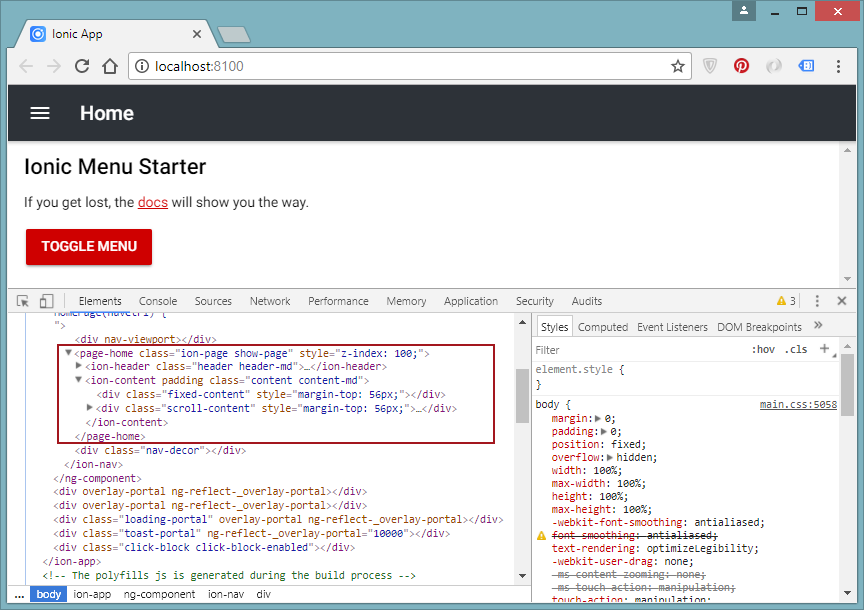
If you view the source of the rendered home page in browser using developer tools, you will notice that the home page is rendered with the same element name defined in home.scss file and also as a selector in home.ts file. This is to make sure that styles defined in one page doesn’t overridden by styles defined in other pages. If you want to use some styles on all the pages of the app then you can define them in app.scss file..
app.module.ts
Like every Angular component, every Ionic page of your app must be declared in AppModule available in app.module.ts file. If you will open this file from src/app location you will see how HomePage is imported using import statement and how it is defined in declarations and entryComponents arrays. When we will add more pages in our food recipes app later in this tutorial, you will see that those new pages will also be defined in this file.
import { BrowserModule } from '@angular/platform-browser';
import { ErrorHandler, NgModule } from '@angular/core';
import { IonicApp, IonicErrorHandler, IonicModule } from 'ionic-angular';

import { MyApp } from './app.component';
import { HomePage } from '../pages/home/home';
import { ListPage } from '../pages/list/list';

import { StatusBar } from '@ionic-native/status-bar';
import { SplashScreen } from '@ionic-native/splash-screen';

@NgModule({
  declarations: [
    MyApp,
    HomePage,
    ListPage
  ],
  imports: [
    BrowserModule,
    IonicModule.forRoot(MyApp),
  ],
  bootstrap: [IonicApp],
  entryComponents: [
    MyApp,
    HomePage,
    ListPage
  ],
  providers: [
    StatusBar,
    SplashScreen,
    {provide: ErrorHandler, useClass: IonicErrorHandler}
  ]
})
export class AppModule {}
Let’s just rename the List Page to Recipes Page so that we can see how to rename a page after it is created and in how many places we need to update the renamed page reference.
recipes.html
Rename the list.html file to recipes.html file and make sure ion-title element value is updated to Recipes.
<ion-header>
    <ion-navbar>
        <button ion-button menuToggle>
            <ion-icon name="menu"></ion-icon>
        </button>
        <ion-title>Recipes</ion-title>
    </ion-navbar>
</ion-header>
recipes.scss
Rename the list.scss file to recipes.scss file and make sure it has the element page-recipes in it.
page-recipes {

}
recipes.ts
Rename the list.ts file to recipes.ts file and make sure that the ListPage class inside this file is renamed to RecipesPage.
export class RecipesPage
Also make sure that you are pushing RecipesPage to navigation control instead of ListPage.
itemTapped(event, item) {
    // That's right, we're pushing to ourselves!
    this.navCtrl.push(RecipesPage, {
        item: item
    });
}
app.components.ts
Open app.components.ts file and replace the following line
import { ListPage } from '../pages/list/list';
with the following line
import { RecipesPage } from '../pages/recipes/recipes';
Also make sure that pages array now have a RecipesPage instead of ListPage.
this.pages = [
    { title: 'Home', icon:'md-home', component: HomePage },
    { title: 'Recipes', icon:'md-cafe',component: RecipesPage }
];
app.module.ts
Open app.module.ts file and make sure that ListPage is renamed to RecipesPage in declarations and entryComponents arrays.
declarations: [
    MyApp,
    HomePage,
    RecipesPage
],
entryComponents: [
    MyApp,
    HomePage,
    RecipesPage
],
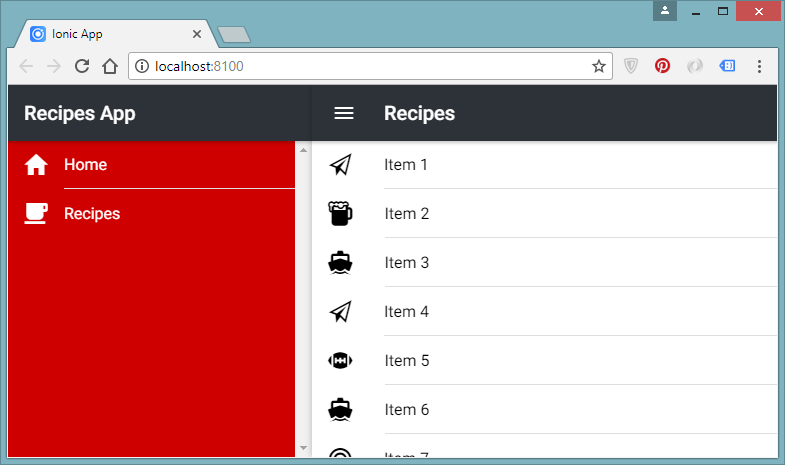
Save all the files and you will see the Recipes page rendered in the browser automatically thanks to live reload feature.
Creating Ionic Pages
You can create a new Ionic page in two ways.
- You can create a new page folder in the pages directory and copy all three files (html, ts and scss) from any existing page folder such as home and paste them in newly created folder. Then you can rename all three files and put the new page reference in app.components.ts and app.module.ts. If this seems too much manual work to you then you have second option below.
- You can create a new page using Ionic CLI generate command. In fact this command can be used to generate different type of components such as directives, pipes, pages, providers etc. To generate a new page such as about, run the following command in command window from within your ionic project root directory.
ionic generate page about
This little command will add the following files to your project:
- app\pages\about\about.html
- app\pages\about\about.js
- app\pages\about\about.scss
The generated files will have the following content:
about.scss
page-about {

}
about.html
<ion-header>
    <ion-navbar>
        <button ion-button menuToggle>
            <ion-icon name="menu"></ion-icon>
        </button>
        <ion-title>About</ion-title>
    </ion-navbar>
</ion-header>

<ion-content padding>
    <h3>About</h3>
</ion-content>
about.ts
import { Component } from '@angular/core';
import { NavController } from 'ionic-angular';

@Component({
    selector: 'page-about',
    templateUrl: 'about.html'
})

export class AboutPage {
    constructor(public navCtrl: NavController) {

    }
}
app.module.ts
Once your page related files are generated using Ionic CLI command, you can define the newly generated page in app.module.ts file as follows:
import { AboutPage } from '../pages/about/about';

…

declarations: [
    MyApp,
    HomePage,
    RecipesPage,
    AboutPage
],
entryComponents: [
    MyApp,
    HomePage,
    RecipesPage,
    AboutPage
],
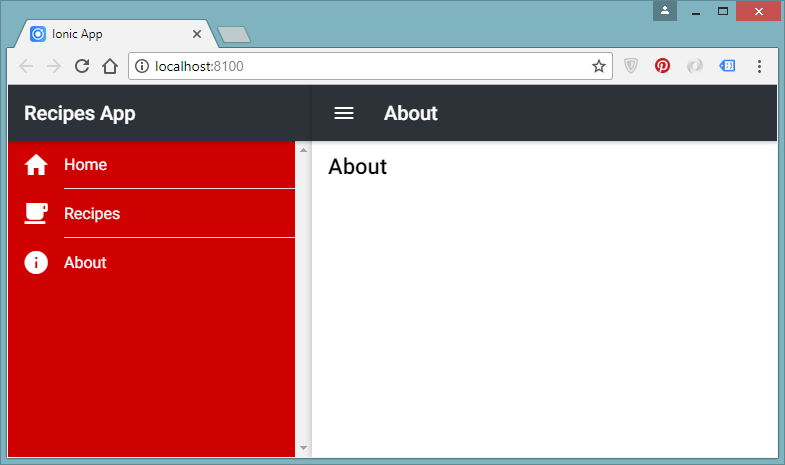
You can also define the newly generated page in pages array in app.components.ts file and you will be able to navigate to your new page from the app side bar.
app.components.ts
import { AboutPage } from '../pages/about/about';
…
this.pages = [
    { title: 'Home', icon:'md-home', component: HomePage },
    { title: 'Recipes', icon:'md-cafe',component: RecipesPage },
    { title: 'About', icon:'md-information-circle',component: AboutPage }
];
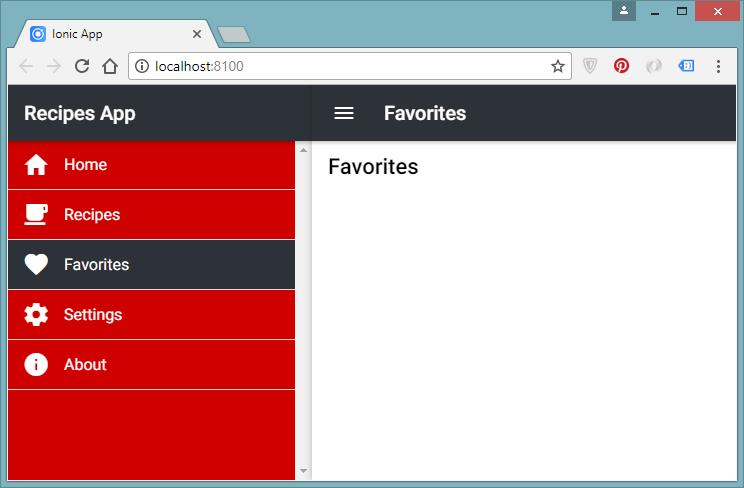
For the sake of this tutorial, you can generate Favorites and Settings pages in our food recipes app. Our app will look similar to following screenshot at this point.

You can find more about Ionic generate command at following URL:
https://ionicframework.com/docs/cli/generate
Highlight current page in sidebar
You may have noticed in the above screenshot that the currently opened page is not highlighted on the app sidebar. Selecting the current page on sidebar can give user some visual clue about the currently opened page. Let’s implement the solution of highlighting the currently opened page in side bar. Open the app.components.ts file and declare the following variable in MyApp class.
activePage: any;
Every time user clicks a page in sidebar, openPage function of MyApp class is called, which set the current page as the root page by calling the setRoot function. This is the best place for you to set the activePage variable value to currently selected page.
openPage(page) {
    // Reset the content nav to have just this page
    // we wouldn't want the back button to show in this scenario
    this.nav.setRoot(page.component);
    this.activePage = page;
}
Create a new function that will return true if the page passed as a parameter in this function is the same page as currently active page.
public checkActivePage(page): boolean{
    return page === this.activePage;
}
Call this new function from within app.html file as shown below. Basically, we are setting the active class on current side bar button if the checkActivePage return us true.
<button menuClose ion-item *ngFor="let p of pages" (click)="openPage(p)" [class.active]="checkActivePage(p)">
    <ion-icon name="{{p.icon}}" item-left></ion-icon>
    {{p.title}}
</button>
Once active class will be appended to currently clicked button, you just need to give it some styles as follows:
.my-sidemenu .content .list .item {
    background-color: transparent;
    color: #FFFFFF;
    border-bottom: 1px solid #dedede;
}
.my-sidemenu .content .list .item.active {
    background-color: #2D3238;
    color: #FFFFFF;
}
.my-sidemenu .content .list .item.active .item-inner {
    border:none;
}
.my-sidemenu .content .list .item .item-inner {
    margin-left: 8px;
    border:none;
}
In part 3 of this tutorial series, you have learned the basics of Ionic pages and how to generate Ionic pages using Ionic CLI command. You have also learned how to highlight the currently opened page in the side bar. In Part 4, we will create Recipes List page so continue reading this tutorial series by clicking Part 4 link below.
This tutorial is part of a serious of tutorials
- Part 1 – Setting up Ionic Development Environment and Creating Ionic Project using Ionic CLI
- Part 2 – Ionic App Themes and Styles and Customizing Ionic Themes and Colors
- Part 3 – Understanding Ionic Pages and Creating Ionic Pages using Ionic CLI
- Part 4 – Creating Food Recipes Page in Ionic
- Part 5 – Creating Food Recipe Detail Page in Ionic

