
This tutorial is part of a serious of tutorials
- Part 1 – Setting up Ionic Development Environment and Creating Ionic Project using Ionic CLI
- Part 2 – Ionic App Themes and Styles and Customizing Ionic Themes and Colors
- Part 3 – Understanding Ionic Pages and Creating Ionic Pages using Ionic CLI
- Part 4 – Creating Food Recipes Page in Ionic
- Part 5 – Creating Food Recipe Detail Page in Ionic
Few years ago, developers had to learn native languages such as Objective C for iOS, Java for Android and C# for Windows Phone to build mobile apps. Those days are gone now as we have mobile frameworks such as Ionic, Sencha Touch, JQuery Mobile, Kendo UI etc. which allow developers to build mobile apps using the web technologies such as HTML, CSS and JavaScript. These types of apps are called hybrid apps and they are hosted inside a native application or wrapper that utilizes a mobile platform’s WebView. This wrapper is responsible for loading HTML, CSS and JavaScript in a WebView when the mobile app is started. One of the most popular native wrappers is Apache Cordova which not only enables hybrid apps to access device capabilities such as accelerometer, camera, contacts and more but also allow you to have a single code base for multiple platforms.
This tutorial series will teach you how to build such hybrid mobile app using one of the most beautiful, free and open source front end mobile apps library called Ionic and a very popular web and mobile apps development framework made by Google called Angular.
Table of Contents
What is Ionic?
The Ionic platform is a popular application framework for building hybrid mobile applications using web technologies you’re already familiar with such as HTML, CSS and JavaScript. The Ionic platform allows developers to use HTML and TypeScript to create mobile applications that can be deployed on iOS, Android, and Windows Phone. You can compare Ionic framework with frameworks such as Bootstrap, Foundation or Materialize but unlike these frameworks Ionic targets mobile applications. Ionic provides similar functionality for AngularJS that iOS UIKit provides for Objective-C/Swift, and that Android UI elements provides for Java. Core mobile UI controls and functionalities are available to developers out of the box, which means that developers can focus on building apps, instead of common user interface elements.
What is Angular?
Angular (also known as AngularJS) is a powerful JavaScript based web development framework to create rich Single Page Applications (SPA). Applications built using Angular can live on the web, mobile, or the desktop. Ionic older version Ionic 2 was built on top of Angular 2 and both frameworks are completely rebuilt from scratch to offer better performance and many features to support each other when building large scare web apps.
Setting up Ionic Development Environment
Although you can develop mobile apps on any operation system of your choice but for this tutorial I am assuming that you are using Microsoft Windows operation system. To work with Ionic we need to install a few packages and tools such as NodeJS and NPM on our machine. Perhaps you already have these packages installed, so make sure your environment is set up properly and you have upgraded these packages to their latest versions.
Installing NodeJS and NPM
These days it seems that everything depends on Node (also known as NodeJS) to exist. Installing Ionic also requires Node and npm (Node package manager) installed on your machine. Node.js is an open-source, cross-platform JavaScript run-time environment for executing JavaScript code server-side. Node.js enables JavaScript to be used for server-side scripting, and runs scripts server-side to produce dynamic web page content before the page is sent to the user’s web browser. You can download and install NodeJS from following website.
NodeJS installer will also install NPM on your machine which is a package manager for managing NodeJS packages and modules. Please keep in mind that npm gets updated more frequently than Node does, so you’ll want to make sure it’s the latest version. Luckily npm knows how to upgrade itself. Run the following command in command window to upgrade npm.
npm install npm@latest -g
You can now verify the node and npm versions by running following the command in command window.
node -v
npm -v
Installing Ionic
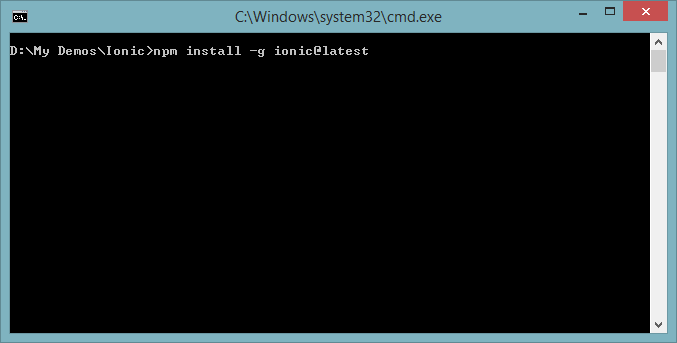
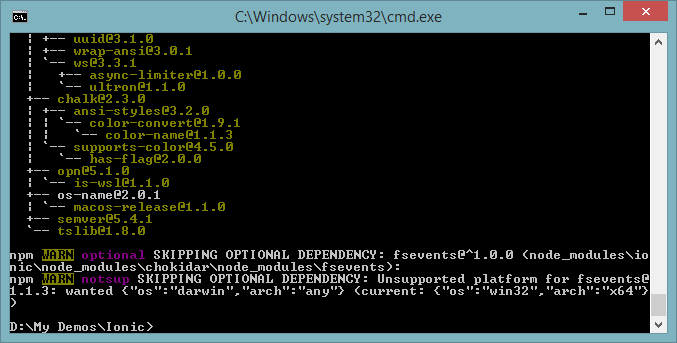
Ionic can be installed as a NodeJS package through the Node Package Manager (npm) directly from the command line. Run the following command in command window to install latest version of Ionic. The -g flag will install Ionic globally so we can access it from anywhere in our machines. It will also add Ionic tools such as Ionic CLI to our Windows operation system PATH so that we don’t need to set the PATH ourselves.
npm install -g ionic@latest
You can verify the Ionic installed version by running the following command in command window.
ionic --version
Ionic CLI
Ionic comes with tool called Ionic CLI which is a command line interface to perform a lot of Ionic magic. It can be used to create, build, test, and deploy Ionic apps onto any platform. The command line interface can be a little intimidating if you’re used to a GUI (Graphic User Interface) approach, but it’s really super simple once you get the hang of it and you can do some cool stuff with it and save lot of your development time when building Ionic apps.
Creating an Ionic Project
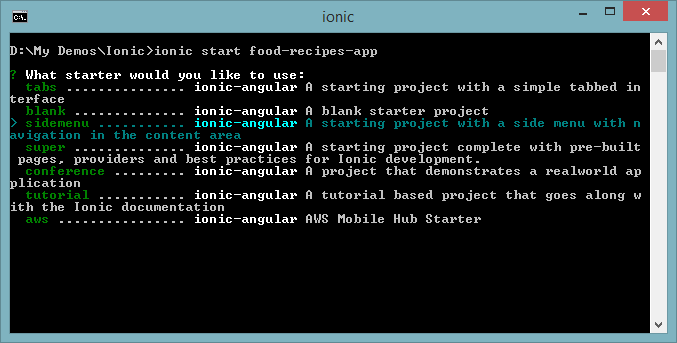
Create a new directory in your file system and navigate to the directory location in Command Window to create a new Ionic project. Type the following command to create a new Ionic Project with the name food-recipes-app and press Enter. You will be asked to choose one template from the list of ready-made app templates Ionic provides. For this tutorial you can choose sidemenu template.
ionic start food-recipes-app
Once Ionic project is created navigate to the newly created food-recipes-app folder using the following command
cd food-recipes-app
Running Ionic Project
We can serve and preview our newly created app in the browser using Ionic CLI serve command.
ionic serve
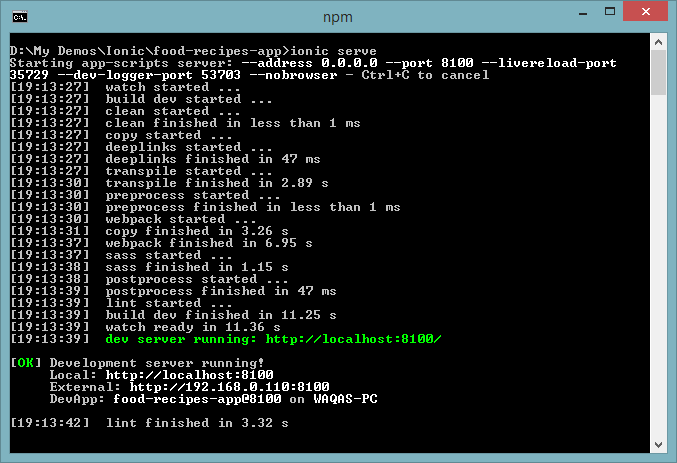
The command will open up a browser at http://localhost:8100. The browser screen is too large to preview a mobile app and for that reason, Ionic added — lab as an option to running the app in the browser so as to preview the app better as it would be seen in Android and iOS.
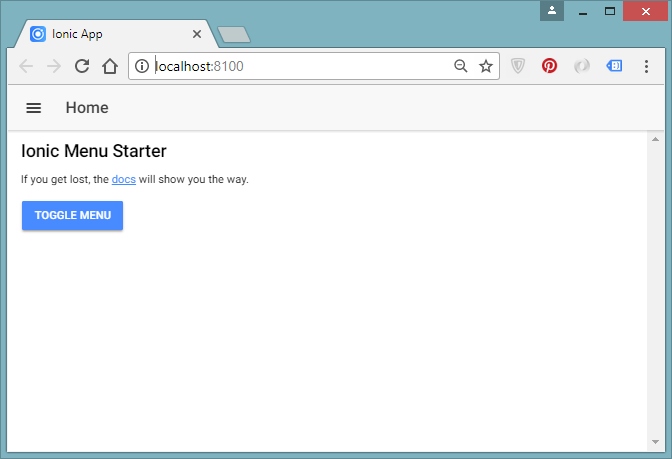
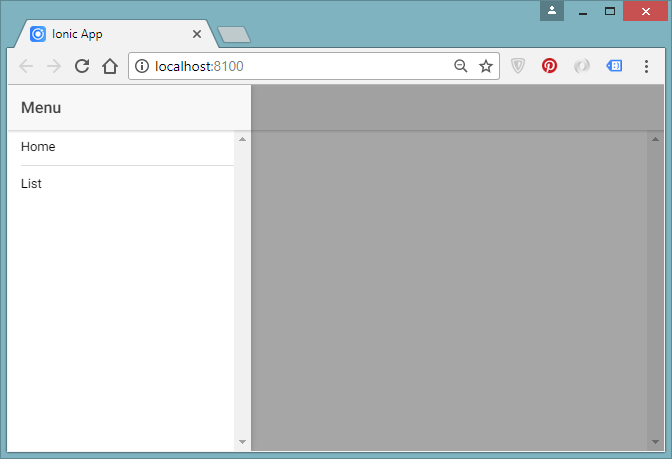
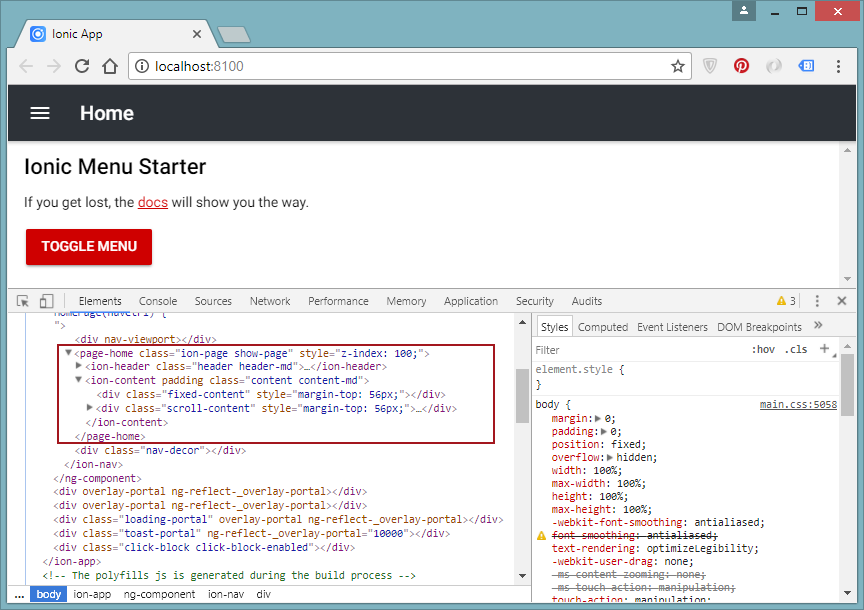
This command supports live-reload, so when you make changes to the code it will instantly update the browser. Testing the app in the desktop browser first will make your life so much easier since you can easily debug it. For example, you can use Chrome developer tools to debug and preview the HTML, CSS and JavaScript generated by your app.
You can find more information about different Ionic CLI commands at following URL:
https://ionicframework.com/docs/cli/commands.html
Visual Studio Code
Before we start editing Ionic project source code, we need a good source code editor which can simplify our code editing and also provide many plugins and extensions to speed up development process. My favorite code editor at this time is Visual Studio Code which not only make it easier to edit HTML, CSS and JavaScript files but it also has many extensions that make this really an awesome code editor. You can download Visual Studio Code from following location.
Off course, you can also use some other editor. Here are some popular options for you.
- WebStorm – Powerful IDE for modern JavaScript development
https://www.jetbrains.com/webstorm - Sublime Text – A sophisticated text editor for code, markup and prose
https://www.sublimetext.com - Atom – A modern, customizable text editor
https://atom.io - Brackets – A modern open source text editor
http://brackets.io
Ionic Project Structure
At first glance, the files inside Ionic project might look scary and overwhelming to you but keep in mind that you will be working on the files in src folder most of the time so initially you can ignore everything else.
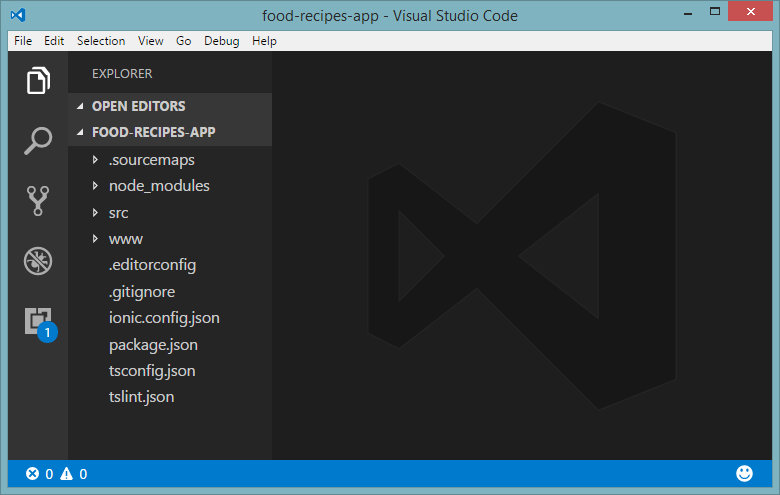
Let’s have a look at some of the important files and folders created in our project:
| File/Folder | Description |
|---|---|
| node_modules | Ionic projects use Node package manager (npm) to import modules. All imported modules are placed in this folder. |
| src | The src folder is the most important folder of your Ionic + Angular project. 99% of your work will happen in that folder. It’s the folder that contains all the code you’re going to write for the app i.e. the pages and services. |
| www | This folder contains the code that is auto generated by the build scripts out of your application code. Do not change any code inside this folder because the files in this folder will be deleted and regenerated every time your app will be rebuilt and previewed inside your browser. |
| ionic.config.json | This file contains configurations used by the Ionic CLI when executing different commands. This file also contains some basic information about your project and is used if you upload your app to the Ionic.io platform. |
| tsconfig.json | This file is related to TypeScript and contains configurations for the TypeScript compiler so that it can compile TypeScript files accordingly. |
| tslint.json | This file is also related to TypeScript and contains TSLint related options. TSLint is an extensible static analysis tool that checks TypeScript code for readability, maintainability, and functionality errors. |
| package.json | This file contains the list of all npm packages that are used in this project. |
In first part of this tutorial series, I have given you overview of Ionic and Angular. I have also explained how to setup development environment by installing NodeJS and Ionic CLI etc. I have also demostrated the process of creating and running a new Ionic project using Ionic CLI commands. We have also learned about role of different folders and files in Ionic project. In Part 2 of this tutorial series, you will learn about Styling Ionic apps using Themes and colors so continue reading this tutorial series by clicking the Part 2 below.
This tutorial is part of a serious of tutorials
- Part 1 – Setting up Ionic Development Environment and Creating Ionic Project using Ionic CLI
- Part 2 – Ionic App Themes and Styles and Customizing Ionic Themes and Colors
- Part 3 – Understanding Ionic Pages and Creating Ionic Pages using Ionic CLI
- Part 4 – Creating Food Recipes Page in Ionic
- Part 5 – Creating Food Recipe Detail Page in Ionic


Excelent! thank you!
amzing tutorial,
i’m from indonesia and i follow this tutorial to make a song lyric.
but my problem was in the array of typescript, it can’t to multiline string for display a lyric, how can i fix this?