
We all love cookies but today I am not going to talk about the cookies we eat. I am going to talk about the cookies which help us in securing ASP.NET Core web applications. The cookie is a small piece of data sent by the web server to the client’s computer. It helps the web application to authenticate the user on subsequent visits to the same web application. ASP.NET Core supports cookies-based authentication out of the box and we don’t need to install any additional libraries or NuGet packages. In this post, I will show you how to set up ASP.NET Core authentication middleware and configure cookies-based authentication to secure ASP.NET Core web applications.
Table of Contents
What is Authentication?
Authentication is the process that confirms a user’s identity and provides access to sensitive information. Most of the time, authentication is done through a username and password but there are other types as well e.g. biometric, face recognition, etc. During authentication, the application validates user-provided credentials against some database or service and allows the user access to the application.
What is Authorization?
Authorization determines what actions an authenticated user can perform within the application. Most of the time, authorization is done by assigning users some roles and permissions to perform certain actions. If we don’t have authorization in place, then every authenticated user can access all features and data (including sensitive data) of the application.
The following diagram demonstrates the easiest way to understand the relationship between authentication and authorization.

Setting Up ASP.NET Core Application
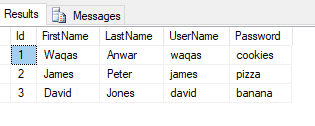
Let’s create a new ASP.NET Core MVC web application in Visual Studio 2019. To authenticate users from the database, I created a simple Users table in SQL Server 2016 database. I also added some users with their username and password. For simplicity, I am storing the plain passwords in the database which you should never do in a real-world application.
Download and Install the following NuGet packages in the project.
- Microsoft.EntityFrameworkCore.SqlServer
- Microsoft.EntityFrameworkCore.Design
- Microsoft.EntityFrameworkCore.Tools
We are using an existing SQL Server database that’s why we want to use EF Core (database first) approach to reverse engineer the entity models and DbContext. Open the Package Manager Console of the project and copy/paste the following command and press Enter. The following command will generate entity classes in the Models folder and ApplicationDbContext class in the Data folder.
Scaffold-DbContext -Connection "Server=DB_SERVER; Database=Test; Trusted_Connection=True; MultipleActiveResultSets=true;" -Provider Microsoft.EntityFrameworkCore.SqlServer -OutputDir "Models" -ContextDir "Data" -Context "ApplicationDbContext" –NoOnConfiguring
Specify the connection string in the appsettings.json file as follows
{
  "ConnectionStrings": {
    "DefaultConnection": "Server=DB_SERVER; Database=DB_NAME; Trusted_Connection=True; MultipleActiveResultSets=true"
  },
  "Logging": {
    "LogLevel": {
      "Default": "Information",
      "Microsoft": "Warning",
      "Microsoft.Hosting.Lifetime": "Information"
    }
  },
  "AllowedHosts": "*"
}
Finally, Entity Framework provider can be configured in ConfigureServices method of Startup.cs file as shown below:
services.AddDbContext<ApplicationDbContext>(options =>
   options.UseSqlServer(Configuration.GetConnectionString("DefaultConnection")));
If you want to learn more about Entity Framework Core or Scaffold-DbContext command, you can read my post Data Access in ASP.NET Core using EF Core (Database First) that explains the topic in a lot more detail.
To authenticate users from a back-end SQL Server database, we need to implement a service class with a method that can validate users so let’s create a Services folder in the project and create the following IAuthService interface. The interface has a single method ValidateUser in it.
IAuthService.cs
public interface IAuthService
{
    Task<bool> ValidateUser(string username, string password);
}
Create an AuthService class in the Services folder and implement the IAuthService interface. We are injecting the ApplicationDbContext in the constructor of the AuthService class and ValidateUser is simply validating the user from the database using the username and password.
AuthService.cs
public class AuthService : IAuthService
{
    private readonly ApplicationDbContext _context;

    public AuthService(ApplicationDbContext context)
    {
        _context = context;
    }

    public async Task<bool> ValidateUser(string username, string password)
    {
        var dbUser = await _context.Users
            .FirstOrDefaultAsync(x => x.UserName == username && x.Password == password);

        return dbUser == null;
    }
}
Creating a Secure Admin Page
To implement and test authentication, we need to have a secure page in the project so let’s create the following AdminController in the Controllers folder and add an [Authorize] attribute on top of the Index action method.
AdminController.cs
public class AdminController : Controller
{
    [Authorize]
    public IActionResult Index()
    {
        return View();
    }
}
Let’s add the Index.cshtml view and add the following HTML snippet in it so that we can see some contents on the secured admin page.
Index.cshtml
@{
    ViewData["Title"] = "Index";
}

<h1>Admin Area</h1>
Let’s also add a link to the secured admin page on the top navigation bar by adding a new line item in the Layout.cshtml file.
Layout.cshtml
<ul class="navbar-nav flex-grow-1">
    <li class="nav-item">
        <a class="nav-link text-dark" asp-area="" asp-controller="Home" asp-action="Index">Home</a>
    </li>
    <li class="nav-item">
        <a class="nav-link text-dark" asp-area="" asp-controller="Home" asp-action="Privacy">Privacy</a>
    </li>
    <li class="nav-item float-right">
        <a class="nav-link text-dark" asp-area="" asp-controller="Admin" asp-action="Index">Admin Area</a>
    </li>
</ul>
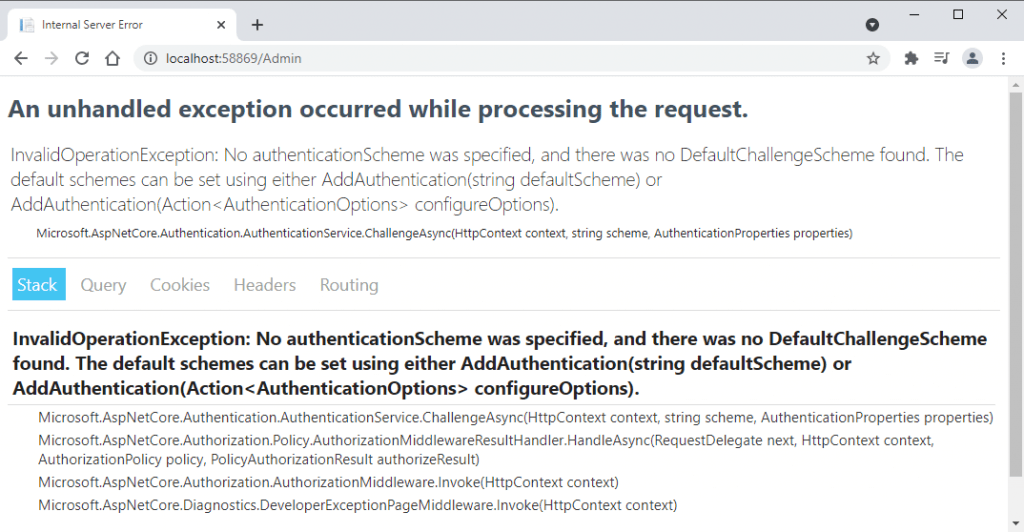
Run the project and try to access the secured admin page and you will see the following exception. This is because we haven’t configured any authentication service yet.
Setup Cookies Authentication in ASP.NET Core
To set up cookies authentication in ASP.NET Core, we need to perform the following actions in the Startup.cs file
- We need to register the services needed for authentication by adding an authentication middleware using the AddAuthentication extension method.
- We need to specify the Cookies authentication scheme using the AddCookies method.
- We need to call the UseAuthentication extension method to enable authentication using the authentication scheme we registered.
In the code snippet below, we are using both AddAuthentication and AddCookies methods and we are also specifying the authentication system that we want to use cookies authentication as a default scheme.
Startup.cs
public void ConfigureServices(IServiceCollection services)
{
    services.AddControllersWithViews();

    services.AddDbContext<ApplicationDbContext>(options =>
        options.UseSqlServer(Configuration.GetConnectionString("DefaultConnection")));

    services.AddAuthentication(CookieAuthenticationDefaults.AuthenticationScheme)
        .AddCookie();
}
Call the following UseAuthentication method in the Configure method of Startup.cs file.
public void Configure(IApplicationBuilder app, IWebHostEnvironment env)
{
    app.UseStaticFiles();
    app.UseRouting();

    app.UseAuthentication();

    app.UseAuthorization();
    app.UseEndpoints(endpoints =>
    {
        endpoints.MapControllerRoute(
            name: "default",
            pattern: "{controller=Home}/{action=Index}/{id?}");
    });
}
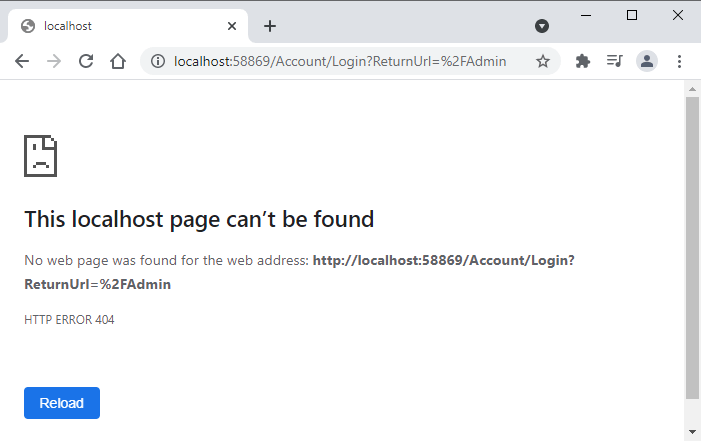
Run the project and once again and try to access the admin page and you will notice that this time the application is trying to access the Login page which is not available in our project yet.
Implementing Login Feature
Before we implement the login page in our application, it is important to note that we can configure the login page path we want the authentication system to use when users try to access a secure page. This can be done by using the CookiesAuthenticationOptions object as shown in the following code snippet.
Startup.cs
services.AddAuthentication(CookieAuthenticationDefaults.AuthenticationScheme)
    .AddCookie(options =>
    {
        options.LoginPath = "/login";
    });
Add a new controller AccountController in the Controllers folder and add the following Login action method to it. Note how I specify the same route login with the help of the HttpGet attribute. I am also saving the returnUrl in the ViewData dictionary and we will send this returnUrl with the login form to redirect the user to this URL after successful login.
AccountController.cs
[HttpGet("login")]
public IActionResult Login(string returnUrl)
{
    ViewData["ReturnUrl"] = returnUrl;

    return View();
}
Add the login page view in the project and put the following code in the Login.cshtml file. Notice how I have saved and encode the ReturnUrl and then send it back to the login post method.
Login.cshtml
@{
    ViewData["Title"] = "Login";

    var returnUrl = ViewData["ReturnUrl"] as string;
    returnUrl = System.Net.WebUtility.UrlEncode(returnUrl);
}

<h1>Login</h1>

<div class="row mt-3">
    <div class="col-4">
        <form action="/login?ReturnUrl=@returnUrl" method="post">
            <div class="form-group">
                <label for="username">User Name</label>
                <input type="text" class="form-control" name="username" placeholder="Enter username">
            </div>
            <div class="form-group">
                <label for="password">Password</label>
                <input type="password" class="form-control" name="password" placeholder="Enter password">
            </div>
            <button type="submit" class="btn btn-primary">Login</button>
        </form>
    </div>
</div>
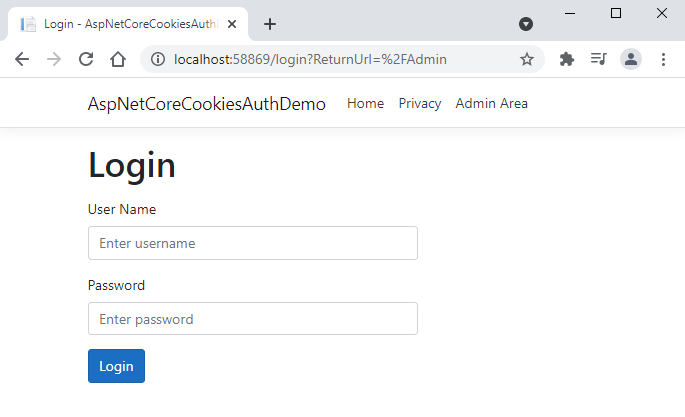
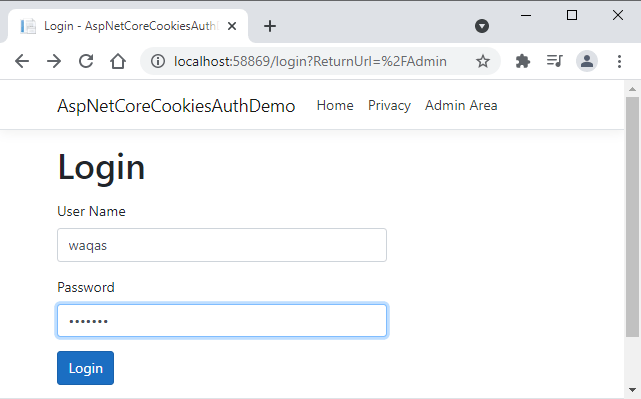
Run the project and as soon as you will try to access Admin Area you will see the login page similar to the following.
Next, we need to add a new Login method that will handle the login page POST request. This method needs to validate the username and password from the backend database using the IAuthService we implemented above and for this purpose, we need to inject IAuthService in the constructor of the AccountController. Following is the complete AccountController code with the new Login action method.
AccountController.cs
public class AccountController : Controller
{
    private readonly IAuthService _authService;

    public AccountController(IAuthService authService)
    {
        _authService = authService;
    }

    [HttpGet("login")]
    public IActionResult Login(string returnUrl)
    {
        ViewData["ReturnUrl"] = returnUrl;

        return View();
    }

    [HttpPost("login")]
    public async Task<IActionResult> Login(string username, string password, string returnUrl)
    {
        var dbUser = await _authService.ValidateUser(username, password);

        if (dbUser != null)
        {
            // Create Claims
            var claims = new List<Claim>();
            claims.Add(new Claim(ClaimTypes.NameIdentifier, username));
            claims.Add(new Claim(ClaimTypes.Name, dbUser.FirstName + " " + dbUser.LastName));
            claims.Add(new Claim("username", dbUser.UserName));

            // Create Identity
            var claimsIdentity = new ClaimsIdentity(claims,
                CookieAuthenticationDefaults.AuthenticationScheme);

            // Create Principal
            var claimsPrincipal = new ClaimsPrincipal(claimsIdentity);

            // Sign In
            await HttpContext.SignInAsync(claimsPrincipal);

            // Redirect
            if (!string.IsNullOrEmpty(returnUrl))
                return Redirect(returnUrl);
            else
                return RedirectToAction("Index", "Admin");
        }

        return View("login");
    }
}
In the above code, we validated user credentials using the ValidateUser method. If the user is validated, we will get the User object and we can use the user information e.g. FirstName, LastName, etc.
var dbUser = await _authService.ValidateUser(username, password);
Next, we are creating claims for authenticated user. The claims are key/value properties which describe user. The examples can be user name, email, IP, date of birth etc. We can create claims using some built-in claim types as a key or we can also specify our own key.
var claims = new List<Claim>();
claims.Add(new Claim(ClaimTypes.NameIdentifier, username));
claims.Add(new Claim(ClaimTypes.Name, dbUser.FirstName + " " + dbUser.LastName));
claims.Add(new Claim("username", dbUser.UserName));
Next, we created a ClaimsIdentity object which is an identity of the user with claims attached to it and the default authentication scheme the identity is bound to.
var claimsIdentity = new ClaimsIdentity(claims,
    CookieAuthenticationDefaults.AuthenticationScheme);
Next, we created a ClaimsPrincipal object and passed the ClaimsIdentity to the constructor.
var claimsPrincipal = new ClaimsPrincipal(claimsIdentity);
Finally, we called the SignInAsync method that will perform all the authentication work for us. It will sign in the principal with the current authentication scheme configured in Startup.cs file. The claims and data we passed in using principal will be encrypted, a cookie will be created and we will see this cookie saved on the client machine shortly.
await HttpContext.SignInAsync(claimsPrincipal);
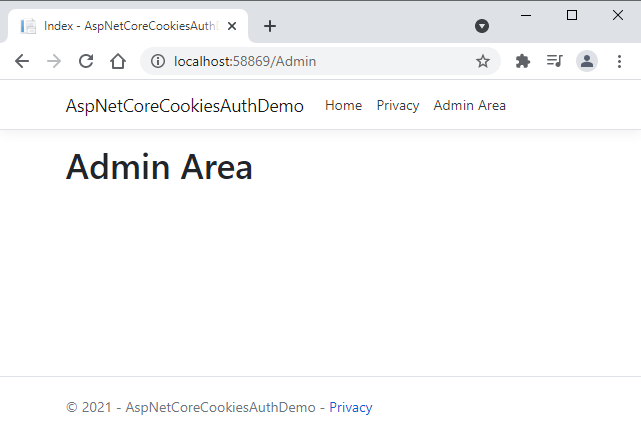
Run the application and this time try to log in with the correct username and password.
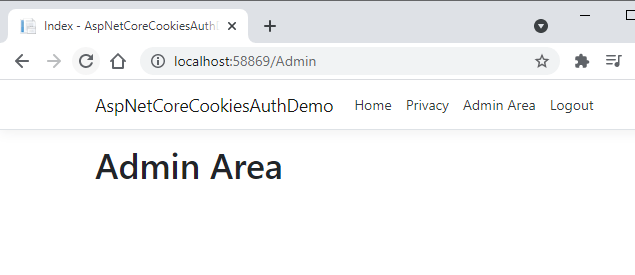
You will be redirected to the secure admin page after login.
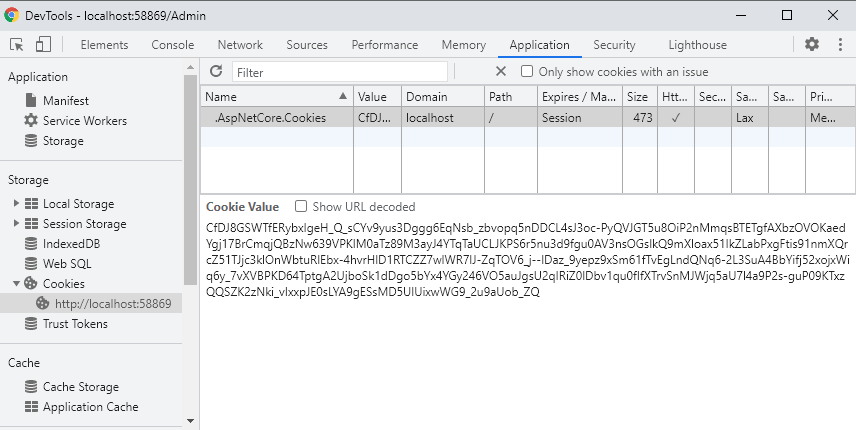
You can open the browser’s developer tools and check the encrypted contents saved with the authentication cookie as shown below.
Handling Invalid Login Attempts
In our example demo application, we are assuming that the user will also put the correct username and password for login. This is not something we can assume in a real-world application. Users will enter incorrect credentials and we should display a suitable error message to the user.
To achieve this, first you need to save the error message inside the TempData dictionary as shown below.
AccountController.cs
[HttpPost("login")]
public async Task<IActionResult> Login(string username, string password, string returnUrl)
{
    var dbUser = await _authService.ValidateUser(username, password);

    if (dbUser != null)
    {
        // Create Claims
        var claims = new List<Claim>();
        claims.Add(new Claim(ClaimTypes.NameIdentifier, username));
        claims.Add(new Claim(ClaimTypes.Name, dbUser.FirstName + " " + dbUser.LastName));
        claims.Add(new Claim("username", dbUser.UserName));

        // Create Identity
        var claimsIdentity = new ClaimsIdentity(claims,
            CookieAuthenticationDefaults.AuthenticationScheme);

        // Create Principal
        var claimsPrincipal = new ClaimsPrincipal(claimsIdentity);

        // Sign In
        await HttpContext.SignInAsync(claimsPrincipal);

        // Redirect
        if (!string.IsNullOrEmpty(returnUrl))
            return Redirect(returnUrl);
        else
            return RedirectToAction("Index", "Admin");
    }

    TempData["ErrorMessage"] = "Invalid username or password.";
    return View("login");
}
Next, you need to access the error message inside the Login.cshtml page and if the error message is not null or empty, you simply need to display an error anywhere on the page.
Login.cshtml
@{
    ViewData["Title"] = "Login";

    var returnUrl = ViewData["ReturnUrl"] as string;
    returnUrl = System.Net.WebUtility.UrlEncode(returnUrl);

    var error = TempData["ErrorMessage"] as string;
}

<h1>Login</h1>

@if (!string.IsNullOrEmpty(error))
{
    <h5 class="alert-danger pt-2  pb-2 m-2">@error</h5>
}

<div class="row mt-3">
    <div class="col-8">
        <form action="/login?ReturnUrl=@returnUrl" method="post">
            <div class="form-group">
                <label for="username">User Name</label>
                <input type="text" class="form-control" name="username" placeholder="Enter username">
            </div>
            <div class="form-group">
                <label for="password">Password</label>
                <input type="password" class="form-control" name="password" placeholder="Enter password">
            </div>
            <button type="submit" class="btn btn-primary">Login</button>
        </form>
    </div>
</div>
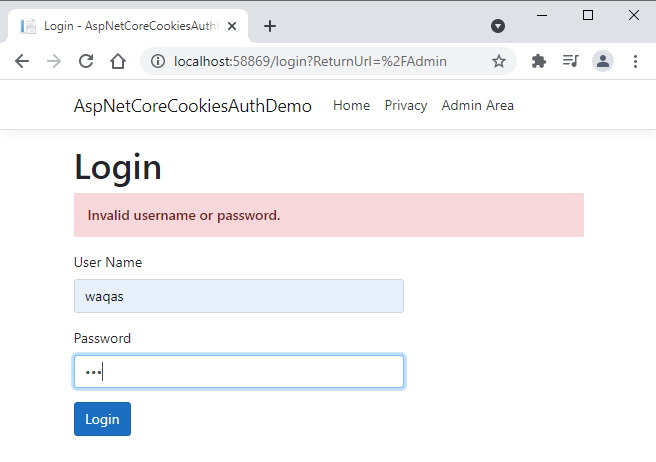
Run this application and this time add some invalid credentials and you will see the error message appearing on top of the page.
Implementing Logout Feature
Once the user is logged in, we also want the user to log out. To add this feature, first, add a Logout link on the top navigation bar, and to make sure this Logout link is only visible when the user is logged in, we can use User.Identity.IsAuthenticated property as shown in the code snippet below.
Layout.cshtml
<ul class="navbar-nav flex-grow-1">
    <li class="nav-item">
        <a class="nav-link text-dark" asp-area="" asp-controller="Home" asp-action="Index">Home</a>
    </li>
    <li class="nav-item">
        <a class="nav-link text-dark" asp-area="" asp-controller="Home" asp-action="Privacy">Privacy</a>
    </li>
    <li class="nav-item float-right">
        <a class="nav-link text-dark" asp-area="" asp-controller="Admin" asp-action="Index">Admin Area</a>
    </li>
    @if (User.Identity.IsAuthenticated)
    {
        <li class="nav-item float-right">
            <a class="nav-link text-dark" asp-area="" asp-controller="Account" asp-action="Logout">Logout</a>
        </li>
    }
</ul>
Next, add a new action method Logout in the AccountController.cs file and decorate the action method with the [Authorize] attribute because we only want this action to run if the user is already logged in and authorize. To implement logout functionality, we simply need to call the SignOutAsync method. This method will automatically remove the cookie from the client machine once the user will logout.
AccountController.cs
[Authorize]
public async Task<IActionResult> Logout()
{
    await HttpContext.SignOutAsync();

    return Redirect("/");
}
Run the application and after successful login, try to click the Logout link to see if it works.
Implementing Roles Based Authorization
So far we are using the [Authorize] attribute which checks if the user is logged in or not. If you want specific pages to be accessible only by users in specific roles, then you can specify the roles directly within the [Authorize] attribute. The code snippet below shows how we can make sure that our Admin Page is only accessible to the users in the Admin role.
AdminController.cs
public class AdminController : Controller
{
    [Authorize(Roles = "Admin")]
    public IActionResult Index()
    {
        return View();
    }
}
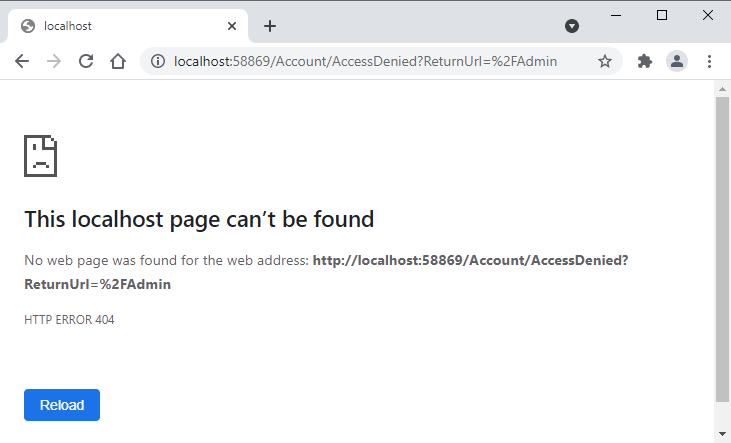
We haven’t given any role to our logged-in users yet so if you will try to access the admin page after login, you will see the following error which clearly shows that the application is trying to navigate the user to an AccessDenied page.
You can also specify which page or route to use as an access denied page using the AccessDeniedPath property available in the CookiesAuthenticationOptions object.
Startup.cs
services.AddAuthentication(CookieAuthenticationDefaults.AuthenticationScheme)
    .AddCookie(options =>
    {
        options.LoginPath = "/login";
        options.AccessDeniedPath = "/denied";
    });
To display custom access denied page, simply add a new action AccessDenied in AccountController.
AccountController.cs
[HttpGet("denied")]
public IActionResult AccessDenied()
{
    return View();
}
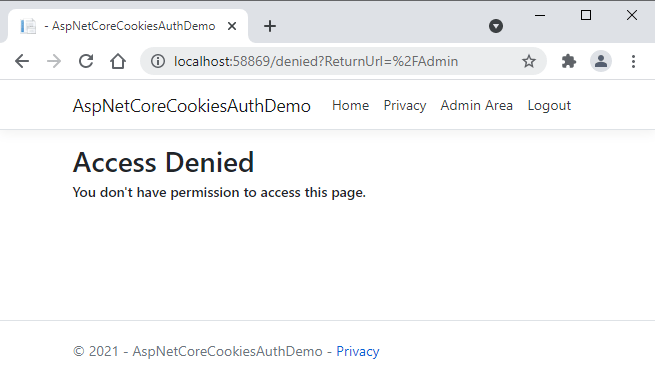
Add some basic contents to our custom access denied page.
AccessDenied.cshtml
<h2>Access Denied</h2>

<h6>You don't have permission to access this page.</h6>
Run the application once again and this time you should see your custom access denied page.
In a real-world application, we normally save user roles in the database and attach roles with logged-in users after they are logged in. For simplicity, let’s attach a hard-coded role Admin with the user waqas. This can be done by adding a new claim at the place where we created other claims. The following example shows how to attach the Admin role with user waqas by adding a new claim.
AccountController.cs
var claims = new List<Claim>();
claims.Add(new Claim(ClaimTypes.NameIdentifier, username));
claims.Add(new Claim(ClaimTypes.Name, dbUser.FirstName + " " + dbUser.LastName));
claims.Add(new Claim("username", dbUser.UserName));

if (dbUser.UserName == "waqas")
{
    claims.Add(new Claim(ClaimTypes.Role, "Admin"));
}
Run the application once again and try to log in with two different users. The user waqas will be able to access the Admin page without any problem and all other users will be redirected to our custom access denied page.
Summary
Implementing cookies-based authentication in ASP.NET Core 5 is a seamless task. We just need to invoke authentication middleware, specify some cookies authentication-related options, and set identity claims as per our requirement. I hope you have found this post useful. If you have any comments or suggestions, please leave your comments below. Don’t forget to share this tutorial with your friends or community. You can also download the complete source code of this post using the Download Source Code button shown above at the start of this post.


what if i want to display the role name of the logged in user,, given i have user table and roles table, mapped with a mapping table