
It is the dream of every website owner to reach a wider audience. To make this dream come true, we usually build web applications that support multiple languages and deliver localize content according to user region and culture. ASP.NET Core has rich support of globalization and localization and it has many built-in features that can help developers to build multilingual web applications with ease. In this tutorial, I will give you a walk-through of some of the common features you can use to deliver localized content according to user preference.
Table of Contents
Configuring Localization in ASP.NET Core
Most of the cross-cutting features in ASP.NET Core are configured using middleware and to configure localization we need to configure the RequestLocalizationMiddleware middleware. This middleware enables the automatic setting of the culture for HTTP requests based on the information sent by the client.
Let’s open Visual Studio 2019 and create a new ASP.NET Core MVC Web Application with the name AspNetCoreLocalizationDemo. To configure localization middleware, open the Startup.cs file and call the following AddLocalization method. The AddLocalization method adds the localization services to the services container. The ResourcePath property specifies the relative path under application root where the resource files are located.
services.AddLocalization(options =>
{
    options.ResourcesPath = "Resources";
});
We can also call AddViewLocalization method that adds support for localized view files which we will use later in this tutorial.
services.AddControllersWithViews()
    .AddViewLocalization();
Please note that ASP.NET Core also has an AddDataAnnotationsLocalization method that adds support for localized DataAnnotations.
Next, we need to define which cultures we want to support in our application and which one of those will be used as a default culture. For this tutorial, I want to support French, German, and English languages so let’s configure these three cultures as shown below:
services.Configure<RequestLocalizationOptions>(options =>
{
    options.DefaultRequestCulture = new RequestCulture("en-US");

    var cultures = new CultureInfo[]
    {
        new CultureInfo("en-US"),
        new CultureInfo("de-DE"),
        new CultureInfo("fr-FR")
    };

    options.SupportedCultures = cultures;
    options.SupportedUICultures = cultures;
});
Following is the complete code of the ConfigureServices method.
public void ConfigureServices(IServiceCollection services)
{
    services.AddLocalization(options =>
    {
        options.ResourcesPath = "Resources";
    });

    services.AddControllersWithViews()
        .AddViewLocalization();

    services.Configure<RequestLocalizationOptions>(options =>
    {
        options.DefaultRequestCulture = new RequestCulture("en-US");

        var cultures = new CultureInfo[]
        {
            new CultureInfo("en-US"),
            new CultureInfo("de-DE"),
            new CultureInfo("fr-FR")
        };

        options.SupportedCultures = cultures;
        options.SupportedUICultures = cultures;
    });
}
The final configuration step is to enable the localization middleware using the UseRequestLocalization method.
app.UseRequestLocalization();
The UseRequestLocalization method initializes the RequestLocalizationOptions object we configured above. The RequestLocalizationOptions has a concept of RequestCultureProvider which determines the culture information in each request. The default providers configured by the RequestLocalizationOptions class are QueryStringRequestCultureProvider, CookieRequestCultureProvider and AcceptLanguageHeaderRequestCultureProvider and we will cover these providers in more detail later in this tutorial. When requests come to the server, the list of RequestCultureProvider is enumerated and the first provider that can successfully determine the request culture is used. If none of the providers can determine the request culture, then the DefaultRequestCulture property setting will be used.
options.DefaultRequestCulture = new RequestCulture("en-US");
We have now configured the basic localization settings in our application. The next step is to decide the naming conventions and the location of the resource files.
Resource Files Naming Conventions and Location
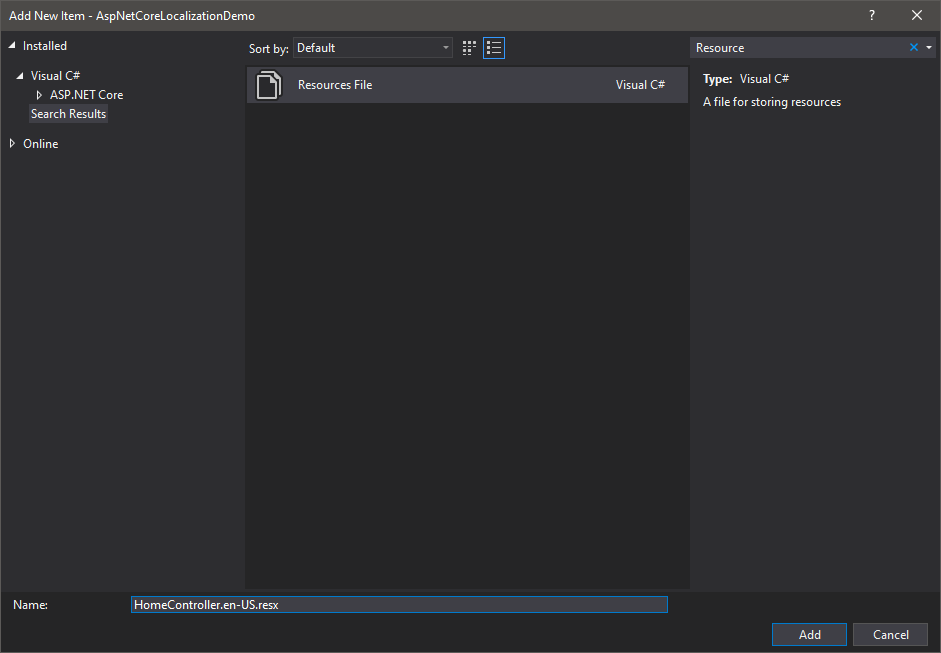
A resource (.resx) file allows us to separate the localizable resources e.g. strings, icons, images, etc. from the source code. To create resource files for different languages and cultures, we usually put the culture information in the file name. For example, if you are creating a resource file to store English language resources then the file name will be MyResourceFile.en.resx. If you want to create a separate resource file for US English, then the file name will be MyResourceFile.en-US.resx. To create a new resource file in Visual Studio, you can right-click on the folder where you want to create the resource file and choose Add > New Item option.
When ASP.NET Core localization try to discover the resource files in the project, they use the full type name of the class. For example, if we are creating French language resources for the HomeController of our application named AspNetCoreLocalizationDemo, then the resource file name would be following:
AspNetCoreLocalizationDemo.Controllers.HomeController.fr-FR.resx
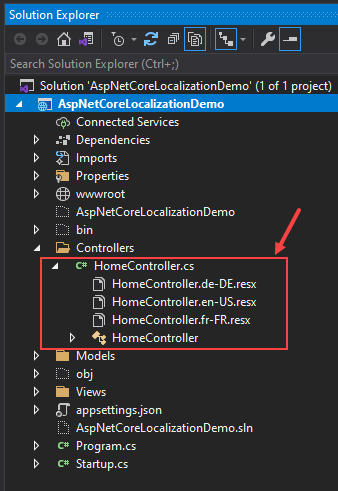
Another approach is to name the resource file as HomeController.fr-FR.resx and save it next to the HomeController class. The following screenshot is showing the English, French, and German resource files created next to HomeController class.
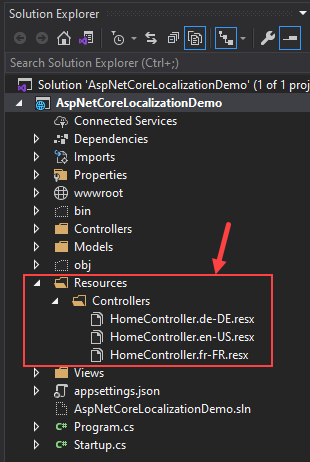
Please keep in mind that we have configured the ResourcesPath property in the ConfigureServices method of the Startup.cs file as follows:
options.ResourcesPath = "Resources";
It means that we can now create the Resources folder in the project root folder and create all resource files in this folder. We can also use nested folders with the same naming conventions to organize the resource files. For example, we can create a Controllers folder inside the Resources folder and move all three resource files related to HomeController inside the Controllers folder.
The choice of using the dot naming convention or mimicking the file path depends on how you want to organize your resource files. If you want to use the dot naming convention, then you will name your file as Resources/Controllers.HomeController.en-US.resx whereas if you are mimicking the path then your resource file will be located at Resources/Controllers/HomeController.en-US.resx.
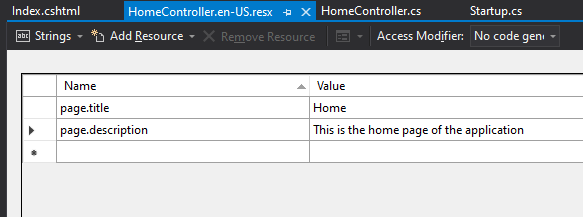
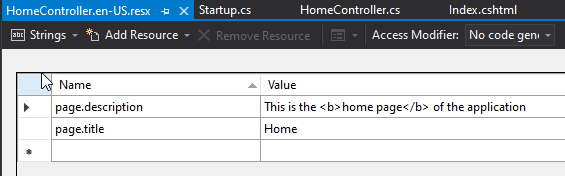
Let’s open all three resource files and add some string resources to them. The following screenshot shows the two English language string resources added in HomeController.en-US.resx resource file.
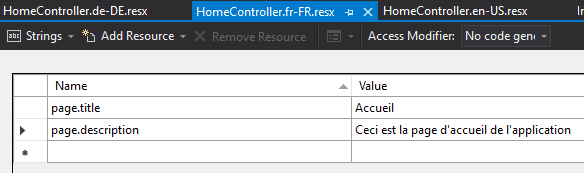
The following screenshot shows the two French language string resources added in HomeController.fr-FR.resx resource file.
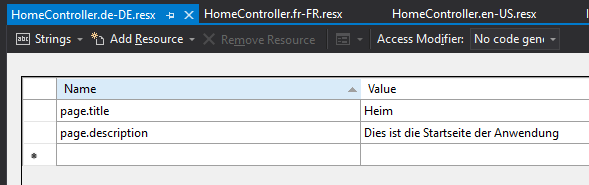
The following screenshot shows the two English language string resources added in HomeController.de-DE.resx resource file.
Introducing .NET Core Localizer Services
To improve developer’s productivity, .NET Core introduces the concept of localized services. These services can be injected using the dependency injection and can provide you access to the resources saved in resource files. The three localizer services are:
- IStringLocalizer or IStringLocalizer<T>
- IHtmlLocalizer or IHtmlLocalizer<T>
- IViewLocalizer
Using IStringLocalizer Service
IStringLocalizer represents a service that provides localized strings. Let’s inject the IStringLocalizer<T> in the HomeController of the application as shown in the code snippet below.
HomeController.cs
public class HomeController : Controller
{
    private readonly IStringLocalizer<HomeController> _stringLocalizer;

    public HomeController(IStringLocalizer<HomeController> stringLocalizer)
    {
        _stringLocalizer = stringLocalizer;
    }

    public IActionResult Index()
    {
        ViewData["PageTitle"] = _stringLocalizer["page.title"].Value;
        ViewData["PageDesc"] = _stringLocalizer["page.description"].Value;

        return View();
    }
}
Once the localizer is available, you can use its indexer to fetch the localized strings from the resource file matching with the current culture. In the above example, we are fetching localized strings using their keys page.title and page.description and saving them in ViewData object. We can then access this ViewData object in our razor view and display the localized strings as shown below.
Index.cshtml
<div class="text-center">
    <h1 class="display-4">
        @ViewData["PageTitle"]
    </h1>
    <p>
        @ViewData["PageDesc"]
    </p>
</div>
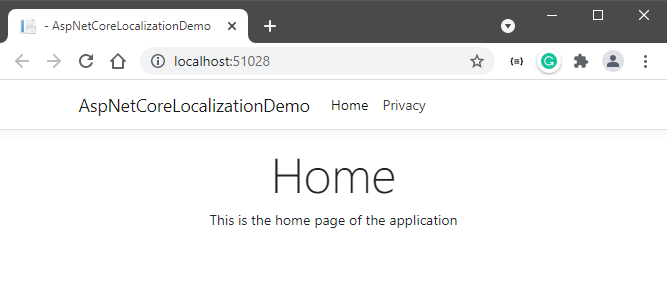
If you will run the application, you will see the English language localized strings rendered on the page.
You can avoid passing the strings from Controllers to Views using the ViewData object and reduce some of the code shown above by injecting the IStringLocalizer<T> directly in your razor views as shown in the following code snippet.
Index.cshtml
@using AspNetCoreLocalizationDemo.Controllers
@using Microsoft.Extensions.Localization

@inject IStringLocalizer<HomeController> Localizer

<div class="text-center">
    <h1 class="display-4">
        @Localizer["page.title"]
    </h1>
    <p>
        @Localizer["page.description"]
    </p>
</div>
Using IHtmlLocalizer Service
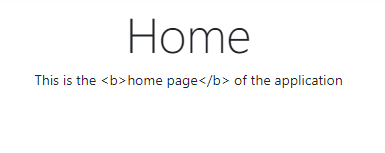
Let’s add some HTML content in your string by introducing the HTML bold tag as shown in the screenshot below.
If will run the application now, you will see that the browse is not showing the formatted string. This is because the IStringLocalizer is not capable of encoding the HTML available in the strings. You need to use IHtmlLocalizer that will HTML encode the HTML characters in the resource string, but doesn’t HTML encode the resource string itself.
IHtmlLocalizer can be injected and used similarly as we use IStringLocalizer. Following is the example usage of IHtmlLocalizer in the razor view.
Index.cshtml
@using AspNetCoreLocalizationDemo.Controllers
@using Microsoft.AspNetCore.Mvc.Localization
@using Microsoft.Extensions.Localization

@inject IStringLocalizer<HomeController> Localizer
@inject IHtmlLocalizer<HomeController> HtmlLocalizer

<div class="text-center">
    <h1 class="display-4">
        @Localizer["page.title"]
    </h1>
    <p>
        @HtmlLocalizer["page.description"]
    </p>
</div>
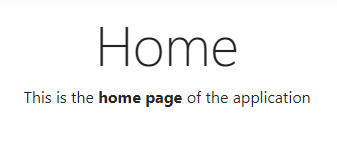
Run the application once again and this time you should see the word home page in bold format.
Using IViewLocalizer Service
The IViewLocalizer service provides localized strings for a view. When we are using the IViewLocalizer service, the resource file naming convention and the location become even more critical. This is because the default implementation of IViewLocalizer tries to find the resource file based on the view file name. This also means that you can’t use the global shared resource files with IViewLocalizer.
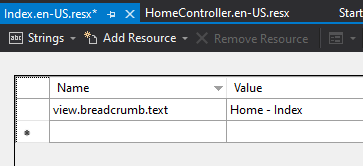
Our view file name is Index.razor so let’s create a resource file with the name Index.en-US.resx at Resources\Views\Home folder as shown in the following screenshot.

For demonstration purposes, let’s add a different string in the Index.en-US.resx file.
To use IViewLocalizer, inject it in the Index.cshtml file as shown in the code snippet below.
Index.cshtml
@using AspNetCoreLocalizationDemo.Controllers
@using Microsoft.AspNetCore.Mvc.Localization
@using Microsoft.Extensions.Localization

@inject IStringLocalizer<HomeController> Localizer
@inject IHtmlLocalizer<HomeController> HtmlLocalizer
@inject IViewLocalizer ViewLocalizer

<div class="text-center">
    <h1 class="display-4">
        @Localizer["page.title"]
    </h1>
    <p>
        @HtmlLocalizer["page.description"]
    </p>
    <p>
        @ViewLocalizer["view.breadcrumb.text"]
    </p>
</div>
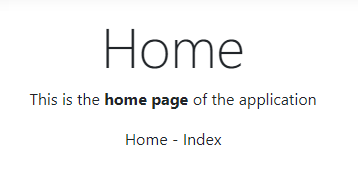
Run the application once again and this time you should see the words Home – Index rendered on the page using the IViewLocalizer service.
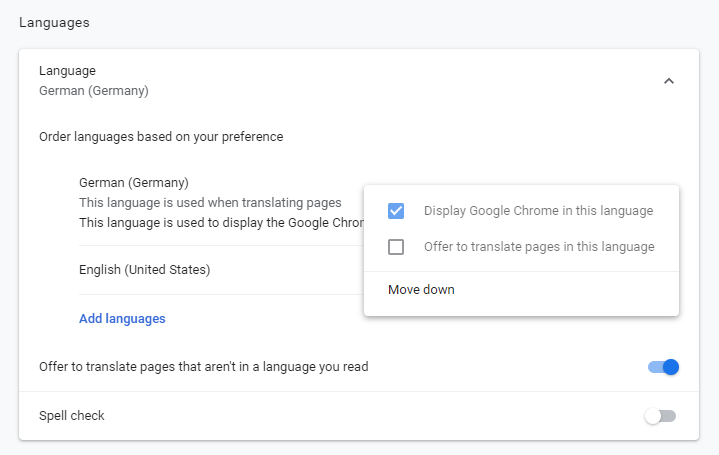
If you are using the Chrome browser, you can add additional languages from the Settings and can make any language your default language. For example, in the screenshot below, I added the German language and told the Chrome browser to display everything using the German language.
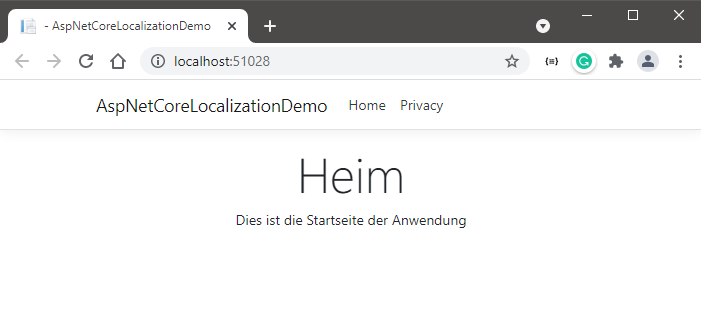
If you will run your application now, you will see that the page is now showing the localized strings from the German language resource file.
Overview of Default Request Culture Providers
When we configure and use the request localization in .NET Core, it comes with some request culture providers out of the box. We can use these default providers in our application or can also define our custom request culture provider. Following is the list of default request culture providers.
- AcceptLanguageHeaderRequestCultureProvider
- QueryStringRequestCultureProvider
- CookieRequestCultureProvider
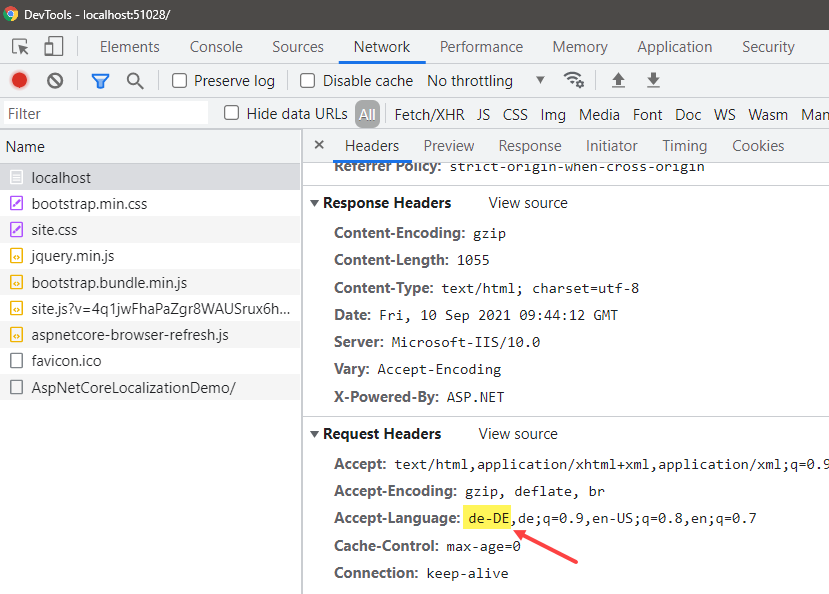
AcceptLanguageHeaderRequestCultureProvider
Web browsers by default send the client culture with every request using the Accept-Header and most of the time it is set to the native language of the user. You can easily see this header and its value using the Chrome browser tools. For example, my browser is currently showing both en-US and de-DE at the moment because I added the German language in the previous section.
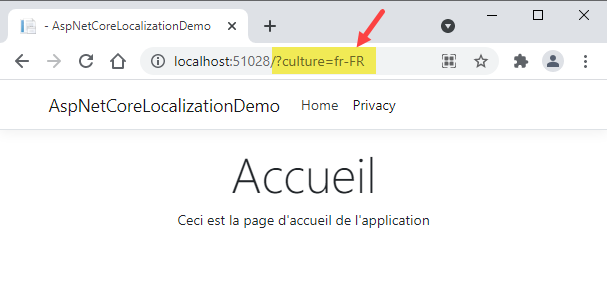
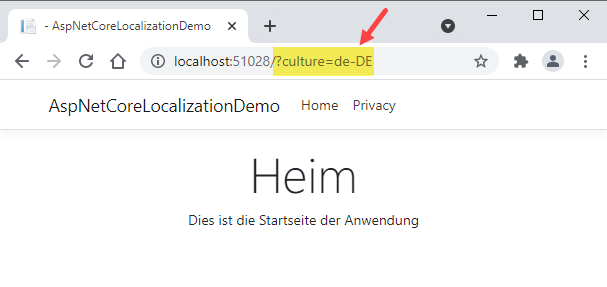
QueryStringRequestCultureProvider
This provider allows you to pass a query string to override the culture. This is very useful because the developers can quickly debug or test different cultures by changing the culture value in the query string. To use query string provider, we can pass culture and ui-culture parameters. If you will only pass in one of the two culture or ui-culture, the query string provider will set both values using the one you passed in. Let’s test this provider in our application by passing in the fr-FR in the query string and you will notice the page contents immediately changed to French strings.
Let’s change the value to de-DE and the page contents will update accordingly.
CookieRequestCultureProvider
Most production apps normally use cookies to set the culture. The CookieRequestCultureProvider uses the cookie with the name .AspNetCore.Culture by default and you can see how the cookie value is formatted using the browser tools. The cookie format is c=%LANGCODE%|uic=%LANGCODE%, where c is Culture and uic is UICulture

Switching Language in ASP.NET Core Applications
We are now aware of the default mechanisms e.g. Accept-Header, query string, and cookies, etc. of changing the ASP.NET Core application culture so let’s create a sample demo that will provide the application end-user the option to change the language at runtime using one of the default mechanism mentioned above. The first thing we need to do is to get the list of supported cultures so that we can display these cultures in a dropdown at the top of the page. Open the _Layout.cshtml file and add the following code snippet on top of the file.
_Layout.cshtml
@using Microsoft.AspNetCore.Builder
@using Microsoft.AspNetCore.Localization
@using Microsoft.Extensions.Options

@inject IOptions<RequestLocalizationOptions> LocOptions

@{
    string returnUrl = ViewContext.HttpContext.Request.Path;

    var requestCulture = Context.Features.Get<IRequestCultureFeature>();
    var cultureItems = LocOptions.Value.SupportedUICultures
        .Select(c => new SelectListItem { Value = c.Name, Text = c.DisplayName })
        .ToList();
}
The Features property of HttpContext provides access to the collection of feature interfaces for the current request. We are interested in the IRequestCultureFeature which represents the feature that provides the current request’s culture information.
var requestCulture = Context.Features.Get<IRequestCultureFeature>();
To fetch the list of all supported cultures we configured in Startup.cs file at the start of this post, we are using RequestLocalizationOptions object. We are also creating a SelectListItem from the SupportedUICultures list so that we can bind the SelectListItem with the HTML select control.
var cultureItems = LocOptions.Value.SupportedUICultures
        .Select(c => new SelectListItem { Value = c.Name, Text = c.DisplayName })
        .ToList();
Next, we need to add a form in the top navigation bar that will bind the HTML select dropdown with the cultures using the asp-items property. The current culture name is also bound with the asp-for property to make sure the current culture is pre-select automatically on page refresh. I also used the onchange event to automatically submit the form to the ChangeLanguage action method that will do all the magic for us.
<ul class="navbar-nav flex-grow-1">
    <li class="nav-item">
        <a class="nav-link text-dark" asp-area="" asp-controller="Home" asp-action="Index">Home</a>
    </li>

    <li class="nav-item">
        <form asp-action="ChangeLanguage" asp-controller="Home" method="post">

            <input type="hidden" id="returnUrl" name="returnUrl" value="@returnUrl" />

            <select id="culture"
                name="culture"
                class="form-control"
                onchange="this.form.submit();"
                asp-items="cultureItems"
                asp-for="@requestCulture.RequestCulture.UICulture.Name">
            </select>

        </form>
    </li>
</ul>
The ChangeLanguage action method of the HomeController class will receive the culture and the returnUrl as a parameter and its main job is to make a cookie with the currently selected culture and append it in the HTTP response cookies collection.
[HttpPost]
public IActionResult ChangeLanguage(string culture, string returnUrl)
{
    Response.Cookies.Append(
        CookieRequestCultureProvider.DefaultCookieName,
        CookieRequestCultureProvider.MakeCookieValue(new RequestCulture(culture)),
            new CookieOptions
            {
                Expires = DateTimeOffset.UtcNow.AddDays(7)
            }
    );

    return LocalRedirect(returnUrl);
}
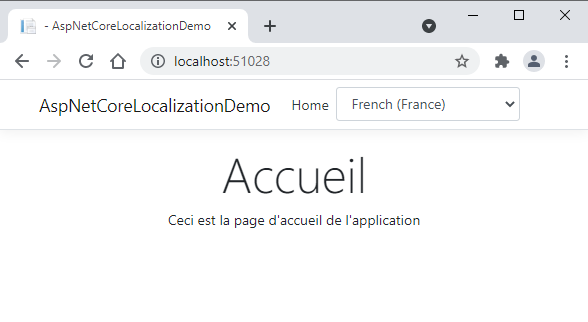
That’s all the code you need to provide language switching functionality. Run the application and select the French language from the dropdown and you will see the page contents automatically translated to the French language.
Now try to select the German language from the dropdown and the page contents will update accordingly.
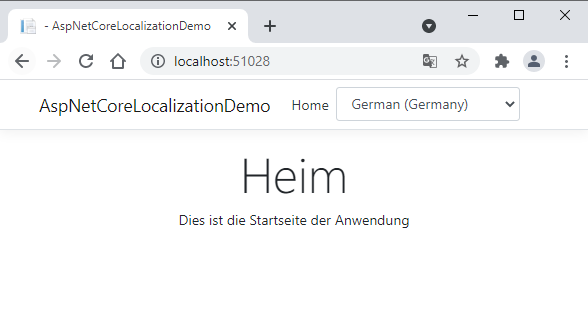
If you will check the cookies in browser developer tools at this point, you will see the German language set as the current culture.
Summary
Localization is considered a scary topic among many web developers but you will agree with me that ASP.NET Core has made localization very simple to implement. In this post, we have learned how to configure multiple languages, how to create localized string resources, and how to use the default request culture providers. We have also learned how to switch languages at runtime. I hope you have found this post useful. If you have any comments or suggestions, please leave your comments below. Don’t forget to share this tutorial with your friends or community. You can also download the complete source code of this post using the Download Source Code button shown at the start of this post.


I tried cloning this repository as well as also created a web application manually but in either case I didn’t run.
You must have missed some steps or didn’t follow the article properly.
Great Job. Very clearly explained. Thank you very much for this post. It helped me a lot.
absolutely great post it’s more clear than microsoft docs
Thank You Sir. From Central America. Have a good day!
I wanted to follow you on social media, how do i do it? very well written text thank you very much, it helped me a lot i found this article on Google.
Congratulations on the site, also know mine:
https://strelato.com
.
The links of all my social media profiles are available here.
Absolutely great post here. It has a lot of key elements that truly makes it work.
Great introduction.
I usually want to switch Language between cultures that need to change the direction of the UI element also.