If you are building a large and well-architectured web application, you have to pass data between different layers of the application. Most of the time this data is passed between domain entities and view models. If these objects are small, then mapping all properties one by one is not a big problem but if you have dozens of properties then it’s quite a tedious task to map every single property. This dirty work of figuring out how to map object A to object B can be automated with the help of a very popular .NET library called AutoMapper developed by Jimmy Bogard. In this tutorial, I will show you how to configure and use AutoMapper in ASP.NET Core 5 web applications. I will also cover some useful features of the AutoMapper library with real-world examples.
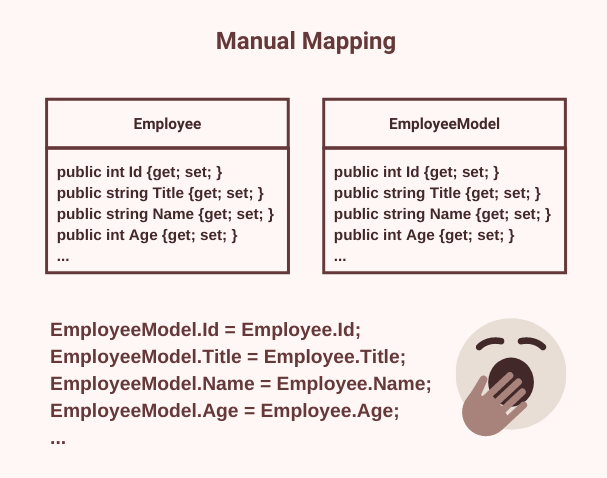
Table of Contents
What is AutoMapper?
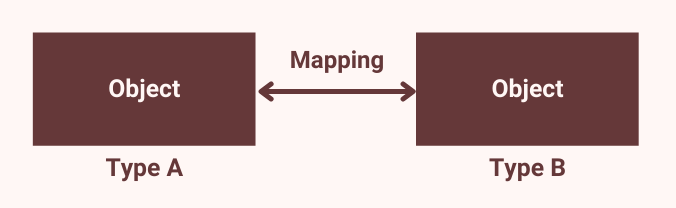
AutoMapper is a convention-based object-oriented mapper that transforms a source object into a destination object. If both source and destination objects have the same properties with the same types, then AutoMapper can perform this mapping with almost zero configuration. If you are dealing with complex or dissimilar objects, then you can still use AutoMapper’s built-in type converters, transformers, and resolvers to perform the mapping. You can use object-to-object mapping in many places in an application but most of the time it is used to pass objects between layers such as passing data from Domain to Service layer or Service to the Presentation layer.
Configuring AutoMapper in ASP.NET Core Project
Create a new ASP.NET Core 5 MVC web application and add the following two NuGet packages to the project.
- AutoMapper – Core AutoMapper library
- AutoMapper.Extensions.Microsoft.DependencyInjection – Provides some extension methods which can be used to configure AutoMapper with the .NET dependency injection framework.
Once AutoMapper has been successfully installed, you can configure it by calling the AddAutoMapper method on the IServiceCollection instance.
Startup.cs
public void ConfigureServices(IServiceCollection services)
{
    services.AddControllersWithViews();

    services.AddAutoMapper(Assembly.GetExecutingAssembly());
}
Before we start using AutoMapper, we need to create two classes that can be used for mapping. Create the following Employee class that will act as a source object.
Employee.cs
public class Employee
{
    public int Id { get; set; }
    public string Title { get; set; }
    public string Name { get; set; }
    public int? Age { get; set; }
    public DateTime? RegistrationDate { get; set; }
}
Next, create the following EmployeeModel class that will act as a target object.
EmployeeModel.cs
public class EmployeeModel
{
    public int Id { get; set; }
    public string Title { get; set; }
    public string Name { get; set; }
    public int? Age { get; set; }
    public DateTime? RegistrationDate { get; set; }
}
Creating AutoMapper Mapping Profiles
When doing the mapping from one type to another, AutoMapper looks for mapping profiles. Mapping profiles give AutoMapper all information and configuration related to mappings. To create a mapping profile, we need to create a class that derives from the Profile class available in the AutoMapper library.
The following class shows how you can create a class named MappingProfile by extending the Profile class and specifying mapping information. The CreateMap method is configuring a mapping between the Employee and EmployeeModel class.
MappingProfile.cs
public class MappingProfile : Profile
{
    public MappingProfile()
    {
        CreateMap<Employee, EmployeeModel>();
    }
}
If you are working on a large project, you may have hundreds of domain entities and model classes and if you want to configure all of them, then you need to call the CreateMap method for all of them one by one as shown in the example below.
public class MappingProfile : Profile
{
    public MappingProfile()
    {
        CreateMap<Employee, EmployeeModel>();
        CreateMap<Product, ProductModel>();
        CreateMap<Customer, CustomerModel>();
    }
}
This seems quite a repetitive task and you can avoid this by using some advanced reflection and assembly scanning techniques that I will show you later in this post.
Using AutoMapper IMapper Service
AutoMapper has a service called IMapper that can be injected into any component or service to map objects from one type to another. Let’s create the following IEmployeeService interface and EmployeeService class and inject IMapper service in the constructor.
IEmployeeService.cs
public interface IEmployeeService
{
    List<EmployeeModel> GetEmployees();
}
EmployeeService.cs
public class EmployeeService : IEmployeeService
{
    private readonly IMapper _mapper;

    public EmployeeService(IMapper mapper)
    {
        _mapper = mapper;
    }

    public List<EmployeeModel> GetEmployees()
    {
        var employees = new List<Employee>()
        {
            new Employee()
            {
                Id = 1,
                Title = "Mr",
                Name = "Simon",
                Age = 32,
                RegistrationDate = new DateTime(2015, 12, 5)
            },
            new Employee()
            {
                Id = 2,
                Name = "David",
                Age = 35,
                RegistrationDate = new DateTime(2013, 3, 15)
            },
            new Employee()
            {
                Id = 3,
                Title = "Mr",
                Name = "Peter",
                Age = 29
            }
        };

        return _mapper.Map<List<EmployeeModel>>(employees);
    }
}
Inside the GetEmployees method, we created a fake list of Employee objects that we want to map with a list of EmployeeModel objects. In the real-world application, this list of Employee objects can be fetched from the backend database using Entity Framework Core. The most important line is where we used the Map method of IMapper service to map the List<Employee> objects to List<EmployeeModel> objects.
return _mapper.Map<List<EmployeeModel>>(employees);
To test whether our mappings worked or not, let’s register the above service in the ConfigureServices method of Startup.cs file
services.AddScoped<IEmployeeService, EmployeeService>();
Inject the IEmployeeService in the HomeController and simply return the List<EmployeeModel> from the Index action method to the razor view.
HomeController.cs
public class HomeController : Controller
{
    private readonly IEmployeeService _employeeService;

    public HomeController(IEmployeeService employeeService)
    {
        _employeeService = employeeService;
    }

    public IActionResult Index()
    {
        return View(_employeeService.GetEmployees());
    }
}
Add the following code inside the Index.cshtml razor view to iterate the collection of EmployeeModel objects.
Index.cshtml
@model IEnumerable<EmployeeModel>

@{
    ViewData["Title"] = "Index";
    Layout = "~/Views/Shared/_Layout.cshtml";
}

<div class="row">
    <div class="col">
        <h1>Employees</h1>
    </div>
</div>
<br />
<table class="table">
    <thead>
        <tr>
            <th>@Html.DisplayNameFor(model => model.Id)</th>
            <th>@Html.DisplayNameFor(model => model.Title)</th>
            <th>@Html.DisplayNameFor(model => model.Name)</th>
            <th>@Html.DisplayNameFor(model => model.Age)</th>
            <th>@Html.DisplayNameFor(model => model.RegistrationDate)</th>
        </tr>
    </thead>
    <tbody>
        @foreach (var item in Model)
        {
            <tr>
                <td>@Html.DisplayFor(modelItem => item.Id)</td>
                <td>@Html.DisplayFor(modelItem => item.Title)</td>
                <td>@Html.DisplayFor(modelItem => item.Name)</td>
                <td>@Html.DisplayFor(modelItem => item.Age)</td>
                <td>@Html.DisplayFor(modelItem => item.RegistrationDate)</td>
            </tr>
        }
    </tbody>
</table>
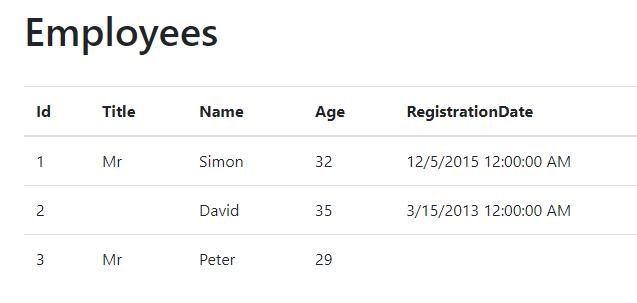
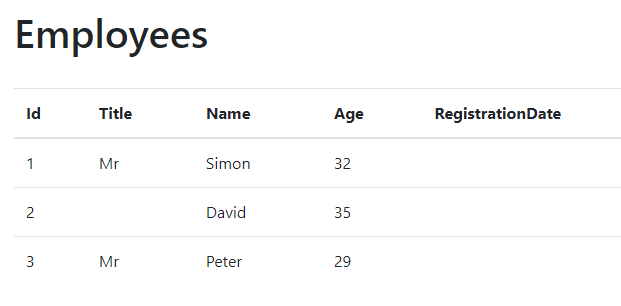
Run the project and you should be able to see the output similar to the following. The following output clearly shows that the data is successfully mapped from all the properties of the Employee class to the EmployeeModel class.
Simplify AutoMapper Configurations using Reflection
As I mentioned above that in large projects, we normally have hundreds of objects to map, and adding the CreateMap statement for every single mapping seems quite a non-productive and time-consuming task.
CreateMap<Employee, EmployeeModel>();
CreateMap<Product, ProductModel>();
CreateMap<Customer, CustomerModel>();
We can avoid the above mapping configurations using a C# interface and some reflection. Let’s create the following IMapFrom interface in the project. The interface has a single method called Mapping and it has a default implementation that simply calls the same CreateMap method we used above to define mapping configuration.
IMapFrom.cs
public interface IMapFrom<T>
{
    void Mapping(Profile profile) => profile.CreateMap(typeof(T), GetType());
}
We can now update our EmployeeModel class that will implement the above interface as shown in the code snippet below. This tells AutoMapper that we want to map the EmployeeModel with the Employee class.
EmployeeModel.cs
public class EmployeeModel : IMapFrom<Employee>
{
    public int Id { get; set; }
    public string Title { get; set; }
    public string Name { get; set; }
    public int? Age { get; set; }
    public DateTime? RegistrationDate { get; set; }
}
You can see that our mapping configuration is simplified a lot. We can simply implement IMapForm<T> interface on any class we want to map with the T class and AutoMapper will do the rest. Once we have all those classes ready to map, we don’t want to register them all manually so let’s add some automation in our MappingProfile class we created above.
MappingProfile.cs
public class MappingProfile : Profile
{
    public MappingProfile()
    {
        ApplyMappingsFromAssembly(Assembly.GetExecutingAssembly());
    }

    private void ApplyMappingsFromAssembly(Assembly assembly)
    {
        var types = assembly.GetExportedTypes()
            .Where(t => t.GetInterfaces().Any(i =>
                i.IsGenericType && i.GetGenericTypeDefinition() == typeof(IMapFrom<>)))
            .ToList();

        foreach (var type in types)
        {
            var instance = Activator.CreateInstance(type);

            var methodInfo = type.GetMethod("Mapping") ??
                             type.GetInterface("IMapFrom`1").GetMethod("Mapping");

            methodInfo?.Invoke(instance, new object[] { this });
        }
    }
}
In the above code, we are using the .NET reflection framework to scan the assembly and looking for all classes that are implementing the IMapFrom interface. Once we have all those types available, we are simply invoking their Mapping method. We have already seen the default implementation of the Mapping method above which is calling the CreateMap method for the current type.
Run the project and you should be able to see the same output we saw before.
Customizing AutoMapper Mappings with Advance Features
So far we are only using the default convention-based mappings but what if you want to customize how the two objects need to map with each other. You can easily customize the default convention-based mapping with so many advanced features available in AutoMapper. To define custom mappings, you need to implement the Mapping method available in the IMapFrom interface we created above.
Skip Mapping of Specific Properties
Let’s say you don’t want to map the RegistrationDate property of the Employee class, you can use the ForMember method that allows us to customize individual members of the class. You need to specify the property you want to customize e.g. RegistrationDate and then you can call the Ignore method as shown in the example below. The Ignore method simply skips the mapping of the current property.
EmployeeModel.cs
public class EmployeeModel : IMapFrom<Employee>
{
    public int Id { get; set; }
    public string Title { get; set; }
    public string Name { get; set; }
    public int? Age { get; set; }
    public DateTime? RegistrationDate { get; set; }

    public void Mapping(Profile profile)
    {
        var c = profile.CreateMap<Employee, EmployeeModel>()
            .ForMember(d => d.RegistrationDate, opt => opt.Ignore());
    }
}
Run the project again and you will notice that the data of RegistrationDate property is not mapped from Employee object to EmployeeModel object.
Substitute Null Values during Mapping
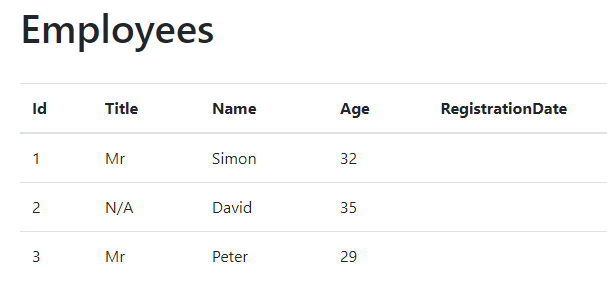
In the above example, the Title property of employee David is not specified and this is why the Title column is empty for David. You can tell AutoMapper to replace the null value with any custom value e.g. N/A using the NullSubstitution method. The following code snippet illustrates how to use this method.
EmployeeModel.cs
public class EmployeeModel : IMapFrom<Employee>
{
    public int Id { get; set; }
    public string Title { get; set; }
    public string Name { get; set; }
    public int? Age { get; set; }
    public DateTime? RegistrationDate { get; set; }

    public void Mapping(Profile profile)
    {
        var c = profile.CreateMap<Employee, EmployeeModel>()
            .ForMember(d => d.RegistrationDate, opt => opt.Ignore())
            .ForMember(d => d.Title, opt => opt.NullSubstitute("N/A")));
    }
}
Run the project again and you will notice that the Title property of employee David is now showing N/A value.
Map Dissimilar Objects using AutoMapper
Let’s say you want to map two objects but some properties are not common in both objects. You can still map these dissimilar objects using the AutoMapper MapFrom method. Let’s add a new property OfficeAddress in the Employee class and another new property WorkAddress in EmployeeModel class. The following example illustrates how to use the MapFrom method to map these two properties.
EmployeeModel.cs
public class EmployeeModel : IMapFrom<Employee>
{
    public int Id { get; set; }
    public string Title { get; set; }
    public string Name { get; set; }
    public int? Age { get; set; }
    public DateTime? RegistrationDate { get; set; }

    public void Mapping(Profile profile)
    {
        var c = profile.CreateMap<Employee, EmployeeModel>()
            .ForMember(d => d.RegistrationDate, opt => opt.Ignore())
            .ForMember(d => d.Title, opt => opt.NullSubstitute("N/A"))
            .ForMember(d => d.WorkAddress, opt => opt.MapFrom(s => s.OfficeAddress));
    }
}
To test the above configuration, set the OfficeAddress property of any employee in EmployeeService.
EmployeeService.cs
public List<EmployeeModel> GetEmployees()
{
    var employees = new List<Employee>()
    {
        new Employee()
        {
            Id = 1,
            Title = "Mr",
            Name = "Simon",
            Age = 32,
            RegistrationDate = new DateTime(2015, 12, 5)
        },
        new Employee()
        {
            Id = 2,
            Name = "David",
            Age = 35,
            RegistrationDate = new DateTime(2013, 3, 15),
            OfficeAddress = "123 ABC Street"
        },
        new Employee()
        {
            Id = 3,
            Title = "Mr",
            Name = "Peter",
            Age = 29
        }
    };

    return _mapper.Map<List<EmployeeModel>>(employees);
}
Add the WorkAddress property in Index.cshtml view file and run the project once again.
Index.cshtml
<table class="table">
    <thead>
        <tr>
            <th>@Html.DisplayNameFor(model => model.Id)</th>
            <th>@Html.DisplayNameFor(model => model.Title)</th>
            <th>@Html.DisplayNameFor(model => model.Name)</th>
            <th>@Html.DisplayNameFor(model => model.Age)</th>
            <th>@Html.DisplayNameFor(model => model.RegistrationDate)</th>
            <th>@Html.DisplayNameFor(model => model.WorkAddress)</th>
        </tr>
    </thead>
    <tbody>
        @foreach (var item in Model)
        {
            <tr>
                <td>@Html.DisplayFor(modelItem => item.Id)</td>
                <td>@Html.DisplayFor(modelItem => item.Title)</td>
                <td>@Html.DisplayFor(modelItem => item.Name)</td>
                <td>@Html.DisplayFor(modelItem => item.Age)</td>
                <td>@Html.DisplayFor(modelItem => item.RegistrationDate)</td>
                <td>@Html.DisplayFor(modelItem => item.WorkAddress)</td>
            </tr>
        }
    </tbody>
</table>
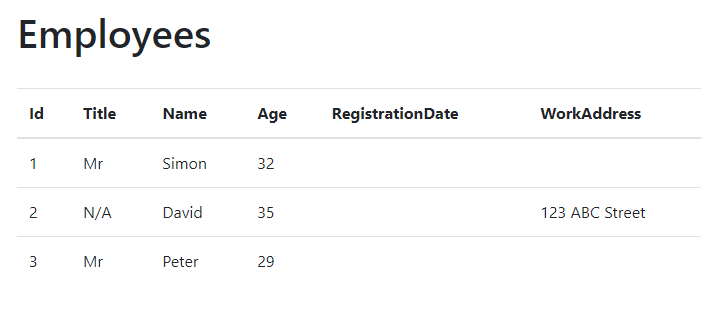
You should see the output similar to the following that proves that the value of OfficeAddress is correctly mapped with WorkAddress property.
You can download the complete source code of this post using the Download Source Code button shown at the start of this post.
Summary
We only covered few methods above to learn how to customize the mapping. AutoMapper has lots of other features to customize the mapping even further and these advanced features cover almost all use cases. You can read more about AutoMapper from the documentation website. I hope you have found this post useful. If you have any comments or suggestions, please leave your comments below. Don’t forget to share this tutorial with your friends or community.


Thanks for this straightforward intro!
I tried reading the docs on automapper.org, but it was so dense and terse, it kept me turned off from even using automapper unless I had to. As your intro reveals, it’s not hard at all, it’s very easy to use. Upon understanding these basics, the original docs make sense too.
Can I map one more similar entity to employees view model
For example there is a separate entity RetiredEmployee with same props of Employees . How Can we map RetiredEmployee to EmployeeVM ?
Yes, you can map multiple view models with same or multiple entities if the properties of two classes are identical, they will map without a problem.
Thanks.very good and fantastic
As I remember NullSubstitution doesn’t work when we use Project To