
Many websites require functionality for letting their site visitors to select and deselect all the rows in GridView using a single checkbox normally available in the header row. You may have seen the examples of such functionality in Yahoo Mail or Hotmail inbox where you can select all the emails by clicking the single Checkbox on top of the email’s grid. In this tutorial, I will show you how you can provide this functionality in ASP.NET GridView control using few lines of JQuery code.
To get started, create an ASP.NET website and drag a GridView control on the page. For this tutorial, I am using ID, Name and Salary columns, so I added three bound fields and one TemplateField that will contain the checkboxes in the header as well as in the individual row. Following is the complete HTML source for the GridView control.
<asp:GridView ID="GridView1" runat="server" Font-Size="10pt"
   Font-Names="Verdana" CellPadding="4" Width="400px" GridLines="None"
   ForeColor="#333333" AutoGenerateColumns="false">
   <RowStyle BackColor="#EFF3FB" />
   <HeaderStyle BackColor="#507CD1" Font-Bold="True" ForeColor="White" />
   <AlternatingRowStyle BackColor="White" />
   <Columns>
      <asp:TemplateField>
         <HeaderTemplate>
            <asp:CheckBox ID="chkHeader" runat="server" />
         </HeaderTemplate>
         <ItemTemplate>
            <asp:CheckBox ID="chkRow" runat="server" />
         </ItemTemplate>
      </asp:TemplateField>
      <asp:BoundField DataField="ID" HeaderText="ID" />
      <asp:BoundField DataField="Name" HeaderText="Name" />
      <asp:BoundField DataField="Salary" HeaderText="Salary" />
   </Columns>
</asp:GridView>
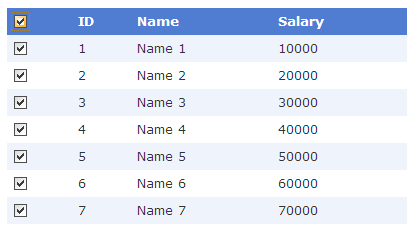
To keep this tutorial simple, I am not connecting my GridView with the database and showing some sample data in the GridView. Add the following code in the Page Load event of the page to add few rows of data.
protected void Page_Load(object sender, EventArgs e)
{
   if (!Page.IsPostBack)
   {
      LoadData();
   }
}

private void LoadData()
{
   DataTable table = new DataTable();
   table.Columns.Add("ID", typeof(int));
   table.Columns.Add("Name", typeof(string));
   table.Columns.Add("Salary", typeof(decimal));

   for (int i = 1; i < 8; i++)
   {
      DataRow row = table.NewRow();
      row["ID"] = i;
      row["Name"] = "Name " + i;
      row["Salary"] = 10000 * i;
      table.Rows.Add(row);
   }

   GridView1.DataSource = table;
   GridView1.DataBind();
}
Now we need only few lines of JQuery code to provide the functionality of selecting or deselecting rows using the checkbox added in the header of the GridView. Add the JQuery script file reference in the head element of the page.
<script src="scripts/jquery-1.4.3.min.js" type="text/javascript"></script>
Add the following JavaScript block inside the head element of the page.
<script type="text/javascript">
   $(document).ready(function() {

      var headerCheckbox = $('#GridView1 > tbody > tr > th > input:checkbox');

      headerCheckbox.click(function() {
         var headerChecked = $(this).attr('checked');
         var rowCheckboxes = $('#GridView1 > tbody > tr > td > input:checkbox');
         rowCheckboxes.attr('checked', headerChecked);
      });

   });
</script>
The above code is using typical JQuery ready function to add some JQuery statements or code. The first line access the checkbox available in the header row of the GridView using JQuery selector.
var headerCheckbox = $('#GridView1 > tbody > tr > th > input:checkbox');
Once we have the reference of header checkbox, we are using the click event function handler that will allow us to run some code every time user will click the header checkbox. Inside click event function handler, the first line stores the current state of the header checkbox in a headerChecked variable. The second line gets the reference of all the checkboxes in all the rows in GridView and then set their state to the same state as the header checkbox using JQuery attr function.
headerCheckbox.click(function() {
   var headerChecked = $(this).attr('checked');
   var rowCheckboxes = $('#GridView1 > tbody > tr > td > input:checkbox');
   rowCheckboxes.attr('checked', headerChecked);
});
Build and test your web page and click the checkbox in the header row, and you will be able to select or deselect all checkboxes in GridView rows. You can click the Live Demo button to see the working example of this tutorial.


very helpful