In my previous post Complete Guide to Docker and ASP.NET Core, I gave you an overview of Docker Images and Containers and we learned how to dockerize both new and existing ASP.NET Core Apps using Dockerfile. In this tutorial, we will learn how to build Docker Images and Containers using Dockerfile commands and how to build and run ASP.NET Core Apps in Containers.
Table of Contents
What is Docker Image?
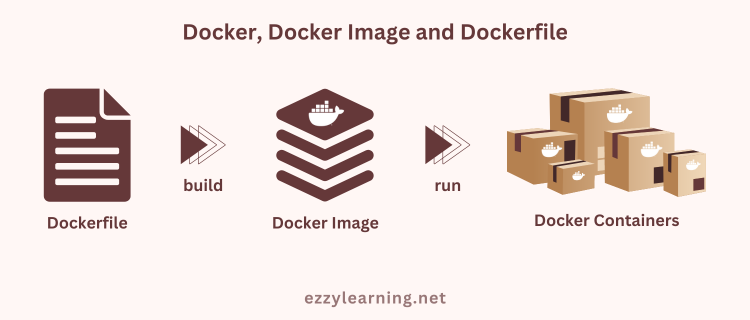
Docker image is a self-contained, read-only file that acts as a template or blueprint for creating Docker containers. It includes a lightweight operating system, application code, runtime libraries, system tools, and any other dependencies required to run a particular software application. Docker images are built using a layered approach, with each layer representing a specific set of changes or additions to the base image. These images can be shared, distributed, and deployed across various systems and platforms, providing a consistent and reliable environment for running applications.
What is Dockerfile?
A Dockerfile is a text file that contains a set of instructions and commands for building a Docker image. It serves as a recipe for creating customizable Docker images. A Dockerfile allows a developer to automate the process of building his Docker images, ensuring consistency and easy deployment across different environments. The Dockerfile contains commands for defining the base image, adding dependencies, copying files to the image, setting environment variables, running commands, exposing ports, and configuring other aspects of the image. Each command in the Dockerfile represents a layer in the resulting image, enabling efficient caching and incremental builds.
What is a Container Registry?
The container registry is a centralized storage system used to store and manage container images. They play an important role in container workflows, making it easier to share, manage, and deploy container images efficiently and securely. Currently, several cloud-based and self-hosted container registries are available. Some popular container registry services include Docker Hub, Google Container Registry, Amazon Elastic Container Registry (ECR), and Azure Container Registry.
What is Docker Base Image?
Docker base images are a fundamental part of the containerization process and they serve as the foundation for building a containerized application. A base image contains a minimal operating system with the libraries and dependencies needed to run a particular type of application. Docker base images are typically pulled from a container registry, like Docker Hub, and serve as a starting point for building custom Docker images.
Create Docker Image for Running ASP.NET Core App
The Dockerfile file is used by the docker build command to create a container image. You can add the Dockerfile to the root folder of the project and start writing instructions to build the Docker images. Docker builds images automatically by reading the instructions from a Dockerfile. Let’s go through the step-by-step process of building Docker images for running the ASP.NET Core App.
Choosing the Base Image
The first instruction in the Dockerfile usually a FROM instruction, that initializes a new build stage and sets the base image for subsequent instructions. The FROM keyword requires a fully qualified Docker container image name. Optionally a name can be given to a new build stage by adding AS name to the FROM instruction. The name can be used in subsequent FROM and COPY –from=<name> instructions to refer to the image built in this stage. We named this build stage as base in case we need to refer to it later by name.
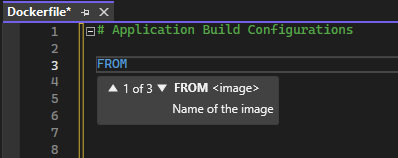
FROM mcr.microsoft.com/dotnet/aspnet:7.0 AS base
If you are using Visual Studio then the built-in intellisense will help you a lot in writing Dockerfile instructions using correct syntax and arguments.
Specifying the Working Directory
The WORKDIR instruction sets the working directory for subsequent instructions, RUN, CMD, ENTRYPOINT, COPY and ADD in the Dockerfile. If you will not specify the WORKDIR instruction in Dockerfile, it will be created automatically even if it’s not used in any subsequent Dockerfile instruction. The WORKDIR instruction can be used multiple times in a Dockerfile.
WORKDIR /app
The above WORKDIR command will change the current directory inside of the container to the app.
Exposing the Ports
The EXPOSE instruction informs Docker that the container listens on the specified network ports at runtime. We can specify whether the port listens on TCP or UDP, and the default is TCP if the protocol is not specified. The EXPOSE instruction does not publish the port. It functions as a type of documentation between the person who builds the image and the person who runs the container, about which ports are intended to be published. To actually publish the port when running the container, use the -p flag on docker run to publish and map one or more ports, or the -P flag to publish all exposed ports and map them to high-order ports.
EXPOSE 80
EXPOSE 443
Our runtime base image configuration stage is now completed with the following four instructions.
FROM mcr.microsoft.com/dotnet/aspnet:7.0 AS base
WORKDIR /app
EXPOSE 80
EXPOSE 443
Create Docker Image for Developing ASP.NET Core App
We can also build Docker images for development environments which usually require a different base image, libraries, and dependencies. Let’s go through the step-by-step process of building Docker images for developing an ASP.NET Core App.
Choosing the Base Image
We need to use the same FROM keyword as we used before but this time we will specify the .NET SDK base image that contains the .NET SDK, .NET runtime, and .NET CLI. This image will help developers in developing, building, and testing ASP.NET Core Apps within the container. We named this build stage as build so that we can refer to it later by name.
FROM mcr.microsoft.com/dotnet/sdk:7.0 AS build
Specifying the Working Directory
The WORKDIR instruction sets the working directory and the following command will change the current directory inside of the container to src.
WORKDIR /src
Adding Project File to Docker Image
The COPY instruction copies files or directories from the local file system and adds them to the file system of the container. Usually, we provide both source and destination paths to the COPY command. In the following command, we are copying the project file name AspNetCoreDockerDemoApp.csproj to the src working directory inside the container.
COPY ["AspNetCoreDockerDemoApp.csproj", "."]
Restoring Project Dependencies in Docker Image
A .NET project typically references external libraries in NuGet packages that provide additional functionality. These external dependencies are referenced in the project file (.csproj or .vbproj). When you run the dotnet restore command, the .NET CLI uses NuGet to look for these dependencies and download them if necessary. It also ensures that all the dependencies required by the project are compatible with each other and that there are no conflicts between them. Once the command is completed, all the dependencies required by the project are available in a local cache and can be used by the .NET CLI to build and run the application.
The RUN instruction is used to execute any commands in a new layer on top of the current image and commit the results. The resulting committed image will be used for the next step in the Dockerfile.
RUN dotnet restore "./AspNetCoreDockerDemoApp.csproj"
Adding Application Files to Docker Image
Once all the dependencies are restored, we can now copy all project files and folders to the Docker image by specifying the following command.
COPY . .
Building ASP.NET Core Project in Docker Image
The .NET CLI command dotnet build command builds the project and its dependencies into a set of binaries. The library dependencies from NuGet are typically NOT copied to the output folder as they’re resolved from the NuGet global packages folder at run time. If you want to create a deployable version of the application, you can use the dotnet publish command. Before we build the project, we need to set the working directory as follows.
WORKDIR "/src/."
To build the application, we can use the following dotnet build command in the Docker image. The – c argument specifies the configuration, e.g. Release and the – o argument specified the output directory where all the binaries will be copied.
RUN dotnet build "AspNetCoreDockerDemoApp.csproj" -c Release -o /app/build
Our development base image configuration stage is now completed and has the following instructions.
FROM mcr.microsoft.com/dotnet/sdk:7.0 AS build
WORKDIR /src
COPY ["AspNetCoreDockerDemoApp.csproj", "."]
RUN dotnet restore "./AspNetCoreDockerDemoApp.csproj"
COPY . .
WORKDIR "/src/."
RUN dotnet build "AspNetCoreDockerDemoApp.csproj" -c Release -o /app/build
Publishing ASP.NET Core App in Docker Image
The first instruction below is initializing a new build stage publish by referring to a previous stage build by name. The .NET CLI command dotnet publish compiles the application, reads through its dependencies specified in the project file, and publishes the resulting set of files to a directory.
FROM build AS publish
RUN dotnet publish "AspNetCoreDockerDemoApp.csproj" -c Release -o /app/publish
  /p:UseAppHost=false
Specifying Application Execution Entry Point
We are now ready to run our application in Docker containers. For this, we need to specify a new build stage with the following commands.
FROM base AS final
WORKDIR /app
COPY --from=publish /app/publish .
ENTRYPOINT ["dotnet", "AspNetCoreDockerDemoApp.dll"]
The first instruction is initializing a new build stage final by referring to a previous stage base by name.
FROM base AS final
We then set the working directory /app and copied the application binaries from the /app/publish folder to the working directory.
WORKDIR /app
COPY --from=publish /app/publish .
The last command is the ENTRYPOINT command, which allows us to configure a container that will run as an executable. The ENTRYPOINT command takes an array that transforms into a command-line invocation with arguments. The command has the following syntax where the first argument specifies the name of the executable and subsequent parameters are the parameters to pass to the executable file.
ENTRYPOINT ["executable", "param1", "param2"]
In our case, we specified the executable as dotnet and then we provided the dll file of our project as the parameter.
ENTRYPOINT ["dotnet", "AspNetCoreDockerDemoApp.dll"]
It means it will invoke dotnet AspNetCoreDockerDemoApp.dll on the command line.
The complete Dockerfile will now looks like this:
FROM mcr.microsoft.com/dotnet/aspnet:7.0 AS base
WORKDIR /app
EXPOSE 80
EXPOSE 443

FROM mcr.microsoft.com/dotnet/sdk:7.0 AS build
WORKDIR /src
COPY ["AspNetCoreDockerDemoApp.csproj", "."]
RUN dotnet restore "./AspNetCoreDockerDemoApp.csproj"
COPY . .
WORKDIR "/src/."
RUN dotnet build "AspNetCoreDockerDemoApp.csproj" -c Release -o /app/build

FROM build AS publish
RUN dotnet publish "AspNetCoreDockerDemoApp.csproj" -c Release -o /app/publish
  /p:UseAppHost=false

FROM base AS final
WORKDIR /app
COPY --from=publish /app/publish .
ENTRYPOINT ["dotnet", "AspNetCoreDockerDemoApp.dll"]
Ignoring Files using .dockerignore File
The .dockerignore is very similar to the .gitignore file used in version control systems like Git and it is used in Docker projects to specify which files and directories should be excluded when building a Docker image. In this file, the developers can define patterns and rules for ignoring unnecessary or sensitive files that do not need to be included in the container image. By excluding these files, the Docker build process becomes more efficient, as it only includes essential resources, reducing the image size and build time.
Following is an example of a .dockerignore file in which we are specifying to exclude many files, e.g. Dockerfile, README.md and folders bin, obj, etc.
**/.classpath
**/.dockerignore
**/.env
**/.git
**/.gitignore
**/.vs
**/.vscode
**/bin
**/docker-compose*
**/Dockerfile*
**/node_modules
**/obj
LICENSE
README.md
Building Docker Image for ASP.NET Core App
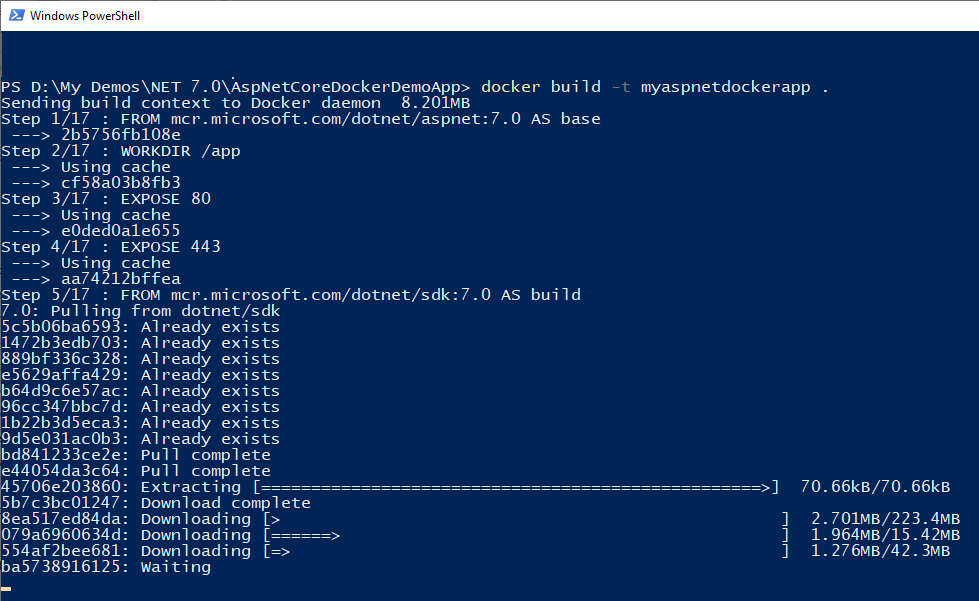
To create an image an image we can use the docker build command in the folder where we created our Dockerfile. We use -t to give our image a name, e.g. myaspnetdockerapp. The last argument (.) means tells the docker build command where to find the Dockerfile, which in our case is the current directory. To learn more about the docker build command, read the official documentation.
docker build -t myaspnetdockerapp .
You will start seeing the logs that will show you that Docker is downloading base images and dependencies as per the instructions we provided in Dockerfile above.
Once all the commands in Dockerfile are executed, you will see the following messages at the end.
Successfully tagged myaspnetdockerapp:latest
This means everything is good and we have an image that you can check by running the following command.
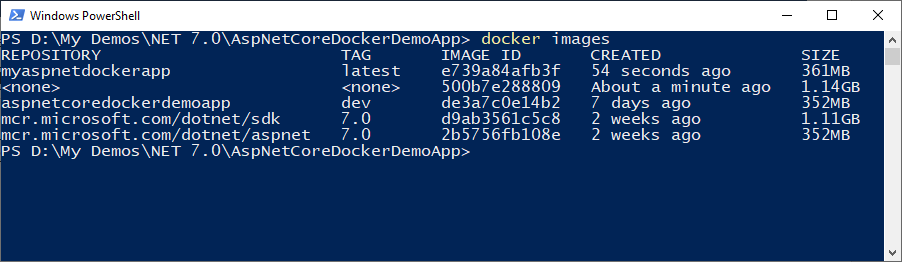
docker images
You should be able to see the Docker image myaspnetdockerapp in the list of images available on your machine.
Running ASP.NET Core App in Containers
We now have an image that contains our application code, dependencies, and everything else we told it to contain. We are now ready to create a Docker container from the Docker image so that we can run our application in the container. To do this, we can run the docker run command as follows:
docker run -d -p 8080:80 --name myapp myaspnetdockerapp
Let’s review the options we specified in the above command.
- -d option specify that we want to run the container in the background.
- -p option binds the internal container port 80 to the external host machine port 8080.
- –name option is used to give the container a name. If we don’t specify a name one will otherwise be generated for us. Having a name makes it easier to reference it later.
- The last argument is the image name myaspnetdockerapp.
To learn more about the docker run command, read the official documentation.
To check if our container is created and is running, we can use the command docker ps

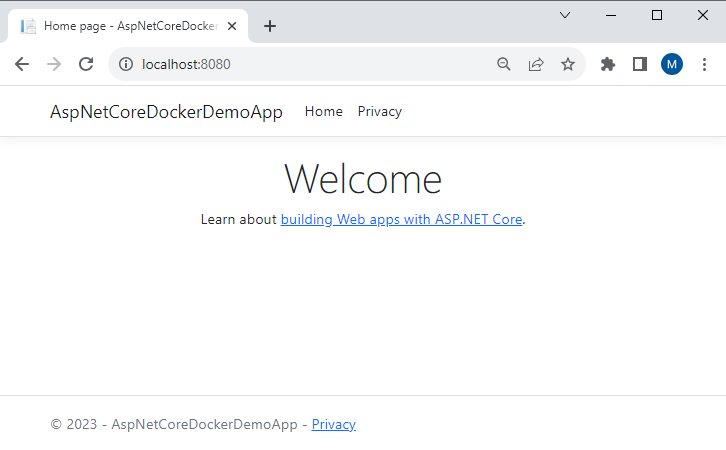
Finally, we can check if we can access our application in the browser by typing http://localhost:8080 in the browser address bar.
Cleanup Docker Images and Containers
Right now we have created an image and container that is up and running. However, when working with Docker, you can end up piling up unused images, containers, and datasets that clutter the output and take up disk space. The good news is that Docker offers useful tools to help you clean up your system and stay organized. Let’s go through some useful cleanup commands one by one.
Stopping Docker Containers
To stop one or more running Docker containers, use the docker container stop [container name] command. We gave our container myapp name so we can stop it using the following command.
docker container stop myapp
Removing Docker Containers
To remove the Docker container, use the docker container rm [container name] command. We can remove our myapp container using the following command.
docker container rm myapp
Removing Docker Images
To remove the Docker image, use the docker rmi [image name] command. We can remove our myaspnetdockerapp image using the following command.
docker rmi myaspnetdockerapp
If you want to remove all images, you can run the following commands
docker rmi $(docker images -q)
Docker also has a single command that cleans up all dangling resources, such as images, containers, volumes, and networks, not tagged or connected to a container. This is a quick way to get rid of old images, containers, volumes, and networks that are not associated with a container.
docker system prune
Conclusion
In this tutorial, we learn the contents of Dockerfile in detail and we learn how to specify base images, how to copy files from the local system to Docker images, how to run commands, how to create Docker images and containers using Docker CLI commands, how to exclude some files using the .dockerignore file, how to clean Docker images and containers and how to create and run ASP.NET Core App in Docker containers. I hope you have found this post useful. If you have any comments or suggestions, please leave your comments below. Don’t forget to share this tutorial with your friends or community.


Another good article, thank you so much.