
It is the dream of every web developer to build blazing fast and high-performance web applications but this is not easy to accomplish unless we implement some performance optimizations. Web pages have evolved from static HTML pages to complex and responsive pages with a lot of dynamic contents and plugins which require a large number of CSS and JavaScript files to be downloaded to the clients. To improve the initial page request load time, we normally apply two performance techniques called bundling and minification. In this tutorial, I will give you a step by step overview of different tools and techniques we can use to apply bundling and minification in ASP.NET Core 5 applications.
Table of Contents
Introduction To Bundling and Minification
Bundling and minification are two distinct performance optimizations we can use in our web apps to improve the performance of our apps and to reduce the number of requests from the browser to server and to reduce the size of data transferred from server to browser. If these two techniques are used together they improve the load time of our page on the first request. Once the page has been requested and loaded into the browser, the browser caches the static files e.g. JavaScript, CSS, and images so this improves the overall user experience.
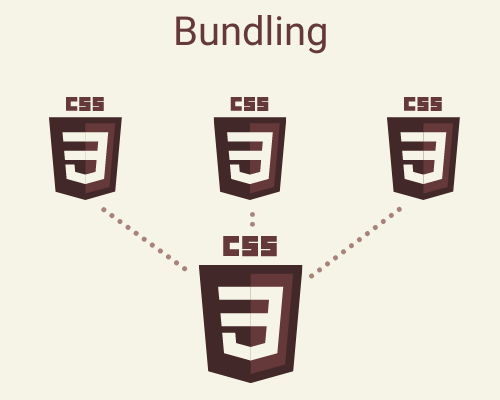
Bundling
Bundling is a process of combining multiple files into a single file. The benefit is that the browser needs to make fewer requests for all those separate files and needs to load just a single file from the server. We can have separate bundles for CSS and JavaScript files and we can even have separate bundles for third-party plugins, scripts, and styles.
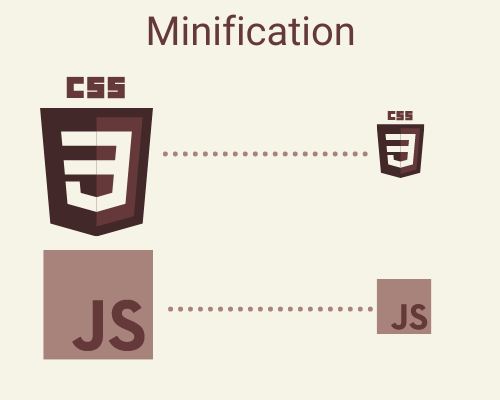
Minification
Minification is the process of removing unnecessary comments, spaces, and extra characters from the code without altering any functionality. This means we can reduce the file size significantly which increases the file load time from server to client.
The following table (available at the official docs page) outlines the differences between individually loading assets and using bundling and minification on a local machine. You can expect even greater performance gains when bundled and minified assets are transferred over the network.
| Action | With Bundling and Minification | Without Bundling and Minification | Change |
| File Requests | 7 | 18 | 157% |
| KB Transferred | 156 | 264.68 | 70% |
| Load Time (ms) | 885 | 2360 | 167% |
Bundling and Minification Strategies in ASP.NET Core
In old days, we were using a different technique to register all our bundles in BundleConfig.cs file available in App_Start folder. A method called RegisterBundles in ASP.NET was used to create, register, and configure bundles as follows:
public static void RegisterBundles(BundleCollection bundles)
{
    bundles.Add(new ScriptBundle("~/bundles/js").Include(
      "~/Scripts/bootstrap.js",
      "~/Scripts/jquery-3.3.1.js"));
}
We were including above bundles in our Web pages, Views and Layout Pages as follows:
<head>
    <title>@ViewBag.Title</title>

    @Scripts.Render("~/bundles/js")
</head>
While this approach looks easy to use, it’s no longer applicable in ASP.NET 5. The new ASP.NET Core project templates in Visual Studio provide a solution for bundling and minification using a JSON configuration file called bundleconfig.json. There are also some NuGet Packages and Visual Studio extensions that can help us in bundling and minification. If you need a more advanced bundling and minification solution or your workflow requires processing beyond bundling and minification then you have the option of using third-party tools or task runners such as Gulp, Grunt or Webpack, etc.
Another important aspect is to decide whether you want to do bundling and minification at design time or run time. Design time bundling and minification will allow you to create minified files before application deployment which will reduce server load time. However, the downside is that the design time bundling and minification only work with static files and it will also increase the build complexity.
Configure Bundles using bundleconfig.json File
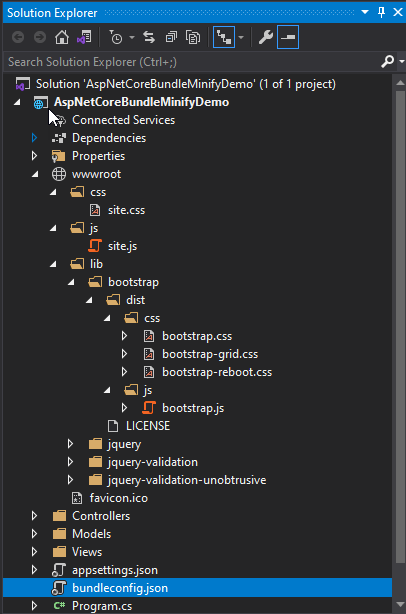
In ASP.NET Core we typically add our static files in the wwwroot folder. There is a folder css for CSS files, a folder js for JavaScript files, and a third folder lib for external libraries such as JQuery, bootstrap, etc. To start bundling and minification, the first you need is a bundleconfig.json file so let’s add this file using the standard Add New Item dialog in Visual Studio.
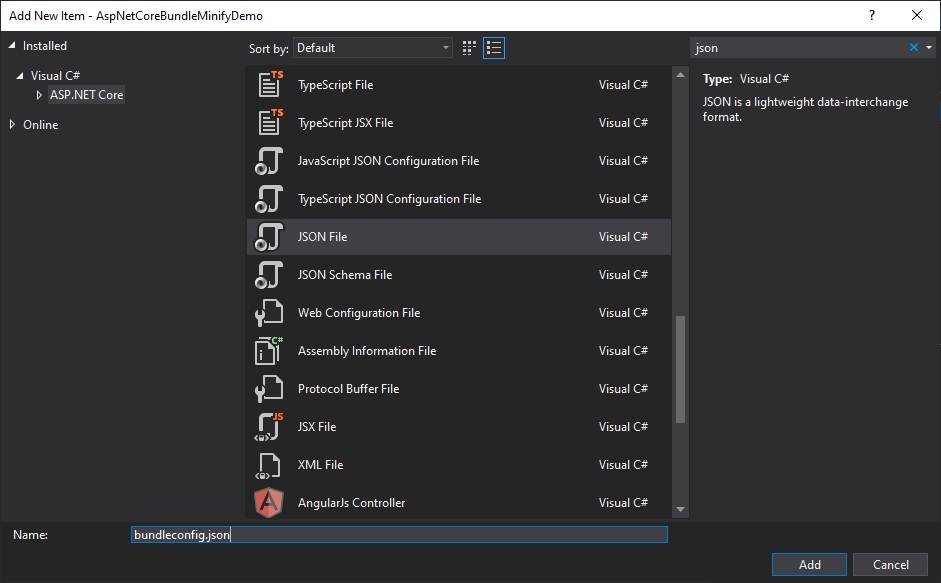
Typically, we add this file to our project root folder.
Here’s an example of how the contents of bundleconfig.json look like in the default template:
[
  {
    "outputFileName": "wwwroot/css/site.min.css",
    "inputFiles": [
      "wwwroot/lib/bootstrap/dist/css/bootstrap.css",
      "wwwroot/css/site.css"
    ]
  },
  {
    "outputFileName": "wwwroot/js/site.min.js",
    "inputFiles": [
      "wwwroot/js/site.js"
    ],
    "minify": {
      "enabled": true,
      "renameLocals": true
    },
    "sourceMap": false
  }
]
It is not very difficult to understand the JSON available in the bundleconfig.json file. There is a JSON object for each bundle we want to configure and there are some options available related to each bundle e.g. outputFileName, inputFiles etc. The default template has a single bundle configuration for custom JavaScript wwwroot/js/site.js and a single bundle configuration for custom stylesheet wwwroot/css/site.css files.
{
    "outputFileName": "wwwroot/css/site.min.css",
    "inputFiles": [
      "wwwroot/lib/bootstrap/dist/css/bootstrap.css",
      "wwwroot/css/site.css"
    ]
}
Some of the common options available are the following:
outputFileName: This is a required option and this specifies the name of the output bundle file. It can contain a relative path from the bundleconfig.json file.
inputFiles: This is an array of files we want to bundle together and it can also contain relative paths from the bundleconfig.json file. This option is not required so if you will not specify any input file, an empty output file will be generated.
minify: This is another optional setting and it specifies whether we want to enable minification or not. The default value is enabled: true.
sourceMap: This option indicates whether a source map for the bundled file should be generated or not. The default value is false.
includeInProject: This option specifies whether to add generated files to the project file. The default value is false. Let’s modify the default template and include both bootstrap and jquery into the generated bundle files. I have also renamed the output file name from site to main.
[
  {
    "outputFileName": "wwwroot/css/main.min.css",
    "inputFiles": [
      "wwwroot/lib/bootstrap/dist/css/bootstrap.css",
      "wwwroot/css/site.css"
    ]
  },
  {
    "outputFileName": "wwwroot/js/main.min.js",
    "inputFiles": [
      "wwwroot/lib/jquery/dist/jquery.js",
      "wwwroot/lib/bootstrap/dist/js/bootstrap.js",
      "wwwroot/js/site.js"
    ],
    "minify": {
      "enabled": true,
      "renameLocals": true
    },
    "sourceMap": false
  }
]
Bundling and Minification using BuildBundlerMinifier Package
In the previous section, we added the bundleconfig.json file and configure our bundles in this JSON file. If you will build your project in Visual Studio, nothing will happen and no bundles will be generated. This is because you need to install a NuGet package called BuildBundlerMinifier to let Visual Studio and .NET know that they need to build your bundles. You can install this package from the NuGet package manager available within Visual Studio.
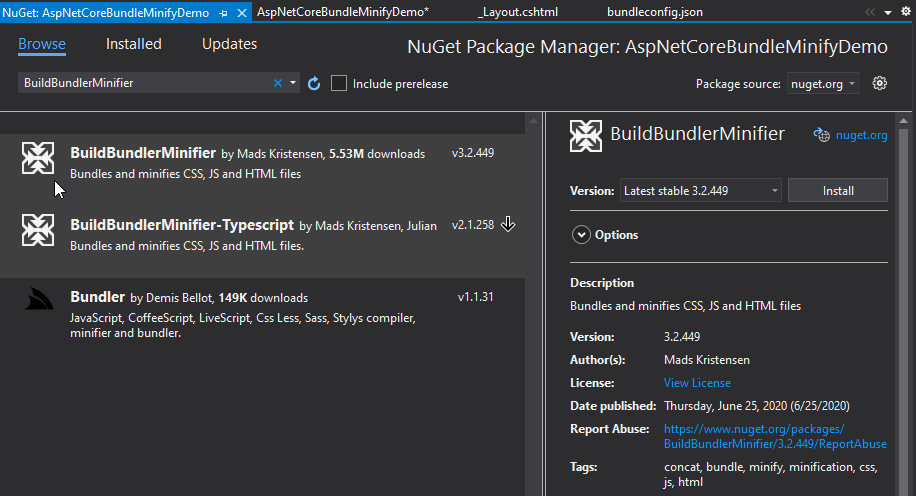
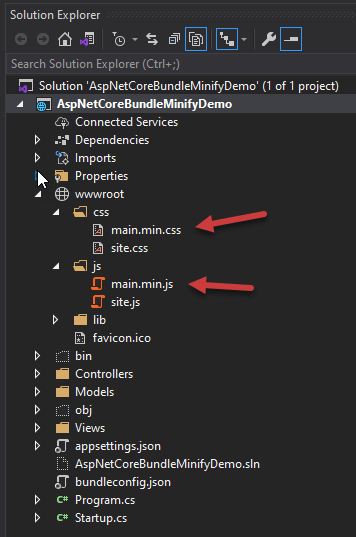
Once the package is installed, build your project and you will now see your bundled and minified files generated in the folder specified in bundleconfig.json.
Environment-based Bundling and Minification
I am sure you would like to use the non-bundles and non-minified files in the development environment because they will make your life much easier during debugging. As a best practice, you should use the bundled files only in the production environment. You can specify which file to use in which environment by using Environment Tag Helper. If you want to learn more about Tag Helpers then you can read my post A Developer Guide to ASP.NET Core Tag Helpers.
The Environment Tag Helper only renders its contents when the application is running in specific environments. The following code snippet shows how to use environment tag helper to render non-bundled files in the Development environment and bundled files when the environment is not Development such as Production or Staging. You can add the following environment tag helper in _Layout.cshtml file.
<environment include="Development">
        <link rel="stylesheet" href="~/lib/bootstrap/dist/css/bootstrap.css" />
        <link rel="stylesheet" href="~/css/site.css" />
    </environment>

    <environment exclude="Development">
        <link rel="stylesheet" href="~/css/main.min.css" asp-append-version="true" />
    </environment>
We can use same environment tag helper to render our JavaScript files as follows:
<environment include="Development">
    <script src="~/lib/jquery/dist/jquery.js"></script>
    <script src="~/lib/bootstrap/dist/js/bootstrap.js"></script>
    <script src="~/js/site.js" asp-append-version="true"></script>
</environment>

<environment exclude="Development">
    <link rel="stylesheet" href="~/js/main.min.js" asp-append-version="true" />
</environment>
If you will build and run your project now, you will see the following CSS and JavaScript files will be included on your website. This is because you are currently in the Development environment.
<link rel="stylesheet" href="/lib/bootstrap/dist/css/bootstrap.css" />
<link rel="stylesheet" href="/css/site.css" />
...
...
...
<script src="/lib/jquery/dist/jquery.js"></script>
    <script src="/lib/bootstrap/dist/js/bootstrap.js"></script>
    <script src="/js/site.js?v=4q1jwFhaPaZgr8"></script>
You can change your environment from Development to Production using the project properties dialog as shown in the following screenshot.

If you will run your project again, you will see the following bundled and minified files are included on your web page.
<link rel="stylesheet" href="/css/main.min.css?v=GEO9YOMPwE4" />
...
...
...
<link rel="stylesheet" href="/js/main.min.js?v=AHmIHyQd" />
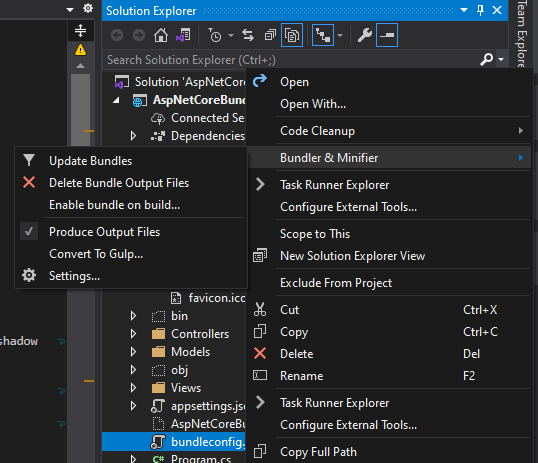
Using Bundler & Minifier Visual Studio Extension
If you are using Visual Studio, it is a good idea to automate the bundling and minification process using a Visual Studio extension Bundler & Minifier developed by Mads Kristensen. This extension allows us to select and bundle files without writing a single line of code. You can download and install this extension from Visual Studio Marketplace. You may be asked to close Visual Studio and re-open it during the installation of the extension.
Please note that if you want to use this extension then you don’t need the BuildBundlerMinifier NuGet package anymore. You can uninstall the BuildBundlerMinifier package from your project.
If you will right-click on the bundleconfig.json file, you will see some new “Bundler & Minifier” related options available to you. You can Delete Bundle Output Files, Update Bundles, etc.
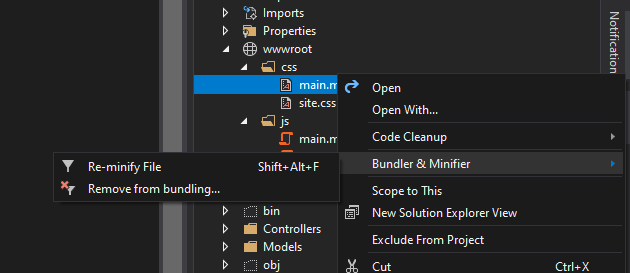
Similarly, if you will select and right-click on a single bundled file such as main.min.css, you should see the option to “Re-minify File” or an option to remove the file from bundling.
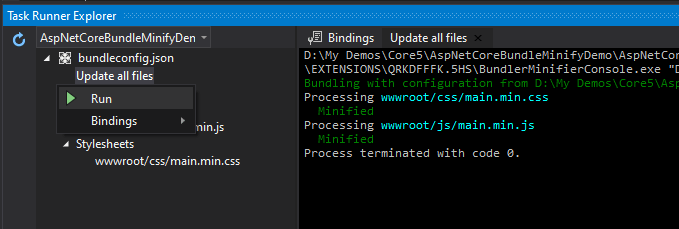
This extension will also make your bundleconfig.json file recognizable in Task Runner Explorer. This will allow us to run bundling from Task Runner Explorer manually or we can trigger bundling when certain Visual Studio events occur such as Before or After Build.
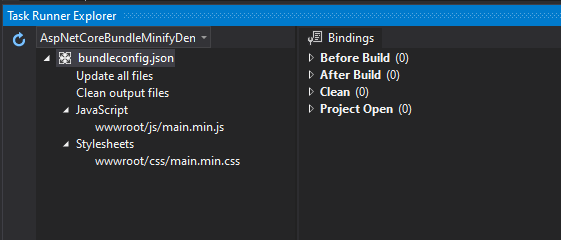
To execute the bundle from Task Runner Explorer, right-click on “Update all files” option and click “Run” option and you will see the bundled files are generated in your project Solution Explorer.
Summary
In this tutorial, I have given you a basic overview of bundling and minification. I have also shown you some packages, tools, and extensions available for handling bundling and minification in our projects. If you need more than bundling and minification such as linting, image optimization, cache busting, CDN, and so on then you can use task runners such as Gulp, Grunt, or Webpack. I will show you how to Gulp for bundling and minification in my next post.


This is a really informative article with lots of great ideas. Could you please tell me what software you use to run your incredibly fast website? I also want to create a simple website for my business, but I need help with the domain and hosting. Asphostportal reportedly has a good reputation. Are there any other choices available, and if so, what would you suggest?
That is real nice. Thanks.
I’m waiting for a real stack to use in development. JS / TS (TS preferred) + bundling (with support for importing scripts or modules), minify, transpiling (e.g babel) + code splittting + linting; saas -> css + bundling & minify. All in .NET Core MVC
You need to use task runner such as Gulp, Grunt etc. I just posted an article of using Gulp with ASP.NET Core.
https://www.ezzylearning.net/tutorial/asp-net-core-bundling-and-minification-using-gulp