In my previous post, Building Multilingual Applications in ASP.NET Core, I showed you how to configure multiple languages in an ASP.NET Core web application and how to display localized string resources from the local and shared resource files using the request culture providers. Most real-world applications have thousands of localized strings and they normally save and load the resource strings from a relational database such as SQL Server. In this post, I will show you different techniques for displaying the localized contents from the database.
Table of Contents
Create Database with Localized Strings
Before we start building our demo ASP.NET Core application, we need to create some database tables to store the languages we want to support in the application and the localized strings in each supported language.
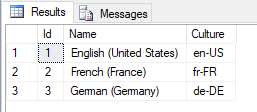
Let’s create a simple Languages table in a SQL Server database and for our demo application, add the following three languages in the Languages table along with their culture values.
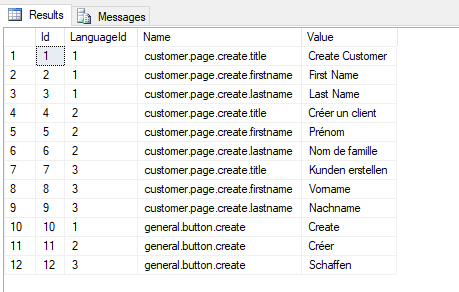
Next, create a StringResources table to store some resource strings in each of the supported languages. Notice, how the resource strings are associated with the languages using the LanguageId foreign key column. I added four strings with the same name but with different values as per their language.
Connecting Resource Strings Database using EF Core
Let’s create a new ASP.NET Core MVC web application in Visual Studio 2019 with the name AspNetCoreDatabaseLocalizationDemo. This demo application needs to connect to the SQL Server database to load and display strings on the page. We already created the database above so for this demo, I have decided to use the EF Core (Database First) approach. To set up Entity Framework, you need to download and install the following NuGet packages in the project.
- Microsoft.EntityFrameworkCore.SqlServer
- Microsoft.EntityFrameworkCore.Tools
- Microsoft.EntityFrameworkCore.Design
Next, we need to add the database connection string in the appsettings.json file. Make sure you are providing the server and database names as per your development environment.
appsettings.json
{
  "ConnectionStrings": {
    "DefaultConnection": "Server=DB_SERVER; Database=MyAppDb; Trusted_Connection=True; MultipleActiveResultSets=true"
  },
  "Logging": {
    "LogLevel": {
      "Default": "Information",
      "Microsoft": "Warning",
      "Microsoft.Hosting.Lifetime": "Information"
    }
  },
  "AllowedHosts": "*"
}
To generate the EF Core DbContext and entities, you need to run the following Scaffold-DbContext command in the Package Manager Console window within Visual Studio 2019.
Scaffold-DbContext -Connection name=DefaultConnection -Provider Microsoft.EntityFrameworkCore.SqlServer -OutputDir "Models" -ContextDir "Data" -Context "MyAppDbContext" -NoOnConfiguring
The following command will generate a MyAppDbContext class in the Data folder and two model classes Language and StringResource in the Models folder. The StringResource class will look something like the following code snippet.
StringResource.cs
public partial class StringResource
{
    public int Id { get; set; }
    public int? LanguageId { get; set; }
    public string Name { get; set; }
    public string Value { get; set; }

    public virtual Language Language { get; set; }
}
The Language class will look like the code snippet below.
Language.cs
public partial class Language
{
    public Language()
    {
        StringResources = new HashSet<StringResource>();
    }

    public int Id { get; set; }
    public string Name { get; set; }
    public string Culture { get; set; }

    public virtual ICollection<StringResource> StringResources { get; set; }
}
Finally, we need to configure the EF Core in the ConfigureServices method of the Startup.cs file as shown in the code snippet below.
Startup.cs
services.AddDbContext<MyAppDbContext>(options =>
    options.UseSqlServer(Configuration.GetConnectionString("DefaultConnection")));
If you want to learn more about EF Core (Database First) then you can read my post Data Access in ASP.NET Core using EF Core (Database First). I also have a post Data Access in ASP.NET Core using EF Core (Code First) in case you want to learn about EF Core (Code First) approach.
Implement Application Services for Localization
We are now ready to implement the application services of our demo application. These services will allow us to communicate with the database using the EF Core DbContext. We can also put the business logic in these services as per our application requirements. Let’s create the following ILanguageService interface in the Services folder and add the following two methods in the interface.
ILanguageService.cs
public interface ILanguageService
{
    IEnumerable<Language> GetLanguages();
    Language GetLanguageByCulture(string culture);
}
Next, add the following LanguageService class in the Services folder and implement the above ILanguageService interface. We are injecting the MyAppDbContext in the LangaugeService class constructor. The GetLanguages method will return all supported languages and the GetLanguageByCulture method will return a single language according to the value of the culture parameter.
LanguageService.cs
public class LanguageService : ILanguageService
{
    private readonly MyAppDbContext _context;

    public LanguageService(MyAppDbContext context)
    {
        _context = context;
    }

    public IEnumerable<Language> GetLanguages()
    {
        return _context.Languages.ToList();
    }

    public Language GetLanguageByCulture(string culture)
    {
        return _context.Languages.FirstOrDefault(x =>
            x.Culture.Trim().ToLower() == culture.Trim().ToLower());
    }
}
Next, create the following ILocalizationService interface in the Services folder and declare a single method GetStringResource that will return the StringResource object.
ILocalizationService.cs
public interface ILocalizationService
{
    StringResource GetStringResource(string resourceKey, int languageId);
}
Next, add the following LocalizationService class in the Services folder and implement the above ILocalizationService interface. The GetStringResource method will return the resource string whose name will match with the resourceKey and the language will match with the languageId parameter.
LocalizationService.cs
public class LocalizationService : ILocalizationService
{
    private readonly MyAppDbContext _context;

    public LocalizationService(MyAppDbContext context)
    {
        _context = context;
    }

    public StringResource GetStringResource(string resourceKey, int languageId)
    {
        return _context.StringResources.FirstOrDefault(x =>
                x.Name.Trim().ToLower() == resourceKey.Trim().ToLower()
                && x.LanguageId == languageId);
    }
}
Finally, we need to register both services in the ConfigureServices method of the Startup.cs file as shown in the code snippet below.
Startup.cs
services.AddScoped<ILanguageService, LanguageService>();
services.AddScoped<ILocalizationService, LocalizationService>();
Configuring Localization in ASP.NET Core
In my previous post, Building Multilingual Applications in ASP.NET Core I showed you how to configure localization in an ASP.NET Core web application. We need to do a similar configuration in the demo application we created in this post but this time, we will not hard code the supported languages but will load and configure the supported languages from the backend database.
To configure localization middleware, open the Startup.cs file and call the following AddLocalization method. The AddLocalization method adds the localization services to the services container.
services.AddLocalization();
Next, we need to call the AddViewLocalization method that will add localization support in razor views.
services.AddControllersWithViews()
    .AddViewLocalization();
Next, we need to resolve the ILanguageService object using the service provider GetRequiredService method and once we have the service reference, we need to call the GetLanguages method that will fetch all the supported languages from the database. We then converted the languages into an array of CultureInfo objects so that we can assign these cultures to SupportedCultures and SupportedUICultures properties. We are also setting en-US as the default request culture using the DefaultRequestCulture property.
var serviceProvider = services.BuildServiceProvider();
var languageService = serviceProvider.GetRequiredService<ILanguageService>();
var languages = languageService.GetLanguages();
var cultures = languages.Select(x => new CultureInfo(x.Culture)).ToArray();

services.Configure<RequestLocalizationOptions>(options =>
{
    var englishCulture = cultures.FirstOrDefault(x => x.Name == "en-US");
    options.DefaultRequestCulture = new RequestCulture(englishCulture?.Name ?? "en-US");

    options.SupportedCultures = cultures;
    options.SupportedUICultures = cultures;
});
The final configuration step is to call the UseRequestLocalization method to enable the localization middleware in the Configure method of the Startup.cs file.
app.UseRequestLocalization();
Switching Language in ASP.NET Core Applications
We already configured the supported languages in our application. We need to allow application users the option to switch the application language at runtime. We can implement a simple dropdown control on top of the page that will display all the supported languages to the user.
Let’s open the _Layout.cshtml file and add the following code snippet on top of the file. The following code will load the supported cultures and will convert them into a list of SelectListItem objects.
_Layout.cshtml
@using Microsoft.AspNetCore.Builder
@using Microsoft.AspNetCore.Localization
@using Microsoft.Extensions.Options

@inject IOptions<RequestLocalizationOptions> LocOptions

@{
    string returnUrl = ViewContext.HttpContext.Request.Path;

    var requestCulture = Context.Features.Get<IRequestCultureFeature>();
    var cultureItems = LocOptions.Value.SupportedUICultures
        .Select(c => new SelectListItem { Value = c.Name, Text = c.DisplayName })
        .ToList();
}
Next, we need to add a form in the top navigation bar that will bind the HTML select dropdown with the cultures using the asp-items property. The current culture name is also bound with the asp-for property to make sure the current culture is pre-select automatically on page refresh. I also used the onchange event to automatically submit the form to the ChangeLanguage action method that will do all the magic for us.
<li class="nav-item">
    <form asp-action="ChangeLanguage" asp-controller="Home" method="post">
        <input type="hidden" id="returnUrl" name="returnUrl" value="@returnUrl" />
        <select id="culture"
                name="culture"
                class="form-control"
                onchange="this.form.submit();"
                asp-items="cultureItems"
                asp-for="@requestCulture.RequestCulture.UICulture.Name">
        </select>
    </form>
</li>
The ChangeLanguage action method of the HomeController class will receive the culture and the returnUrl as a parameter and its main job is to make a cookie with the currently selected culture and append it in the HTTP response cookies collection.
[HttpPost]
public IActionResult ChangeLanguage(string culture, string returnUrl)
{
    Response.Cookies.Append(
        CookieRequestCultureProvider.DefaultCookieName,
        CookieRequestCultureProvider.MakeCookieValue(new RequestCulture(culture)),
        new CookieOptions
        {
            Expires = DateTimeOffset.UtcNow.AddDays(7)
        }
    );

    return LocalRedirect(returnUrl);
}
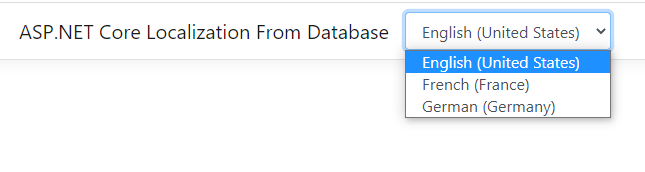
If you will run the application, you will see the page with all the supported languages we loaded from the database and configured within our application.
Reading Localized Strings in Controllers
So far, we set up a database to store localized strings, we configured localization in our project and we also added functionality to switch languages at runtime. It is now time to read the localized strings from the database and display them on the page. There are many ways you can achieve this task. If you are in a Controller class and you want to read a localized string you can inject the ILocalizationService in the constructor and call the GetStringResource method to read any string from the database.
You may want to read resource strings in multiple Controllers throughout the project so we can make our life easy by adding this logic in a BaseController class and then inherit all the controllers from the BaseController class. Let’s create a BaseController class in our project Controllers folder and add the following code to it.
BaseController.cs
public class BaseController : Controller
{
    private readonly ILanguageService _languageService;
    private readonly ILocalizationService _localizationService;

    public BaseController(ILanguageService languageService, ILocalizationService localizationService)
    {
        _languageService = languageService;
        _localizationService = localizationService;
    }

    public HtmlString Localize(string resourceKey, params object[] args)
    {
        var currentCulture = Thread.CurrentThread.CurrentUICulture.Name;

        var language = _languageService.GetLanguageByCulture(currentCulture);
        if (language != null)
        {
            var stringResource = _localizationService.GetStringResource(resourceKey, language.Id);
            if (stringResource == null || string.IsNullOrEmpty(stringResource.Value))
            {
                return new HtmlString(resourceKey);
            }

            return new HtmlString((args == null || args.Length == 0)
                ? stringResource.Value
                : string.Format(stringResource.Value, args));
        }

        return new HtmlString(resourceKey);
    }
}
In the above BaseController class, we first injected the required services in the constructor of the class and then defined a Localize method. The Localize method takes a parameter resourceKey along with optional arguments and returns the string from the database by wrapping it in the HtmlString. If no matching string resource is found in the database, the method simply returns the resourceKey.
Next, we need to inherit the HomeController class from the BaseController class and we can access resource strings from the database using the Localize method as shown in the example below.
HomeController.cs
public class HomeController : BaseController
{
    public HomeController(ILanguageService languageService, ILocalizationService localizationService)
        : base(languageService, localizationService)
    {

    }

    public IActionResult Index()
    {
        ViewData["Title"] = Localize("customer.page.create.title");

        return View();
    }
}
We can display the ViewData[“Title”] in the Razor view page as follows:
<div>
    <h3>@ViewData["Title"]</h3>
</div>
If you will run your project now, you will see the heading and the title of the page in the currently selected language as shown below. Try to change the language from the dropdown and you will see the heading in the selected language.
Reading Localized Strings in Razor Views
If you have a large page with a lot of localized strings, then it is not a good idea to put so many strings in the ViewData dictionary and use them in a Razor view. We need a quick and more productive way to access these localize strings in our views. This problem can be solved with the help of a custom base view page. Let’s create a CustomBaseViewPage in the project and add the following code to it.
CustomBaseViewPage.cs
public abstract class CustomBaseViewPage<TModel> : Microsoft.AspNetCore.Mvc.Razor.RazorPage<TModel>
{
    [RazorInject]
    public ILanguageService LanguageService { get; set; }

    [RazorInject]
    public ILocalizationService LocalizationService { get; set; }

    public delegate HtmlString Localizer(string resourceKey, params object[] args);
    private Localizer _localizer;

    public Localizer Localize
    {
        get
        {
            if (_localizer == null)
            {
                var currentCulture = Thread.CurrentThread.CurrentUICulture.Name;

                var language = LanguageService.GetLanguageByCulture(currentCulture);
                if (language != null)
                {
                    _localizer = (resourceKey, args) =>
                    {
                        var stringResource = LocalizationService.GetStringResource(resourceKey, language.Id);

                        if (stringResource == null || string.IsNullOrEmpty(stringResource.Value))
                        {
                            return new HtmlString(resourceKey);
                        }

                        return new HtmlString((args == null || args.Length == 0)
                            ? stringResource.Value
                            : string.Format(stringResource.Value, args));
                    };
                }
            }
            return _localizer;
        }
    }
}

public abstract class CustomBaseViewPage : CustomBaseViewPage<dynamic>
{}
The CustomBaseViewPage class inherits from the ASP.NET Core RazorPage<TModel> class. The services are injected in the class using the [RazorInject] attributes as follows.
[RazorInject]
public ILanguageService LanguageService { get; set; }

[RazorInject]
public ILocalizationService LocalizationService { get; set; }
Next, we created a delegate that has similar parameters we saw in our Localize method in the BaseController above.
public delegate HtmlString Localizer(string resourceKey, params object[] args);
The actual magic is happening inside the Localize property which has almost similar code we defined in the Localize method. We fetched the current language from the database using the GetLanguageByCulture method and then fetched the resource string using the GetStringResource method.
To tell ASP.NET Core that you want to inherit all Razor Views from the above CustomBaseViewPage, you need to add the following line in Views\_ViewImports.cshtml file.
@inherits CustomBaseViewPage<TModel>
Now, we can access any localized resource string in any Razor view using the Localize property as follows:
@{
    ViewData["Title"] = Localize("customer.page.create.title");
}

<div>
     <h3>@Localize("customer.page.create.title")</h3>
</div>
Run the project once again and you should see the same heading and title string coming from the database using the Localize property.
Let’s complete the example by creating a simple create customer page. Add the following CustomerModel class inside the Models folder.
CustomerModel.cs
public class CustomerModel
{
    public string FirstName { get; set; }
    public string LastName { get; set; }
}
Add the following HTML markup in the Index.cshtml page to create a simple customer form. I am not writing the code to submit the customer form and saving customer data to the database because it is not the focus of this post. If you want to learn about saving data in the database, then you can read some of my other posts that talk about CRUD operations in ASP.NET Core.
Index.cshtml
@model CustomerModel


<div class="pt-5">
    <h3>@Localize("customer.page.create.title")</h3>
    <br/>
    <form asp-controller="Customer" asp-action="Create" method="post">
        <div class="form-group row">
            <div class="col-md-2">
                <label>@Localize("customer.page.create.firstname")</label>
            </div>
            <div class="col-md-4">
                <input asp-for="FirstName" class="form-control" />
            </div>
        </div>
        <div class="form-group row">
            <div class="col-md-2">
                <label>@Localize("customer.page.create.lastname")</label>
            </div>
            <div class="col-md-4">
                <input asp-for="LastName" class="form-control" />
            </div>
        </div>

        <div class="form-group row">
            <div class="col-md-4 offset-2">
                <input type="submit"
                    class="btn btn-primary"
                    value="@Localize("general.button.create")" />
            </div>
        </div>
    </form>
</div>
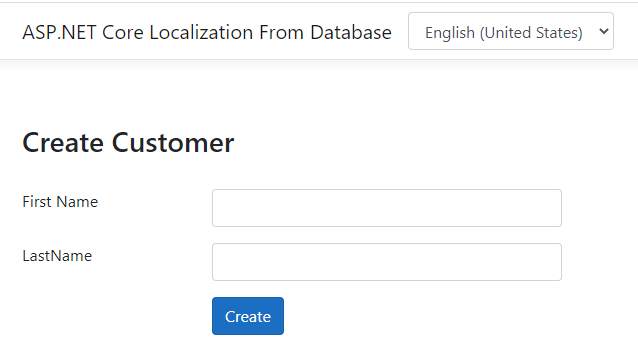
Run the application once again and you should see a page similar to the following.
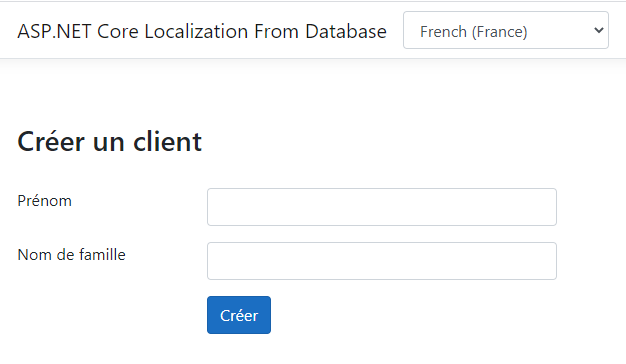
Try to change the language to French and the entire form will update instantly to display everything in French.
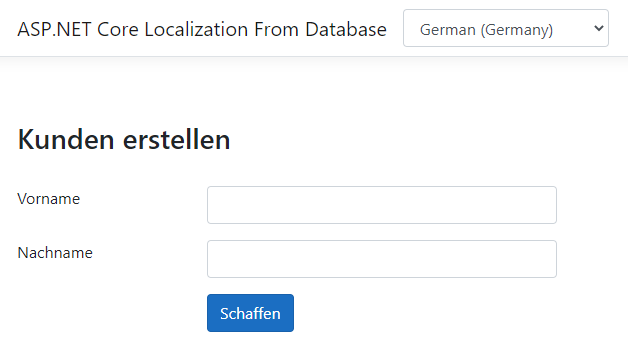
If you will change the language to German, the entire form will update once again to the German language strings loaded from the database.
Summary
In this post, I have shown you some basic techniques to store, query, and display localized strings in an ASP.NET Core application. Please keep in mind that you can also extend the built-in IStringLocalizer and IStringLocalizerFactory to implement even more sophisticated localization solutions. I hope you have found this post useful. If you have any comments or suggestions, please leave your comments below. Don’t forget to share this tutorial with your friends or community. You can also download the complete source code of this post using the Download Source Code button shown at the start of this post.


Hi, when I inherit CustomBaseViewPage in _ViewImports, I get the error
“CS0103: The name ‘PageContext’ does not exist in the current context”
in all my cshtml views
any suggestion?
Hi Anwar,
How can I use this approach on Data Annotations Models,
Thanks a lot amazing and usefull article
What a great tutorial! Thank you!
My only question is: is there an easy way to allow the culture to be shown in the route?
ie.
/en/index
/ru/index
/fr/index
etc..?
Great job! You’ve given me a way to simplify my project…
I’ve only a request. Is there a way to apply localization to Identity Area (Razor Pages)?
It doesn’t matter.
I’ve found an Identity sample project in MVC (https://github.com/aspnet/Identity) and said goodbye to Area/Identity in razor pages, so your code work like a charm.
Thank you very much!!!
Awesome Tutorial – almost exactly what I needed. Any idea how to make this work with straight Asp Core Razor pages (non-MVC)? Not sure how to link a _Layout page to a HomeController in a non-MVC app. I assume some of the logic needs to be moved into the MiddleWare – but what and where?
Hello
it’s nice tutorial.
I see in the comment that some people already ask how to use it with the DataAnnotation but without answer.
Is it possible to an idea or way to use in the DataAnnotation
I just wrote a post about implementing a localized Data Annotation Attribute in ASP.NET Core
https://www.ezzylearning.net/tutorial/localizing-data-annotation-attributes-in-asp-net-core
Hi
How can I use this for DataAnnotations.
For example
[Display(Name = nameof(Resource.Title))]
[Required(ErrorMessageResourceType = typeof(DataAnnotationsShareResource),
ErrorMessageResourceName = nameof(DataAnnotationsShareResource.Required))]
public string Title{ get; set; }
Read my post about implementing a localized Data Annotation Attribute in ASP.NET Core
https://www.ezzylearning.net/tutorial/localizing-data-annotation-attributes-in-asp-net-core
Hello,
I get a: System.Globalization.CultureNotFoundException: ‘Culture is not supported. (Parameter ‘name’)
en-US is an invalid culture identifier.’
on: var cultures = languages.Select(x => new CultureInfo(x.Culture)).ToArray();
Do you have any idea why this happens? I have searched the internet for hours and tried to fix this myself, but I can’t get it fixed 🙁 ..
I am so sorry
I am kinda new to databases and I didn’t know that CHAR(8) would always fill to 8 chars
My god I feel so stupid right now. Thank you for this awesome guide though! ..
How to use in viewmodels, for example error messages in validations
Thank you so much for this solution.
How use in class model, for example in DataAnnotations
I just wrote a post about implementing a localized Data Annotation Attribute in ASP.NET Core
https://www.ezzylearning.net/tutorial/localizing-data-annotation-attributes-in-asp-net-core
Amazing tutorial! Thanks and congrats.
Can you point out some advantages in using localization this way as opposed to the traditional way with the resources file?
1. If you want to support a new language in your application, you don’t need to create a new resource file. You can simply add a new language and its related resource strings in database from an admin site.
2. Database can easily manage thousands of resource strings in multiple languages.
3. It is easy to provide an admin interface with basic CRUD operations on Languages and Resource Strings table rather than manually updating resource files.
What happened with the SQL read performance , when this kind of localization have thousand of users ?
You can use memory cache or Redis cache to improve performance. You don’t need to query resource strings from database all the time.