In my previous tutorial A Beginner’s Guide to GraphQL, I gave an overview of GraphQL and also covered some of the major building blocks required to implement GraphQL APIs. In this tutorial, I will show you how to write and test GraphQL APIs in ASP.NET Core. You will also learn how to integrate GraphQL with Entity Framework Core to fetch data from the SQL Server database and serve it to GraphQL clients in JSON format.
Table of Contents
How to use GraphQL in ASP.NET Core?
GraphQL is not a built-in part of ASP.NET Core so we need to install some third-party libraries or packages to use GraphQL in ASP.NET Core. There are several options available but two of the most popular libraries are GraphQL .NET and Hot Chocolate. Both libraries are very powerful and support a vast array of features but in the recent past, Hot Chocolate is gaining a lot of momentum due to its performance and advanced features.
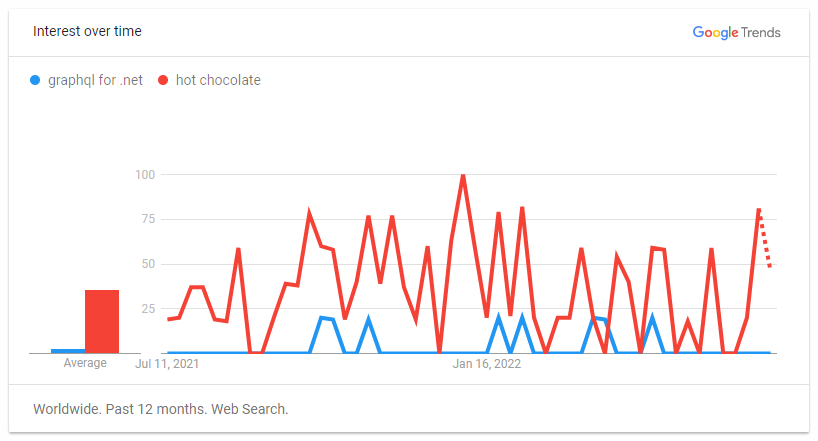
Hot Chocolate is an open-source GraphQL library that is compliant with the latest GraphQL specs. It takes away a lot of the complexity of building a full-fledge GraphQL server and lets you focus on writing your APIs. It is also very simple to set up and configure and removes the clutter from creating GraphQL schemas. Hot Chocolate comes with integration to the ASP.NET Core endpoints API and the middleware implementation follows the current GraphQL specification over HTTP. Another amazing feature of Hot Chocolate is that it has a built-in tool called Banana Cake Pop that makes it very easy and enjoyable to test our GraphQL server implementation.
Setup an ASP.NET Core Web Application
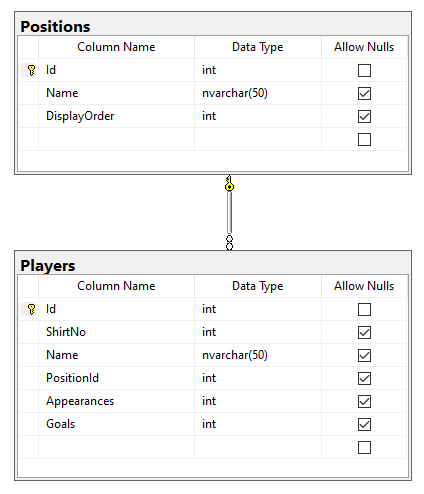
For this tutorial, I will use Visual Studio 2022, Entity Framework Core, and ASP.NET Core with .NET 6.0. I will be using a database name FootballDb that has the following tables in it.
- Positions – This table will store different positions e.g. Goalkeeper, Defender, Midfielder, etc.
- Players – This table will store the data about football players. It has columns such as ShirtNo, Name, PositionId (FK), Appearances, Goals, etc.
Let’s create a new ASP.NET Core Web Application and make sure the application is building and running fine in the browser. Next, we need to install Entity Framework Core and Hot Chocolate packages so open the NuGet package manager or Package Manager Console in Visual Studio 2022 and search and install the following packages in the project.
We are using an existing SQL Server database that’s why we want to use EF Core (database first) approach to reverse engineer the entity models and DbContext. For this purpose, we can use the Scaffold-DbContext command which has many options to customize the generated code. You can read more about EF Core (database first) in my other post.
Specify the connection string in the appsettings.json file as follows:
"ConnectionStrings": {
    "DefaultConnection": "Server=YourDbServerName; Database=FootballDb;
      Trusted_Connection=True; MultipleActiveResultSets=true"
  }
Open the Package Manager Console of the project and copy/paste the following command and press Enter. The following command will generate entity classes in the Models folder and SportsDbContext class in the Data folder.
Scaffold-DbContext -Connection "Server=.; Database=FootballDb;
Trusted_Connection=True; MultipleActiveResultSets=true;"
-Provider Microsoft.EntityFrameworkCore.SqlServer -OutputDir "Models"
-ContextDir "Data" -Context "SportsDbContext" –NoOnConfiguring
Configure the Entity Framework Core provider in Program.cs file as shown below:
builder.Services.AddDbContext<SportsDbContext>(options =>
  options.UseSqlServer(builder.Configuration.GetConnectionString("DefaultConnection")));
Implementing Business Service
Create a Services folder in the project and create the following IPlayersService interface. The interface can have several methods related to players but for this tutorial, we only need to focus on one method that will return the list of players along with their position information.
IPlayersService.cs
public interface IPlayerService
{
    Task<IEnumerable<Player>> GetPlayersAsync();
}
Create a PlayersService class in the Services folder and implement the IPlayersService interface on the class. You need to inject SportsDbContext into the service class to perform database operations. The service has only one method GetPlayersAsync that returns the list of players along with the position information.
PlayersService.cs
public class PlayerService : IPlayerService
{
    private readonly SportsDbContext _context;

    public PlayerService(SportsDbContext context)
    {
        _context = context;
    }

    public async Task<IEnumerable<Player>> GetPlayersAsync()
    {
        return await _context.Players
            .Include(x => x.Position)
            .ToListAsync();
    }
}
You also need to register the above service in the Program.cs file as follows so that we can inject this service using the ASP.NET Core built-in dependency injection feature.
builder.Services.AddScoped<IPlayerService, PlayerService>();
Writing GraphQL Queries in ASP.NET Core
We are now ready to create our first GraphQL Query. Create an Api folder in the project and then add the following Query class in the folder. The class has only one method called GetPlayersAsync in which we are injecting our IPlayerService interface. Inside the method, we are calling the GetPlayersAsync method of IPlayerService which returns the list of players from the database.
public class Query
{
    public async Task<IEnumerable<Player>> GetPlayersAsync(
        [Service] IPlayerService playerService)
    {
        return await playerService.GetPlayersAsync();
    }
}
In ASP.NET Core, we normally inject services through the constructor of the class and you may have already noticed that we haven’t used the typical constructer-based dependency injection approach in the above Query class. We are injecting IPlayerService directly into the method using the [Service] attribute. This is the preferred way of resolving services in Hot Chocolate as most of the time the services only have a request lifetime.
It is also important to note that if we are using Hot Chocolate with ASP.NET Core then we do not need to think about setting up dependency injection because it is already done for us. Hot Chocolate support dependency injection via the IServiceProvider interface and this service provider is automatically passed in with the request.
Configuring GraphQL Server in ASP.NET Core
Now we have defined a Query type that exposes the data and types, e.g. Player, Position, etc. we need to build our GraphQL server and you can do this by calling the AddGraphQLServer method in the Program.cs file as follows.
builder.Services
    .AddGraphQLServer()
    .AddQueryType<Query>();
The AddGraphQLServer method returns an IRequestExecutorBuilder, which has many extension methods, similar to an IServiceCollection, that can be used to configure the GraphQL schema. In the above example, we are specifying the Query type that should be exposed by our GraphQL server.
Once the necessary services are configured, we need to expose the GraphQL server to an endpoint. Hot Chocolate comes with a set of ASP.NET Core middleware used for making the GraphQL server available via HTTP and WebSockets. You can simply call the MapGraphQL method in Program.cs file to register the middleware a standard GraphQL server requires.
app.MapGraphQL();
The middleware registered by MapGraphQL makes the GraphQL server available at /graphql per default. We can customize the endpoint at which the GraphQL server is hosted like the following.
app.MapGraphQL("/my/graphql/endpoint");
Accessing the endpoint from a browser will load the GraphQL IDE Banana Cake Pop which is an amazing tool to test GraphQL queries during development.
Browsing GraphQL Schema and Types
Please keep in mind that you can use your favorite API testing tools such as Postman or Insomnia for executing GraphQL queries but as I mentioned earlier that Hot Chocolate has a built-in tool Banana Cake Pop that makes it very easy to test GraphQL APIs. You can now run the project and If you have set up everything correctly, you should be able to see the GraphQL Banana Cake Pop tool in the browser at http://localhost:5182/graphql (the port might be different for you) endpoint.
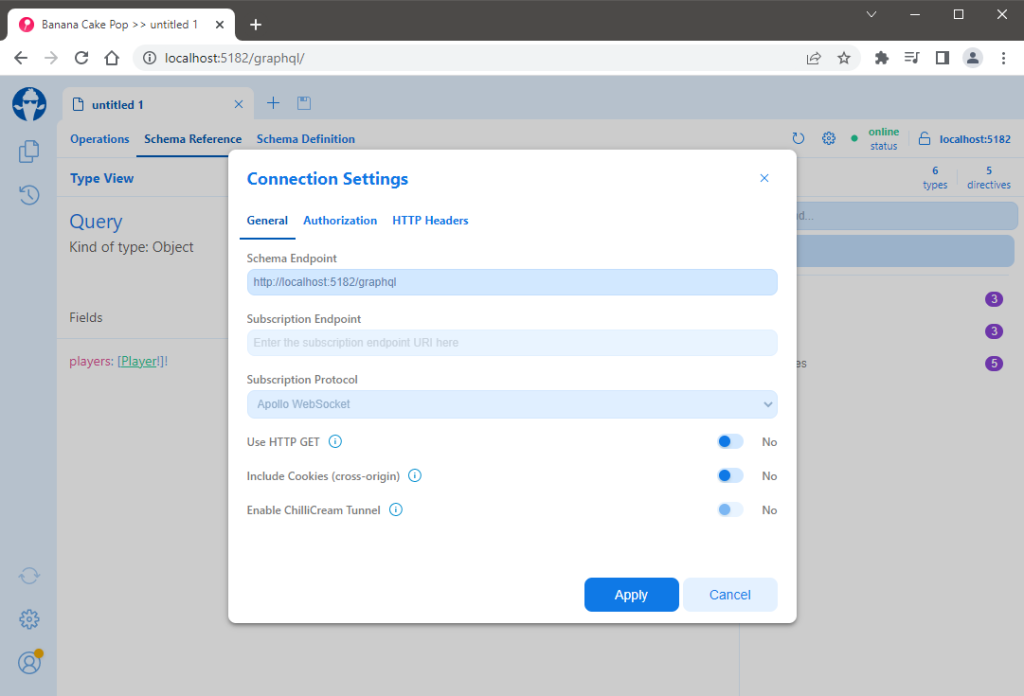
Click the Create document button and you will be presented with a Connection Settings dialog. Make sure the Schema Endpoint input field has the correct URL under which our GraphQL endpoint is available. Click the Apply button if everything seems correct to you.
Now you should be seeing the full-fledge GraphQL editor as shown below. The green-colored online status on the top right corner is what tells us that the GraphQL server is set up correctly and we are ready to browser our GraphQL schema and run our queries.
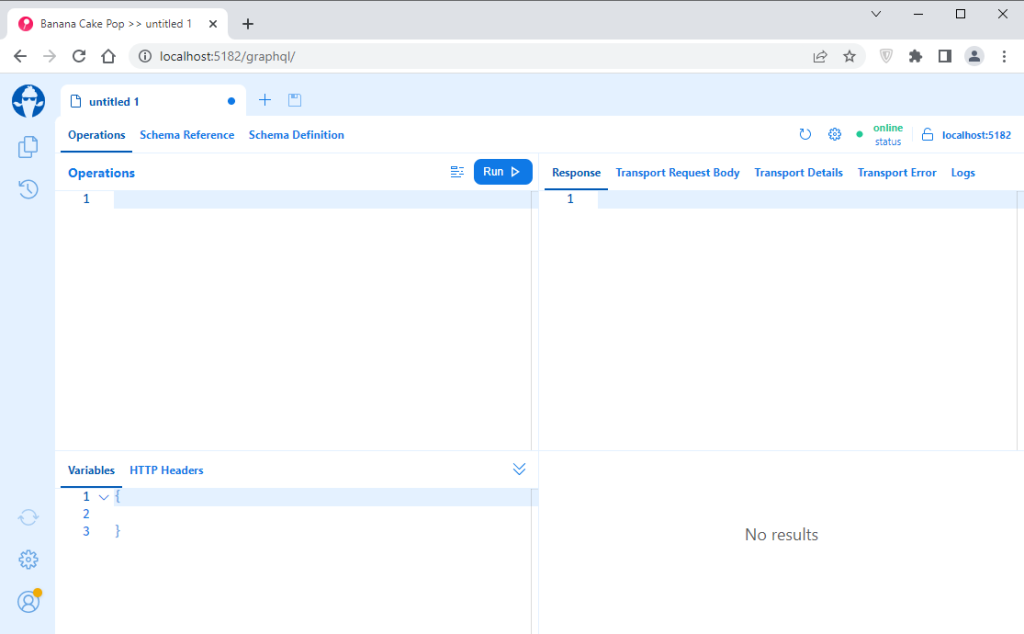
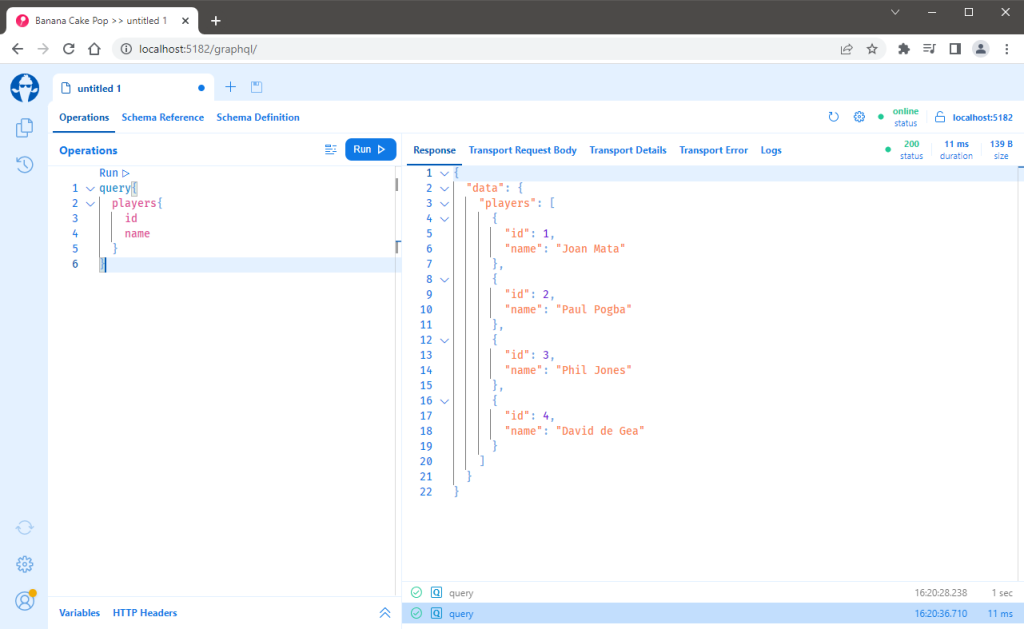
The above editor is split into four panes. The top-left pane is where we enter the queries and the result will be displayed in the top-right pane. Variables and headers can be modified in the bottom left pane and recent queries can be viewed in the bottom right pane. You can also click the Schema Reference tab next to the Operations tab to view details of your schema.
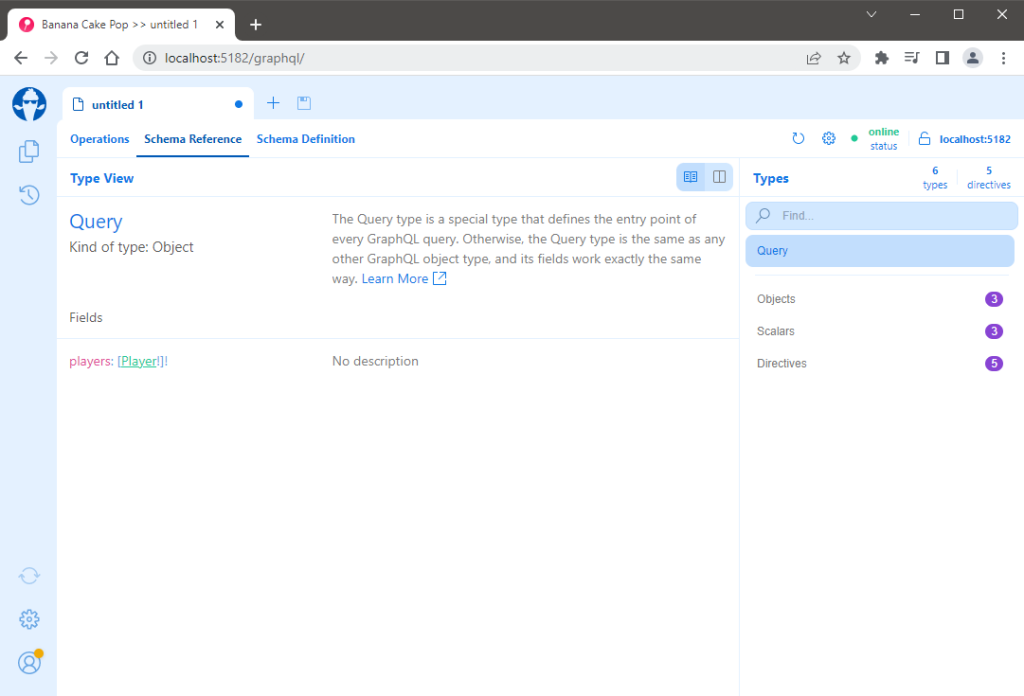
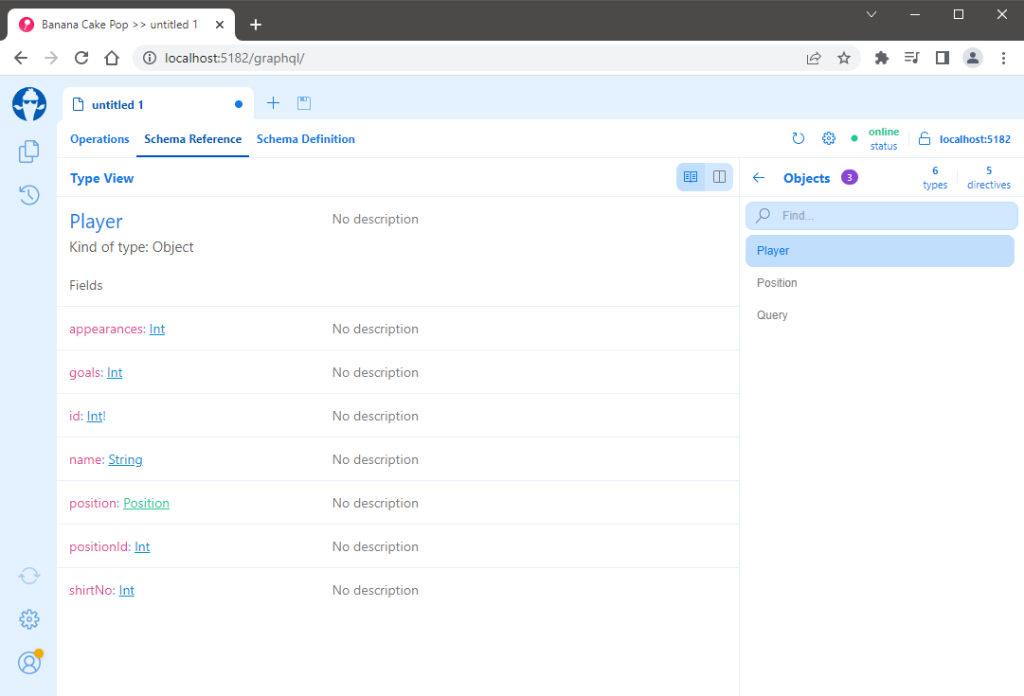
You can also view the types and their fields exposed by the GraphQL schema as shown in the following screenshot.
Running GraphQL Queries in ASP.NET Core
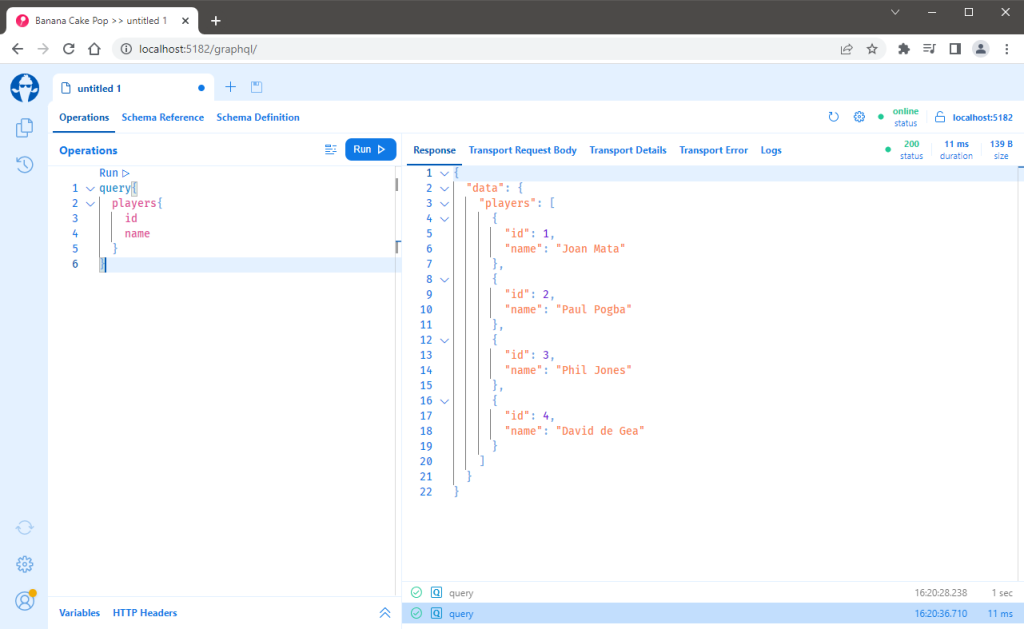
It is now time to write and send our first GraphQL query to the server. Please write the following query into the left pane of the editor and hit the Run button. The results of your query should be displayed in the right pane in JSON format.
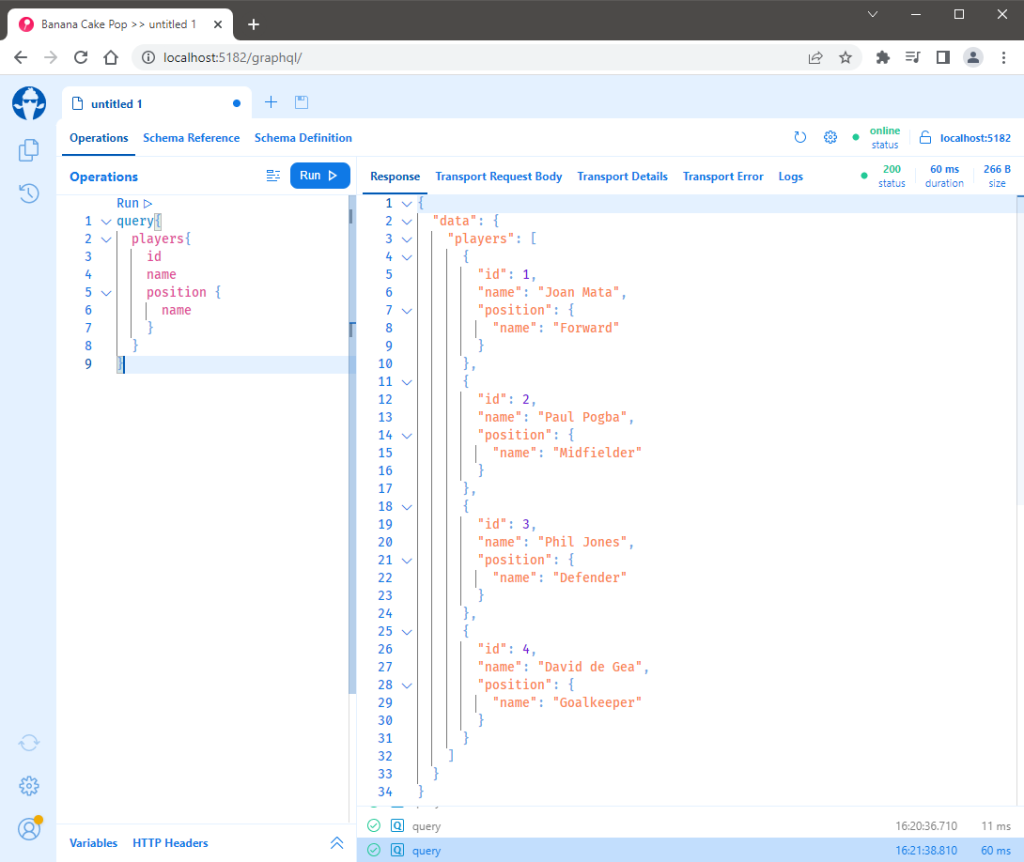
Let’s modify the query and this time also includes the position information. Run the query and you should be able to see that every player now has the position name in the JSON response.
Summary
Congratulations, we have built our first GraphQL server using the Hot Chocolate library and you can see that we just wrote a few lines of code to set up everything. If you want to learn more about the GraphQL Hot Chocolate library, I will recommend this guide that walks you through the basic concepts of GraphQL. You can also jump straight into our documentation and learn more about Defining a GraphQL schema.




how to i set parameters