
Many web designers try to impress their website visitors with animated flash buttons or crazy JavaScript navigation menus, but they forget the old HTML Image maps. Image maps are images with clickable areas called hotspots, which allow a user to navigate to another page or website. Following the same old HTML concept of image maps, Microsoft introduced the server side ImageMap control for ASP.NET developers that let you convert any image into a navigation menu by just setting few properties. In this tutorial, I will show you how to use ASP.NET server side ImageMap control with Rectangular, Circular or even free form Polygon style hotspots.
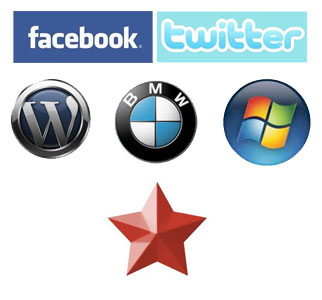
Before you start this tutorial, you need to make sure that you have an image ready which you want to use as ImageMap. It can be a toolbar image created in any graphic tool such as Photoshop, or it can be a map of your or home or country. I have created the following image, especially for this tutorial to show you all types of hotspots ASP.NET ImageMap control supports. You can save this image on your desktop and use it for playing with ASP.NET ImageMap control.
To get started, create an ASP.NET website project in Visual Studio and add the image in your project root or images sub directory. Next, drag the ImageMap control on the page from the left hand side toolbox. Set the ImageUrl property of the control and you will be able to see your image appear on the designer area of the page. If you see the properties of this control in the properties window, you will notice that all the basic properties like BackColor, BorderColor, etc. are available along with ImageAlign and AlternateText properties to fine tune your image look and feel on the page. The properties which need more explanations are HotSpotMode and HotSpots.
HotSpotMode property let you specify the default click behavior of the hotspot inside the ImageMap control. It can be set to one of the followings:
Inactive: This value means that HotSpots does not have any behavior so nothing will happen if the user will click on image.
Navigate: This value allows you to navigate user to any URL.
PostBack: This property allows you to generate post back behavior on user clicks and very useful if you want to execute code on the server side based on the user clicks.
NotSet: This property checks the behavior set by the HotSpotMode property and if none of the above three values are set then all HotSpots navigate to a URL.
Next you need to define the hotspots to divide your image into clickable areas. If you will click the ellipse next to the HotSpots property in the properties window you will see the following HotSpot Collection Editor dialog appear on the screen that lets you specify different types of hotspots. You can add Rectangle, Circle or Polygon hotspots to your image depending upon your image and requirement.
All these hotspots types have some properties to customize the hotspot region and behavior. You can specify Left, Top, Right and Bottom for Rectangle hotspot and X, Y and Radius properties for Circle hotspot. The Polygon hotspot requires a serious of X and Y coordinates to create a free form hotspot. All these hotspots types also have HotSpotMode property available to specify their click behavior individually so you can have one hotspot that navigates the user to another page and other hotspot which generate postback to the server and yet another hotspot which does nothing when user click on it. You also have PostBackValue property to send different values to the server on postback. You also have Target property to open the URL in a new window if you want and other basic properties such as NavigateUrl to specify the URL to navigate to on user click and AlternateText that will show a nice tool tip when the user will move the mouse over that particular hotspot.
In the sample image I used in this tutorial, the facebook and twitter logos will use navigate behavior while the other four will generate postback to the server. The facebook and twitter logos will use Rectangle hotspots, WordPress, BMW and Windows logos will use Circle hotspots and the star will show you how to use Polygon hotspot. Following is the complete HTML markup used in this tutorial.
<asp:ImageMap ID="ImageMap1" runat="server" ImageUrl="~/images/aspnet_imagemap.jpg"
   OnClick="ImageMap1_Click">

   <asp:RectangleHotSpot AlternateText="Facebook" Bottom="62"
      HotSpotMode="Navigate" Left="14" NavigateUrl="http://www.facebook.com"
      Right="152" Target="_blank" Top="11" />

   <asp:RectangleHotSpot AlternateText="Twitter" Bottom="61"
      HotSpotMode="Navigate" Left="156" NavigateUrl="http://www.twitter.com"
      Right="306" Target="_blank" Top="11" />

   <asp:CircleHotSpot AlternateText="WordPress" HotSpotMode="PostBack"
      PostBackValue="WordPress" Radius="41" X="50" Y="118" />

   <asp:CircleHotSpot AlternateText="BMW" HotSpotMode="PostBack"
      PostBackValue="BMW" Radius="41" X="155" Y="121" />

   <asp:CircleHotSpot AlternateText="Windows" HotSpotMode="PostBack"
      PostBackValue="Windows" Radius="44" X="266" Y="122" />

   <asp:PolygonHotSpot AlternateText="Star" HotSpotMode="PostBack"
      PostBackValue="Star" Coordinates="108,217, 141,210, 157,181, 173,210, 207,217, 184,242, 188,276, 158,261, 127,275, 131,243" />

</asp:ImageMap>

<br />

<asp:Label ID="Label1" runat="server" Width="322px" BackColor="#FFFFCC" BorderColor="Black"
   BorderStyle="Solid" BorderWidth="1px"></asp:Label>
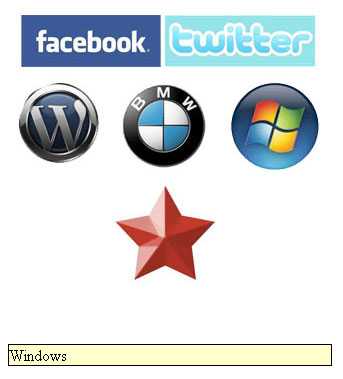
Note, I have also added a Label control at the bottom that will be used to display hotspots PostBackValue on user clicks. The ImageMap control supports click event that allows you to capture the user clicks on different hotspot areas in a single place. It gets the ImageMapEventArgs type object as one of its argument that has PostBackValue property which you can use in the server side code on postback. The following code shows the ImageMap click event handler used in this tutorial.
protected void ImageMap1_Click(object sender, ImageMapEventArgs e)
{
   Label1.Text = e.PostBackValue.ToString();
}
Now, It’s the time to test our ImageMap control in the browser, press F5 and try to click different logo hotspots and you will see the Label control showing you the PostBackValue as you will click the logo that has PostBack behavior defined.


How do you determine the co-ordinates of a hotspot in an entire image ?
thank you very much.. for providing such article with clear procedures…
thank u so much
very nice article thank u for sharing it.
Your tutorials are nice and one thing more can you provide some tutorial how to protect website/webapps from being hacks/hackers
Wish you good luck
It is very use full for beginners
Really nice article. Thanks for sharing it on fb too 🙂