
Windows Communication Foundation (WCF) is Microsoft’s unified programming model for building service-oriented applications. In one of my other tutorial Introducing Windows Communication Foundation (WCF), I have presented detailed overview of WCF key features, important concepts and architecture. In this tutorial, I will give you exposure to the WCF programming experience by giving you basic understanding of the steps required to create WCF service and client application.
When you are creating WCF application, you need to perform a series of tasks one after another. These tasks are required to implement a working WCF application in which you have a running service and a client that calls that service. Let’s begin those tasks step by step.
Table of Contents
Defining a Service Contract
The first step is to define a service contract. The service contract specifies what operations the service will expose to its clients. An operation is just like a web service method that can be called by outside world.
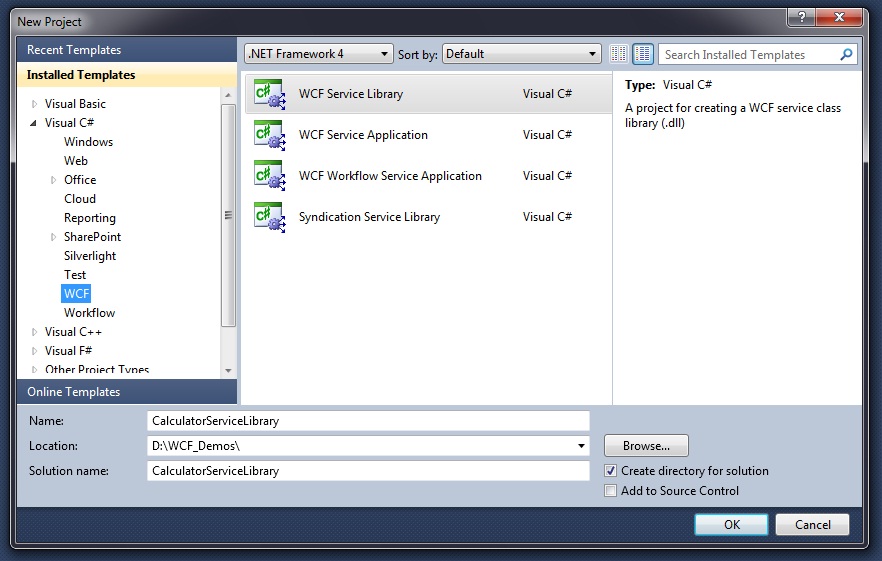
To define a service contract, open Visual Studio 2010 and create a WCF Service Library project by clicking the File menu and selecting New > Project. In the New Project dialog, on the left hand side of the dialog expand Visual C# for a C# project. Under the language selected select WCF and a list of project templates will be displayed on the center section of the dialog. Select WCF Service Library, and type CalculatorServiceLibrary in the Name textbox and click OK.
Visual Studio will create the project with three files named IService1.cs, Service1.cs and App.config. These files contain the default service contract, default implementation of the service contract and the configuration settings needed to load the default service.
Rename the IService.cs to ICalculator.cs and rename Service1.cs to CalculatorService.cs. Open the ICalculator.cs file and delete the code within the namespace declaration and define the service contract ICalculator as shown below:
[ServiceContract]
public interface ICalculator
{
   [OperationContract]
   double Add(double n1, double n2);

   [OperationContract]
   double Subtract(double n1, double n2);

   [OperationContract]
   double Multiply(double n1, double n2);

   [OperationContract]
   double Divide(double n1, double n2);
}
Implementing a Service Contract
The second step in creating a WCF application is to implement the service contract. This involves creating a class called CalculatorService that implements the ICalculator service contract defined in the first step above.
Open the CalculatorService.cs file and implement the ICalculator interface as shown in the code below:
public class CalculatorService : ICalculator
{
   public double Add(double n1, double n2)
   {
      return n1 + n2;
   }
   public double Subtract(double n1, double n2)
   {
      return n1 - n2;
   }
   public double Multiply(double n1, double n2)
   {
      return n1 * n2;
   }
   public double Divide(double n1, double n2)
   {
      return n1 / n2;
   }
}
Hosting WCF Service
This is the third step required to create a WCF application. WCF services cannot listen to incoming clients requests unless it is not hosted. You can host service in IIS, Windows Service, Windows Application or Console application. Each one of these options gives you some advantages and disadvantages. For this tutorial I have decided to create a console application to host WCF service in operating system process.
Create a new Console Application project by right-clicking on the solution, selecting, Add, New Project. In the Add New Project dialog on the left hand side of the dialog select Windows under C#. In the center section of the dialog select Console Application. Name the project ConsoleHost.
Set the target framework of the ConsoleHost project to .NET Framework 4 by right clicking on ConsoleHost in the Solution Explorer and selecting Properties. In the drop down box labeled Target Framework select .NET Framework 4. Setting the target framework will cause Visual Studio 2012 to reload the solution, press OK when prompted.
Add a reference to the CalculatorServiceLibrary project to the ConsoleHost project by right clicking on the References folder under the ConsoleHost project in the solution explorer. Also add a reference to System.ServiceModel to the ConsoleHost project.
To host WCF service you need to define an endpoint. Endpoint contains address, binding and contract information that are required to communicate with clients. You can define endpoints either in code or in configuration files. For this tutorial, I have chosen to define endpoints entirely in code by using the AddServiceEndpoint method of the ServiceHost class. Add the following code in Program.cs file of the console application.
class Program
{
   static void Main(string[] args)
   {
      ServiceHost host = null;
      try {
         // Creating base address
         Uri baseAddress =
            new Uri("http://localhost:8000/CalculatorService/");

         // Creating ServiceHost instance
         host = new ServiceHost(typeof(CalculatorService), baseAddress);

         // Adding service endpoint
         host.AddServiceEndpoint(typeof(ICalculator),
            new BasicHttpBinding(), "");

         // Enable metadata exchange
            ServiceMetadataBehavior smb = new ServiceMetadataBehavior();

         smb.HttpGetEnabled = true;
         host.Description.Behaviors.Add(smb);

         // Adding MEX endpoint
         host.AddServiceEndpoint(typeof(IMetadataExchange),
            MetadataExchangeBindings.CreateMexHttpBinding(), "mex");

         // Start service
         host.Open();

         Console.WriteLine("The service is ready.");
         Console.WriteLine("Press to terminate service.");
         Console.WriteLine();
         Console.ReadLine();

         // Shutdown service (if user press Enter key)
         host.Close();
      }
      catch (CommunicationException ce) {
         Console.WriteLine("An exception occurred: {0}", ce.Message);
         host.Abort();
      }
   }
}
In the above code, the first parameter of the AddServiceEndpoint is the type of the contract ICalculator, the second parameter is the type of binding we want to use and third parameter is address which is empty, which indicates that the address of the endpoint is the same as the base address of the service (http://localhost:8000/CalculatorService/) given at the time of creating ServiceHost object in the above code. I have used the basicHttpBinding which is compliant and interoperable with most systems that implement XML Web Services. You have the option to choose many other types of bindings available in WCF according to your service requirements.
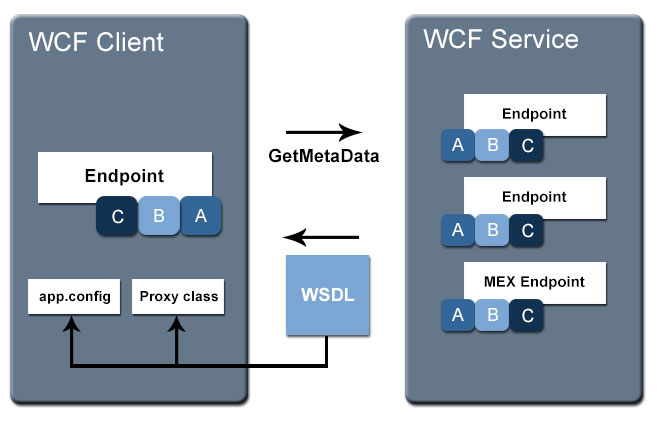
Metadata is able enabled in the above code using ServiceMetadataBehavior class. Metadata in WCF refers to the information that describes precisely how to communicate with a service. Clients can request metadata from a running service to learn about their endpoints and the message formats that they require. At design time, clients send a request message defined by the WS-MetadataExchange standard and receive WSDL in return. The WSDL can be used by the client to define a proxy class and configuration file that will later be used at runtime to communicate with the service.
By default, WCF services do not expose a MEX endpoint. This means that nobody can query the service to find out how to communicate with it. WCF makes it easy to expose a MEX endpoint so that clients can communicate properly with services. You can add it either in code or in configuration. In the above code listing, MEX endpoint is added with IMetadataExchange contract, HTTP protocol for transport and “mex” as the address. Because the address is specified as a relative address, the base address of the service is used as the prefix, so the full address is http://localhost:8000/CalculatorService/mex.
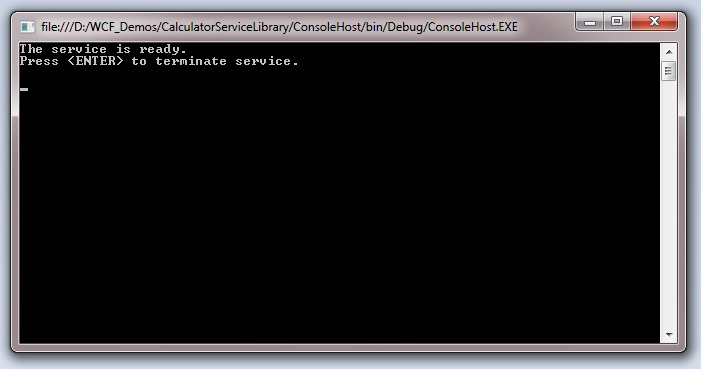
Run the ConsoleHost console application from inside Visual Studio 2010. When running on Windows Vista and later operating systems, the service must be run with administrator privileges. If you will run Visual Studio with Administrator privileges, ConsoleHost application will also run with Administrator privileges.
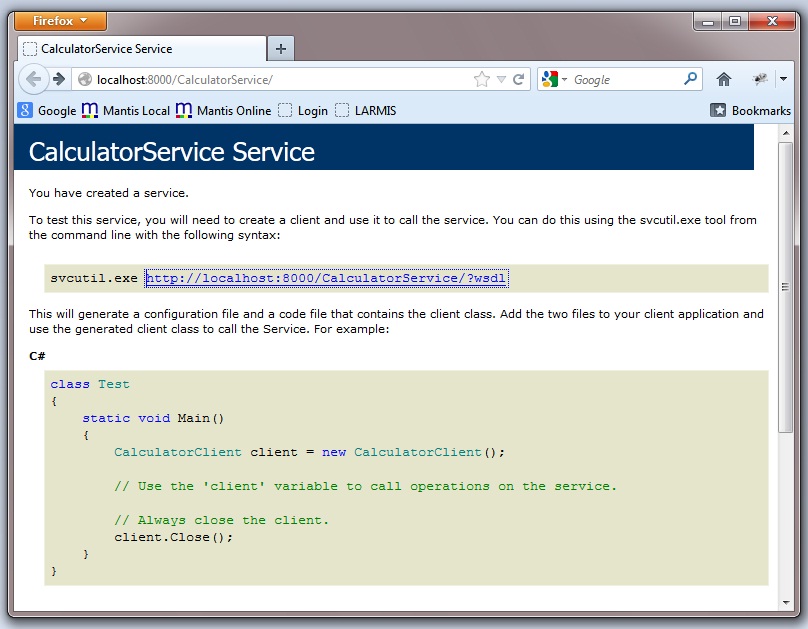
Open Internet Explorer and browse to the service’s debug page at http://localhost:8000/CalculatorService
Creating WCF Service Client
The forth step required to create a WCF application is to create a client that can access the service. Just like service, you have the option to either program the client directly in code using the rich WCF API or you can use tools to generate a proxy class and configuration file. Because, I am not using any configuration file in this tutorial and implementing everything in code so I will not use any tool here. By implementing the WCF client in code, you have more control over the invocation of the service.
Create a new console application project in the solution with the name ConsoleClient and set the target framework of the project to .NET Framework 4.0 the same way as we did before for the ConsoleHost project. Add a reference of System.ServiceModel and CalculatorServiceLibrary to the ConsoleClient project by right-clicking the Reference folder under the ConsoleClient project in Solution Explorer.
Just as a service endpoint must define the ABCs of WCF to expose its capabilities on the network, a client must know the ABCs to access those capabilities. Therefore, when writing the code to access services endpoints, the ABCs are coded into the client application. Add the following code in the Program.cs file of the ConsoleClient project.
class Program
{
   static void Main(string[] args)
   {
      ChannelFactory myChannelFactory =
         new ChannelFactory(
            new BasicHttpBinding(),
            new EndpointAddress("http://localhost:8000/CalculatorService/"));

      ICalculator client = myChannelFactory.CreateChannel();
      double result = client.Add(5, 6);

      Console.WriteLine("Calling Service...");
      Console.WriteLine(result);
      Console.WriteLine();
      Console.ReadLine();
   }
}
The code above first defines the interface it wants to call. This will allow the client to access the service capabilities, including the name of the operations and its parameters. Then the client creates ChannelFactory class object and passed the ABCs in its constructor. The address, the binding BasicHttpBinding and the contract ICalculator are same we used at the time of defining endpoints in the ServiceHost project. Finally the channel is created to establish communication with the service and to call service methods.
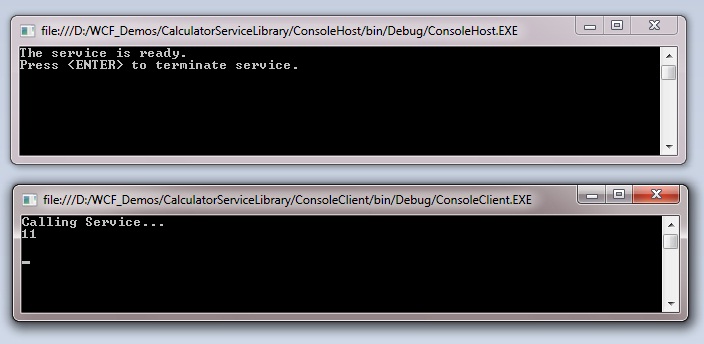
To test out the application first run ConsoleHost to start the service and then run ConsoleClient. You will see the similar shown in the following figures.
Windows Communication Foundation (WCF) enables applications to communicate whether they are on the same computer, across the Internet, or on different application platforms. In this tutorial, I have explained how to implement a simple WCF application by creating service contract, implementing that contract, hosting the service and then creating client that calls that service. You can download the complete Visual Studio 2010 solution with projects source code in case if you have problem in implementing this application.


Thanks for the great wcf service article.