
If you are new to ASP.NET Core development, one of the first few things you will notice is that the old web.config or app.config files are no longer available in ASP.NET Core projects. Configuration in ASP.NET Core is performed using one or more Configuration Providers. There are configuration providers for reading configurations from almost anywhere such as files e.g. JSON, INI or XML, environment variables, Azure key vault, command-line arguments, etc. and many more sources. This tutorial is a step by step guide to show you how can you configure your application settings in various files such as JSON, INI or XML and how can you read those settings from your application code. I will also demonstrate how can you read application settings as custom .NET types (classes) and how can you use the built-in ASP.NET Core dependency injection to read your configuration settings in multiple classes, services or even projects available in your solution.
Table of Contents
Getting Started
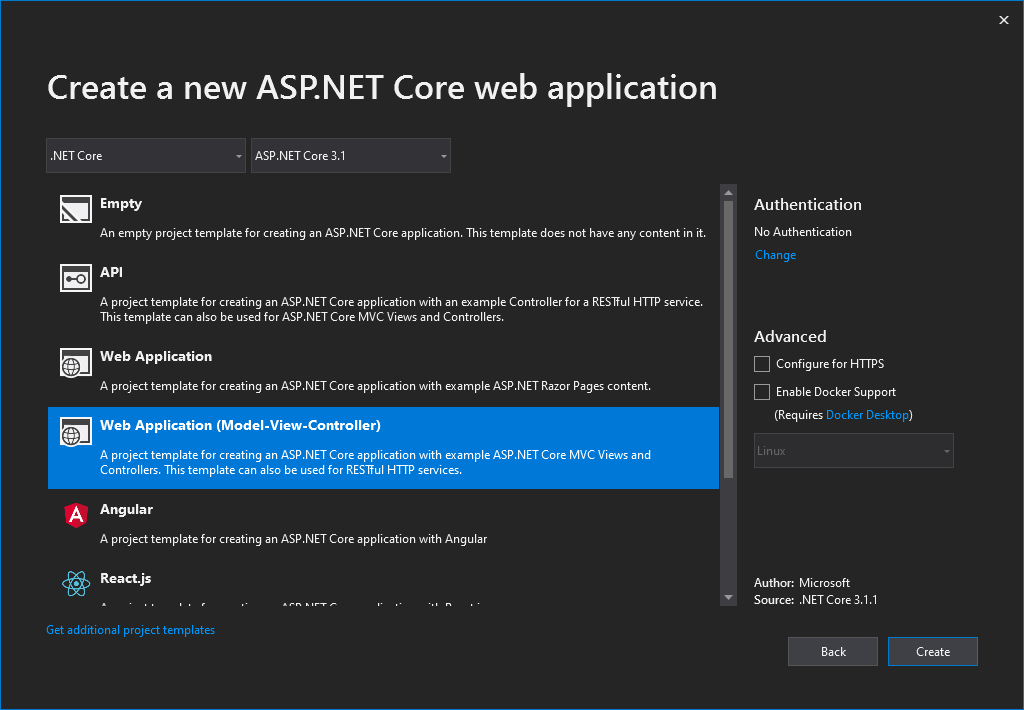
Create an ASP.NET Core Web Application using Visual Studio 2019 Professional or Community edition. Provide project name and location and choose MVC Web Application from one of the available templates
Build your project and press F4 to make sure the project is running in browser without any problem.
Default Configuration
When we create ASP.NET Core web applications using the command line or Visual Studio, we will see a few files automatically generated for us and one of those files is the Program.cs file.
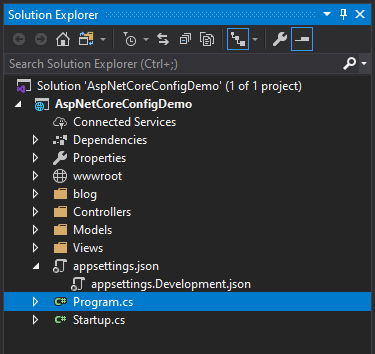
This file creates the host builder for us and you will also see a method CreateDefaultBuilder in this file as shown below.
public class Program
{
	public static void Main(string[] args)
	{
		CreateHostBuilder(args).Build().Run();
	}

	public static IHostBuilder CreateHostBuilder(string[] args) =>
		Host.CreateDefaultBuilder(args)
			.ConfigureWebHostDefaults(webBuilder =>
			{
				webBuilder.UseStartup<Startup>();
			});
}
The CreateDefaultBuilder method configures the default configurations for our application in the following order:
- If there are any host configurations and settings, they will be added first using ChainedConfigurationProvider.
- Next, it will configure our project settings defined in our project appsettings.json file using the JSON configuration provider.
- If we have environment specific application settings in appsettings.Development.json or appsettings.Production.json files then they will be configured.
- If we have any development related application secrets configured, they will be loaded next.
- Environment variables will be loaded next using Environment variables configuration provider.
- In the end, Command line arguments will load using the Command line configuration provider.
Please keep in mind that the Configuration providers added later in the above list will override previous key settings loaded by any previous configuration provider. For example, if you have configured a setting in both appsettings.json and the environment, the environment value will be used. Using the default configuration providers, the Command-line configuration provider overrides all other providers as they are added at the end of the above list.
For more information on CreateDefaultBuilder, see Default builder settings.
As this tutorial is all about saving and reading settings from the configuration files, so I will not discuss other non-file related configuration providers such as environment, command line, etc.
Custom Application Configurations
Now we need to decide what application settings we want to configure and for this tutorial, I am saving the following configuration settings in my project appsettings.json file.
{
  "MyApplication": {
    "Name": "Demo Configuration Application",
    "Version": "1.0",
    "DefaultUrl": "http://www.exampledemoapp.com",
    "Support": {
      "Email": "[email protected]",
      "Phone": "123456789"
    }
  },
  "Logging": {
    "LogLevel": {
      "Default": "Information",
      "Microsoft": "Warning",
      "Microsoft.Hosting.Lifetime": "Information"
    }
  },
  "AllowedHosts": "*"
}
I am adding similar settings in the appsettings.Development.json file with some different values related to the development environment.
{
  "MyApplication": {
    "Name": "Demo Configuration Application (Development)",
    "Version": "1.1",
    "DefaultUrl": "http://localhost:3030",
    "Support": {
      "Email": "[email protected]",
      "Phone": "123456789"
    }
  },
  "Logging": {
    "LogLevel": {
      "Default": "Information",
      "Microsoft": "Warning",
      "Microsoft.Hosting.Lifetime": "Information"
    }
  }
}
We need to read these settings in our application code so open the HomeController.cs file and declare a private field of type IConfiguration. Inject the IConfiguration parameter in the constructor of HomeController and make sure the private field Configuration is initialized within the constructor.
using Microsoft.Extensions.Configuration;

private readonly IConfiguration Configuration;

public HomeController(IConfiguration configuration)
{
    Configuration = configuration;
}
ASP.NET Core will automatically inject and initialize our field at runtime and will provide us access to all configuration settings available within our application. To read configuration settings in the code, we need to use the above Configuration variable and need to pass the application setting key name to the indexer. If we have a nested setting then we can separate the parent setting and child setting using a colon operator as we did in the case of “MyApplication:Support:Email” below.
public IActionResult Index()
{
	var appName = Configuration["MyApplication:Name"];
	var appVersion = Configuration["MyApplication:Version"];
	var appUrl = _ Configuration["MyApplication:DefaultUrl"];
	var supportEmail = _ Configuration["MyApplication:Support:Email"];
	var supportPhone = _ Configuration["MyApplication:Support:Phone"];

	ViewBag.ApplicationName = appName;
	ViewBag.ApplicationVersion = appVersion;
	ViewBag.ApplicationUrl = appUrl;
	ViewBag.SupportEmail = supportEmail;
	ViewBag.SupportPhone = supportPhone;

	return View();
}
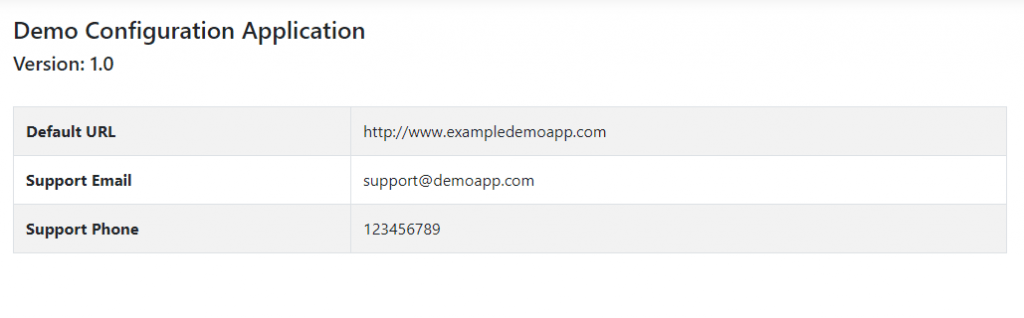
I have passed the settings to view using the ViewBag and then displaying the settings in the view using the same ViewBag properties.
<div>
	<h4>
		@ViewBag.ApplicationName
	</h4>
	<h5>
		Version: @ViewBag.ApplicationVersion
	</h5>
	<br />
	<table class="table table-bordered table-striped" style="width:90%;">
		<tr>
			<td><b>Default URL</b></td>
			<td>@ViewBag.ApplicationUrl</td>
		</tr>
		<tr>
			<td><b>Support Email</b></td>
			<td>@ViewBag.SupportEmail</td>
		</tr>
		<tr>
			<td><b>Support Phone</b></td>
			<td>@ViewBag.SupportPhone</td>
		</tr>
	</table>
</div>
If you will run the project now, you will see the following output in the browser:
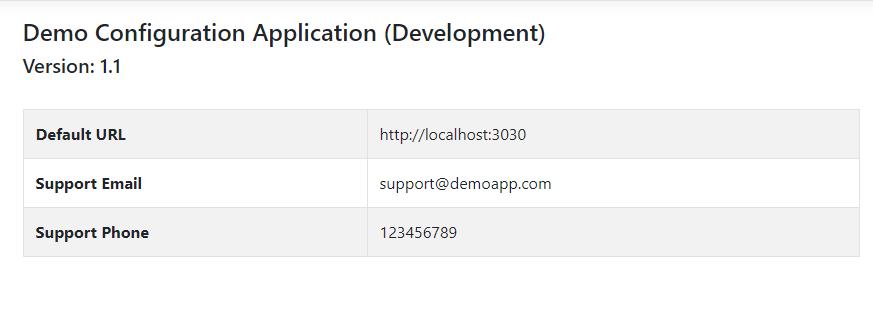
One thing you may have noticed above that the application is reading the settings from the appsettings.Development.json file and this is because by default the current environment of your application is set as Development.
The default JsonConfigurationProvider loads appsettings.json first and then appsettings.Environment.json will be loaded and will override the settings defined in appsetttings.json file. For example, by default:
- In development, appsettings.Development.json configuration overwrites values found in appsettings.json.
- In production, appsettings.Production.json configuration overwrites values found in appsettings.json. For example, when deploying the app to Azure.
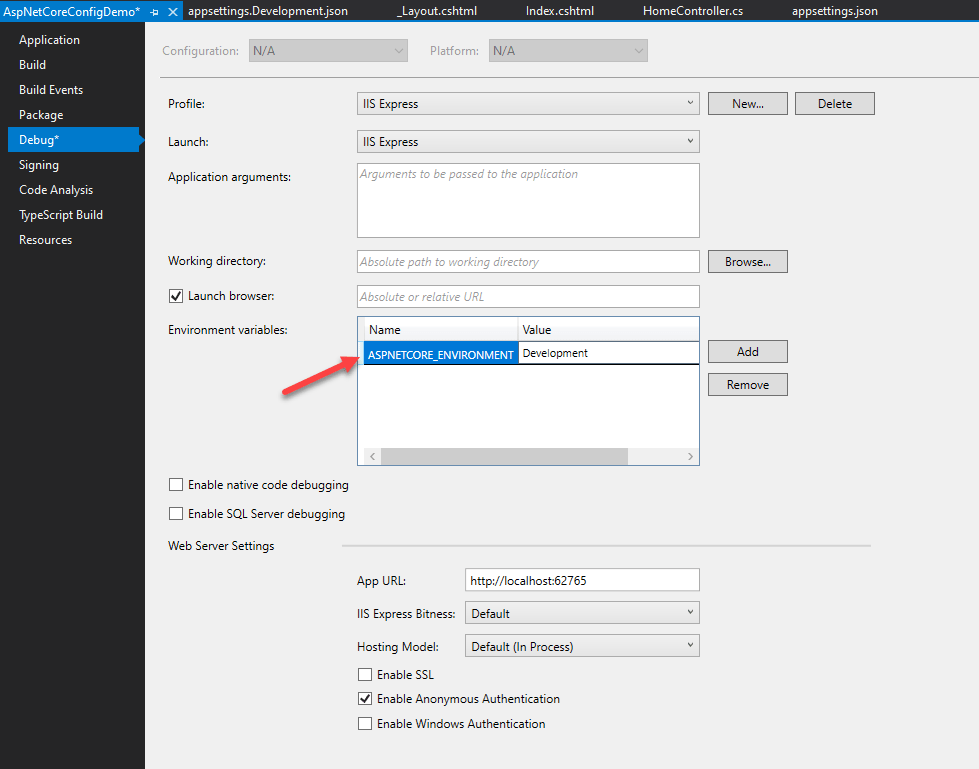
If you will change, your environment from “Development” to “Production” above and will run your application you will see that application will stop reading settings from the appsettings.Development.json file and as we don’t have appsettings.Production.json file in our project so everything defined in appsettings.json file is read and displayed.
Reading Application Settings using Options pattern
If you are building a large application with a lot of configurations or you have many hierarchical settings to read then reading all settings one by one is not the recommended approach. There are also chances of misspelling a setting key in the code, which could lead you to a difficult to track bug. The preferred way to read configuration values is by using the options pattern. The options pattern uses classes to provide strongly typed access to groups of related settings. To read the above configuration values in a strongly typed manner, we need to create strongly-typed C# classes as shown below:
public class ApplicationOptions
{
	public const string MyApplication = "MyApplication";

	public string Name { get; set; }
	public decimal Version { get; set; }
	public string DefaultUrl { get; set; }

	public SupportOptions Support { get; set; }
}

public class SupportOptions
{
	public const string Support = "Support";

	public string Email { get; set; }
	public string Phone { get; set; }
}
We need to keep the following points in mind when we are creating strongly typed classes to read configurations using options pattern.
- A class must be non-abstract with a public parameterless constructor.
- All public read-write properties of the type are bound.
- Fields are not bound e.g., MyApplication and Support const fields will not be bound
To bind our settings we need to call ConfigurationBinder.Bind method and need to bind ApplicationOptions class object with the MyApplication section as follows:
public IActionResult Index()
{
	var applicationOptions = new ApplicationOptions();
	Configuration.GetSection(ApplicationOptions.MyApplication).Bind(applicationOptions);

	ViewBag.ApplicationName = applicationOptions.Name;
	ViewBag.ApplicationVersion = applicationOptions.Version;
	ViewBag.ApplicationUrl = applicationOptions.DefaultUrl;

	ViewBag.SupportEmail = applicationOptions.Support.Email;
	ViewBag.SupportPhone = applicationOptions.Support.Phone;

	return View();
}
In the preceding code, we have called the Bind method to bind the configuration section. There is another convenient method Get<T> which can be used to read the configuration section as a specified Type. Here is how you can use the Get<T> method to read and bind configuration with strongly typed classes:
public IActionResult Index()
{
	var applicationOptions = _ Configuration.GetSection(ApplicationOptions.MyApplication).Get<ApplicationOptions>();

	ViewBag.ApplicationName = applicationOptions.Name;
	ViewBag.ApplicationVersion = applicationOptions.Version;
	ViewBag.ApplicationUrl = applicationOptions.DefaultUrl;

	ViewBag.SupportEmail = applicationOptions.Support.Email;
	ViewBag.SupportPhone = applicationOptions.Support.Phone;

	return View();
}
In all my examples above, I am reading application settings in a standard MVC controller. If you have a large application, you may want to read the configurations in multiple controllers and classes throughout the application. It is not recommended to bind the configuration section in each one of those classes and write a lot of duplicate code. A better approach is to bind the configuration section inside the ConfigureServices method of Startup.cs file using the options pattern and then add it to the dependency injection service container.
public class Startup
{
	public Startup(IConfiguration configuration)
	{
		Configuration = configuration;
	}

	public IConfiguration Configuration { get; }

	public void ConfigureServices(IServiceCollection services)
	{
		services.Configure<ApplicationOptions>(Configuration.GetSection(ApplicationOptions.MyApplication));

		services.AddControllersWithViews();
	}
}
Once our configurations are added to the dependency injection container, we can inject the ApplicationOptions object using the IOptions interface in any controller or class where we want to read the configuration settings. The following code shows how can we inject ApplicationOptions in HomeController and read our settings from the appsettings.json file.
public class HomeController : Controller
{
	private readonly ApplicationOptions _options;

	public HomeController(IOptions<ApplicationOptions> options)
	{
		_options = options.Value;
	}

	public IActionResult Index()
	{
		ViewBag.ApplicationName = _options.Name;
		ViewBag.ApplicationVersion = _options.Version;
		ViewBag.ApplicationUrl = _options.DefaultUrl;

		ViewBag.SupportEmail = _options.Support.Email;
		ViewBag.SupportPhone = _options.Support.Phone;

		return View();
	}
}
Using XML Configuration Provider in ASP.NET Core
So far, in this tutorial, we are using the default JsonConfigurationProvider which reads settings from the appsettings.json file. If you don’t like JSON and want to store and read settings from an XML file then you have to use the XmlConfigurationProvider that loads configuration from XML file key-value pairs at runtime. Let’s create an appsettings.xml file and add the similar settings in the newly created XML file.
<?xml version="1.0" encoding="utf-8" ?>
<MyApplication>
  <Name>Demo Configuration Application</Name>
  <Version>1.0</Version>
  <DefaultUrl>http://www.exampledemoapp.com</DefaultUrl>
  <Support>
    <Email>[email protected]</Email>
    <Phone>123456789</Phone>
  </Support>
</MyApplication>
The following code clears all the configuration providers and adds several configuration providers. I am using the AddXmlFile method to add both appsettings.xml and any environment specific file such as appsettings.Development.xml and appsettings.Production.xml. In the end, I am adding Environment Variables and Command-line configuration providers.
public class Program
{
	public static void Main(string[] args)
	{
		CreateHostBuilder(args).Build().Run();
	}

	public static IHostBuilder CreateHostBuilder(string[] args) =>
		Host.CreateDefaultBuilder(args)
			.ConfigureAppConfiguration((hostingContext, config) =>
			{
				config.Sources.Clear();

				var env = hostingContext.HostingEnvironment;

				config.AddXmlFile("appsettings.xml", optional: true, reloadOnChange: true)
					  .AddXmlFile($"appsettings.{env.EnvironmentName}.xml",
									 optional: true, reloadOnChange: true);

				config.AddEnvironmentVariables();

				if (args != null)
				{
					config.AddCommandLine(args);
				}
			})
			.ConfigureWebHostDefaults(webBuilder =>
			{
				webBuilder.UseStartup<Startup>();
			});
}
The following code shows how we can read the XML settings in our C# code using the same IConfiguration object we used at the start of this tutorial.
public class HomeController : Controller
{
	private readonly IConfiguration Configuration;

	public HomeController(IConfiguration configuration)
	{
		Configuration = configuration;
	}

	public IActionResult Index()
	{
		var appName = Configuration["Name"];
		var appVersion = Configuration["Version"];
		var appUrl = Configuration["DefaultUrl"];
		var supportEmail = Configuration["Support:Email"];
		var supportPhone = Configuration["Support:Phone"];

		ViewBag.ApplicationName = appName;
		ViewBag.ApplicationVersion = appVersion;
		ViewBag.ApplicationUrl = appUrl;
		ViewBag.SupportEmail = supportEmail;
		ViewBag.SupportPhone = supportPhone;

		return View();
	}
}
If you will run the application now, you will see similar output as we saw when we were using JSON configuration files.
Using INI Configuration Provider in ASP.NET Core
If you are integrating with a legacy system, where settings are available in the form of INI files then you have to use IniConfigurationProvider that loads configuration from INI file key-value pairs at runtime. Let’s create an appsettings.ini file and add similar settings in the newly created INI file.
[MyApplication]
Name="Demo Configuration Application"
Version=1.0
DefaultUrl="http://www.exampledemoapp.com"

[MyApplication:Support]
Email="[email protected]"
Phone="123456789"
The following code is very much similar to the above code where we were reading settings from an XML based configuration file. We need to clear all the configuration providers and adds INI files along with other configuration providers. We need to use the AddIniFile method to add both appsettings.ini and any environment specific files such as appsettings.Development.ini and appsettings.Production.ini. In the end, I am adding Environment Variables and Command-line configuration providers.
public class Program
{
	public static void Main(string[] args)
	{
		CreateHostBuilder(args).Build().Run();
	}

	public static IHostBuilder CreateHostBuilder(string[] args) =>
		Host.CreateDefaultBuilder(args)
			.ConfigureAppConfiguration((hostingContext, config) =>
			{
				config.Sources.Clear();

				var env = hostingContext.HostingEnvironment;

				config.AddIniFile("appsettings.ini", optional: true, reloadOnChange: true)
				  .AddIniFile($"appsettings.{env.EnvironmentName}.ini",
								 optional: true, reloadOnChange: true);

				config.AddEnvironmentVariables();

				if (args != null)
				{
					config.AddCommandLine(args);
				}
			})
			.ConfigureWebHostDefaults(webBuilder =>
			{
				webBuilder.UseStartup<Startup>();
			});
}
The following code shows how we can read the INI settings in our C# code using the same IConfiguration object we used at the start of this tutorial.
public class HomeController : Controller
{
	private readonly IConfiguration Configuration;

	public HomeController(IConfiguration configuration)
	{
		Configuration = configuration;
	}

	public IActionResult Index()
	{
		var appName = Configuration["MyApplication:Name"];
		var appVersion = Configuration["MyApplication:Version"];
		var appUrl = Configuration["MyApplication:DefaultUrl"];
		var supportEmail = Configuration["MyApplication:Support:Email"];
		var supportPhone = Configuration["MyApplication:Support:Phone"];

		ViewBag.ApplicationName = appName;
		ViewBag.ApplicationVersion = appVersion;
		ViewBag.ApplicationUrl = appUrl;
		ViewBag.SupportEmail = supportEmail;
		ViewBag.SupportPhone = supportPhone;

		return View();
	}
}
Summary
ASP.NET Core provides powerful and flexible options that support several different ways to work with configurations such as file-based configurations, in-memory configurations, environment variables, or even command-line arguments. This also supports the options model so that we can strongly inject settings to our application. We can also create a custom configuration provider that reads configuration key-value pairs from a database using Entity Framework (EF).

Very Precise and Useful Content . I am also exploring more and more along with it.
Hello, your article is very interesting.
However, and unless I missed something important in your explanation, I’m wondering if there is a way to verify the correspondence between the configured data and the corresponding object nested in IOption.
Unfortunately, I couldn’t find any events or features to accomplish this goal.
Very Informative for .Net Core beginners. Thanks for your efforts..
Keep posting us such kind of latest articles and some interview preparation tips for .Net on technologies.
This is a useful article. I surely can enrich my knowledge by reading
this. Your idea is actually outstanding. Thank’s to
share us such an important matter.
Best regards,
Harrell Griffin